

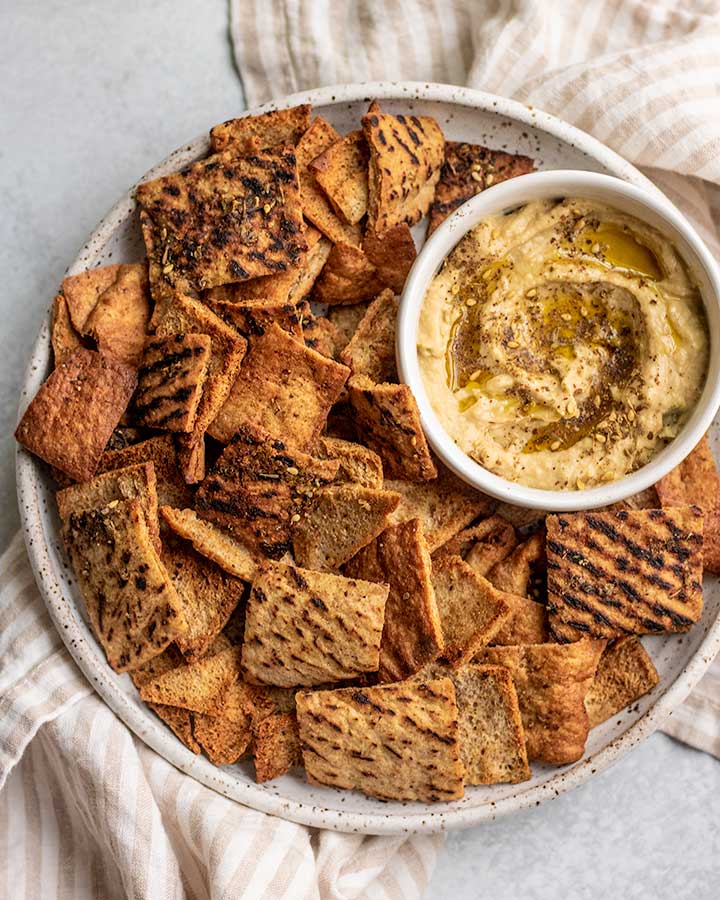
Crispy Baked Pita Chips
These Crispy Baked Pita Chips bake in less than 10 minutes and only require 5 ingredients! An easy to make snack you can customize to your taste.
One of my favorite savory snacks are baked pita chips. To buy a bag these days is pretty pricey depending on where you shop. However, making your own is cheaper and very easy to do. So if you are looking for a fun snack that can also be wholesome at the same time, these crispy baked pita chips are just for you!
Why You’ll Love These Baked Pita Chips
- Quick and easy to make. They roast in less than 10 minutes and use the simplest ingredients to prepare.
- Budget-friendly. So much cheaper than buying a bag of premade chips and an easy way to use up some unused or ripped pitas.
- Versatile. Use your favorite pita and customize the seasonings to your preference!
Key Ingredients and Substitutions
- Pita Bread: You can use pita pockets or really flat pita to prepare your chips. To add some extra fiber, I like to use whole wheat pitas.
- Za’atar: A Middle Eastern spice blend of oregano, marjoram or thyme, toasted cumin, coriander, and sesame seeds. Feel free to swap for some of your favorite herbs and spices to change it up.
- Garlic: Some fresh garlic grated into the oil blend to roast over the pita. You can also use a teaspoon of garlic powder as an alternative.
- Oil: Use a high heat option like avocado oil so that your oil does not burn while roasting.
- Salt: Just a pinch helps to bring out more of the flavors in the za’atar and garlic.
How to Make Crispy Baked Pita Chips
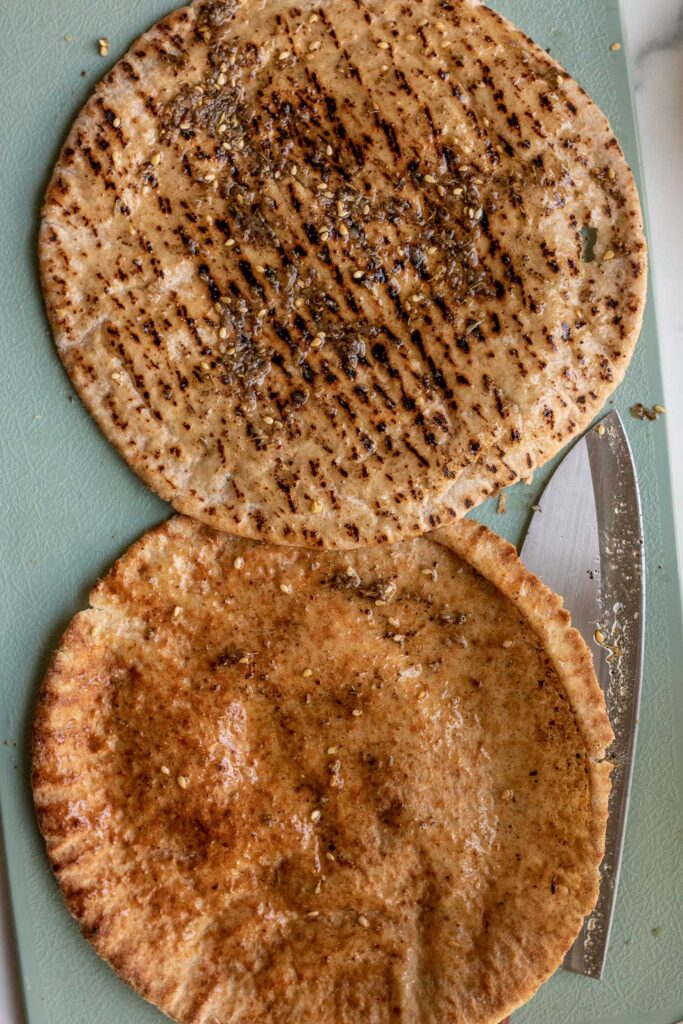
Preheat your oven to 425F. In a small bowl, add the oil, za’atar, grated garlic and a pinch of salt and whisk together to combine then set aside.
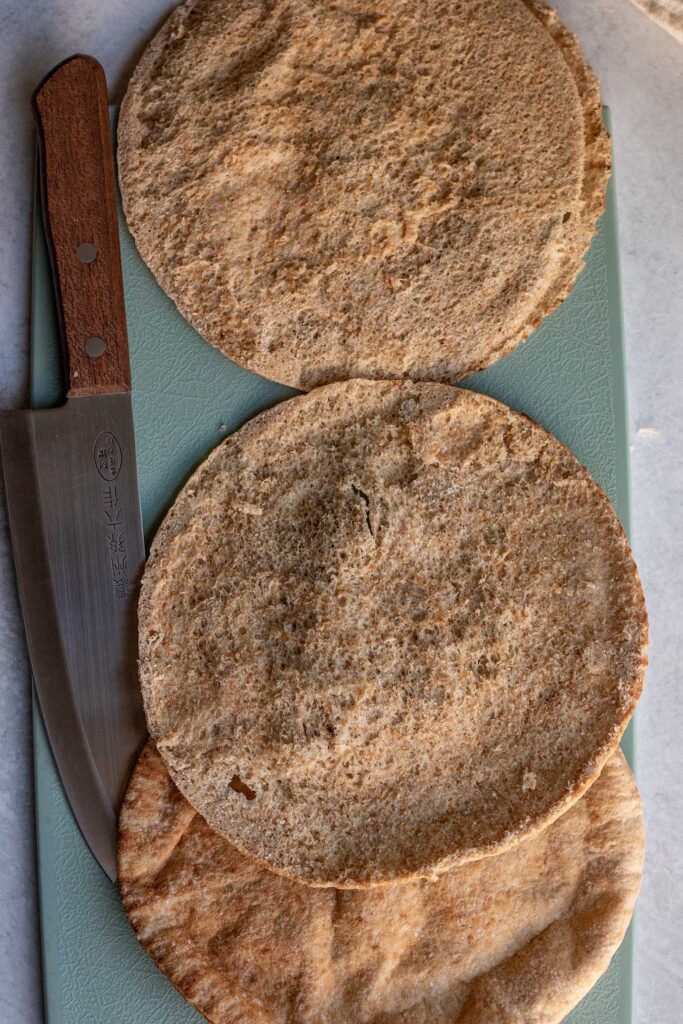
Use a sharp knife to cut your pita in half lengthwise to open the pita up into two equal pita rounds (skip this step if you are using thin pita bread).
Brush the top of the pita with the oil mixture to evenly coat. Then, cut each round into equal sized triangles or squares (I did 2 inch squares).
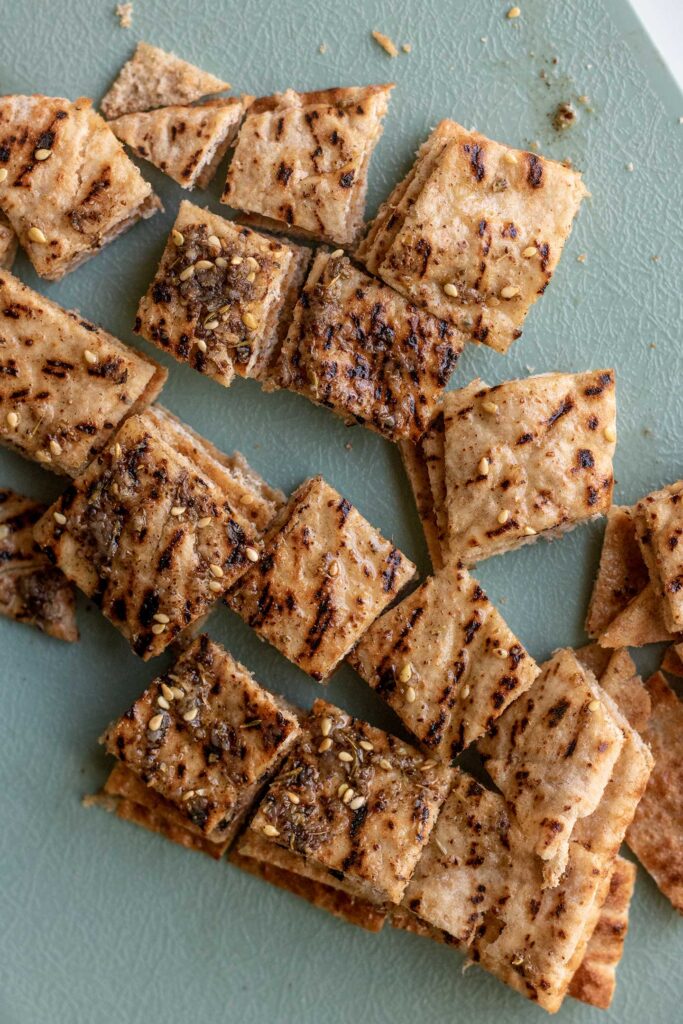
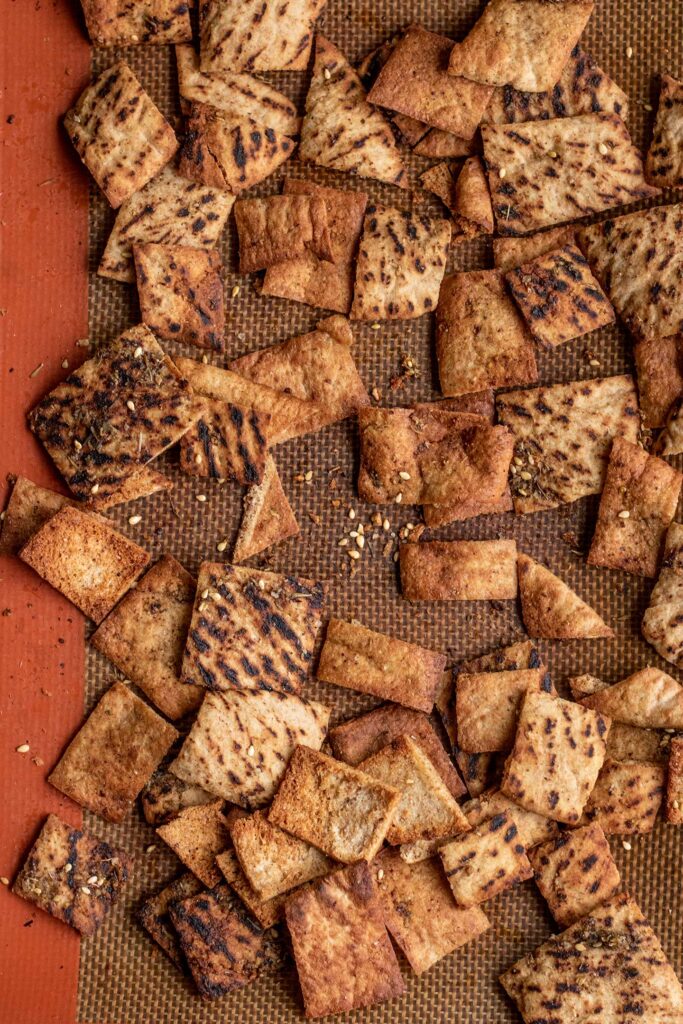
Spread the slices out into a single layer on a large baking sheet. Place the pan in the oven for 4 minutes then give the chips a toss and roast on the other side for an additional 3-4 minutes or until the chips are golden and crispy around the edges.
Expert Tips
- If using a pita pocket, cut the pita into single layer rounds. This will help the chips bake more evenly and crisp up better in the oven. This step is not necessary if using a thin pita.
- Bake directly on the pan. I tested with and without parchment paper. The chips cooked more evenly when they were touching the pan directly.
- Spread the pita evenly on the baking tray. Make sure the pita has enough space on the pan to roast. The pita should be arranged in a single layer on the pan and not laying on top of each other.
- Check on the chips as they roast. Once you flip and place back in the oven, make sure to pay attention to your chips so they don’t burn. I like to check at the 2 minute mark to see if any smaller pieces have gained too much color or have become too toasty.
- Allow the chips to completely cool before enjoying. The chips get crispier as they cool, so don’t skip this step!
- Use whole wheat pita for a boost of nutrition. Using whole grains helps you get in more fiber, which is really important for supporting a healthy gut and reducing chronic disease risks like heart disease and colon cancer.
Frequently Asked Questions
Once the chips are completely cooled, place in an airtight container and store at room temperature on the counter for up to 3 days.
Choose your favorite. I tend to like using whole grain pitas, but any pita will do. Do note that pitas come in different shapes and sizes. Some pitas might be thicker so they may need more time in the oven to crisp up, while others may need less time if thinner. Always monitor the chips as they bake. I like to check every 4 minutes to see how golden they are.
You can flavor your chips however you like! Here are some flavor combos you can try: garlic and Italian seasoning; smoked paprika and garlic; cinnamon and sugar; curry powder; garlic, onion powder and dill.
How to Serve
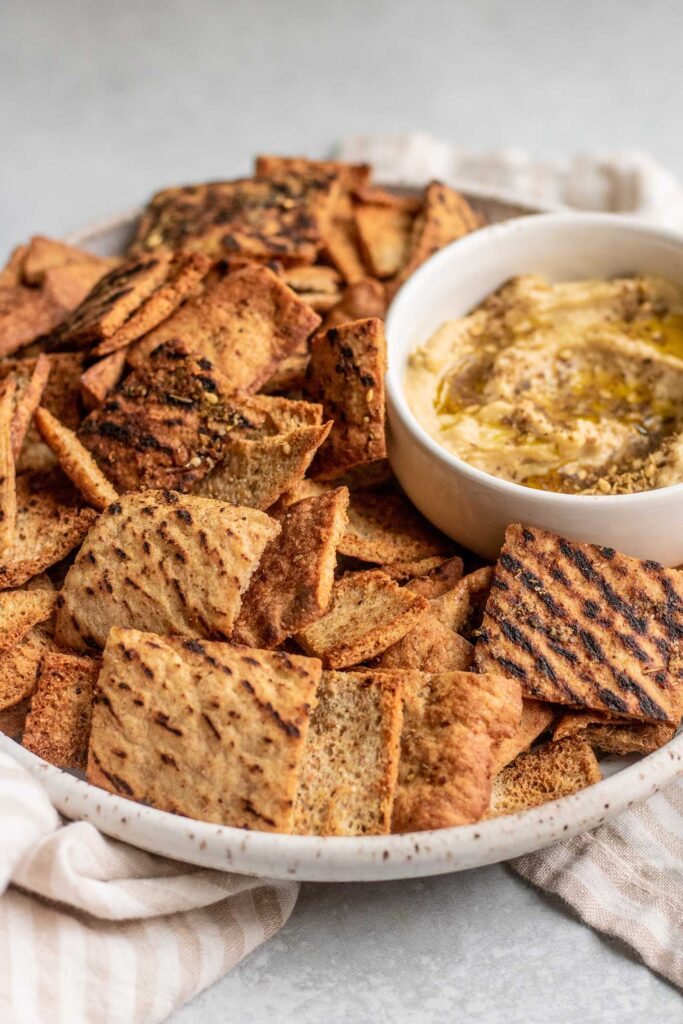
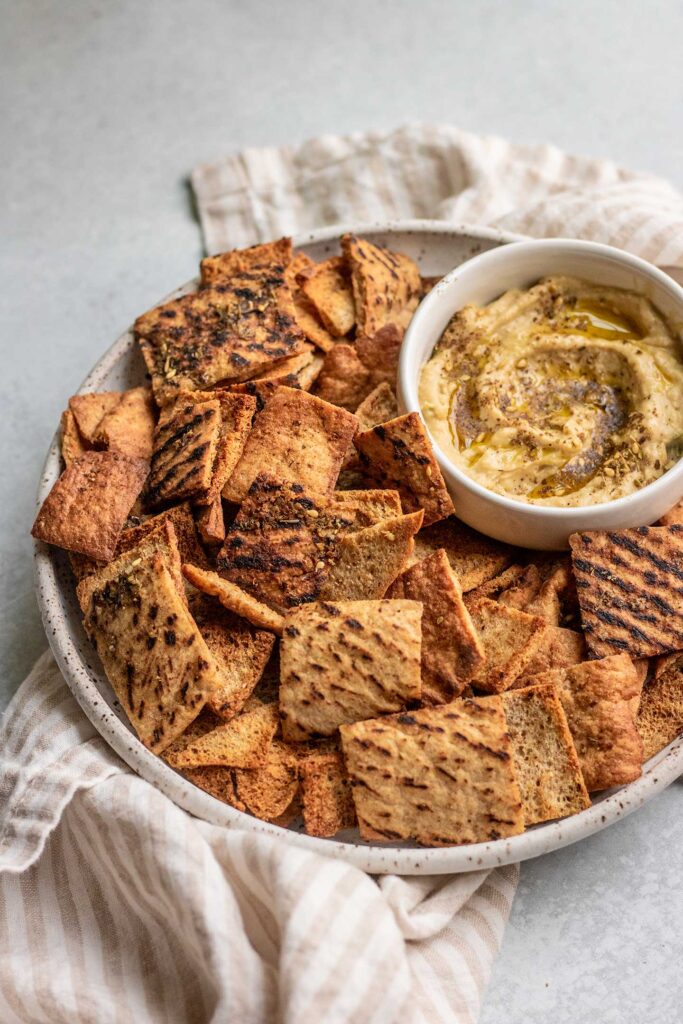
Serve these chips with your favorite dips like homemade hummus, this Lemon Garlic White Bean Dip, or Creamy Avocado Dip. I also love to throw this into salads to add more crunch in place of croutons.
More Easy Snack Ideas
- Air Fryer Zucchini Fries
- Blueberry Chia Pudding
- Chocolate Chip Zucchini Muffins
- Oatmeal Raisin Cookie Bites

Crispy Baked Pita Chips
- Prep Time: 5 minutes
- Cook Time: 8 minutes
- Total Time: 13 minutes
- Yield: 2 servings 1x
- Category: Snack
- Method: Baking
- Cuisine: Mediterranean Inspired
- Diet: Vegan
Description
These Crispy Baked Pita Chips bake in less than 10 minutes and only require 5 ingredients! An easy to make snack you can customize to your taste.
Ingredients
- 2 whole wheat or regular pita pockets
- 1 1/2 tbsp avocado oil
- 1 tsp za’atar
- 1 clove of garlic, grated
- Salt
Instructions
- Preheat your oven to 425F. In a small bowl, add the oil, za’atar, grated garlic and a pinch of salt and whisk together to combine then set aside.
- Use a sharp knife to cut your pita in half lengthwise to open the pita up into two equal pita rounds (skip this step if you are using thin pita bread).
- Brush the top of the pita with the oil mixture to evenly coat. Then, cut each round into equal sized triangles or squares (I did 2 inch squares).
- Spread the slices out into a single layer on a large baking sheet. Place the pan in the oven for 4 minutes then give the chips a toss and roast on the other side for an additional 3-4 minutes or until the chips are golden and crispy around the edges.
Notes
If using a pita pocket, cut the pita into single layer rounds. This will help the chips bake more evenly and crisp up better in the oven. This step is not necessary if using a thin pita.
Bake directly on the pan. I tested with and without parchment paper. The chips cooked more evenly when they were touching the pan directly.
Spread the pita evenly on the baking tray. Make sure the pita has enough space on the pan to roast. The pita should be arranged in a single layer on the pan and not laying on top of each other.
Check on the chips as they roast. Once you flip and place back in the oven, make sure to pay attention to your chips so they don’t burn. I like to check at the 2 minute mark to see if any smaller pieces have gained too much color or have become too toasty.
Allow the chips to completely cool before enjoying. The chips get crispier as they cool, so don’t skip this step!
Use whole wheat pita for a boost of nutrition. Using whole grains helps you get in more fiber, which is really important for supporting a healthy gut and reducing chronic disease risks like heart disease and colon cancer.
If you tried this recipe or any other recipe on the blog, then let me know what you thought in the comments below! And if you loved it, don’t forget to rate it too. Feel free to follow on Instagram, Pinterest, and TikTok for the latest nutrition tips and recipe videos.
★ Catherine
This post contains affiliate links which means I will make a small commission if you purchase from those links. I only recommend and share products that I know, trust and personally use myself!