

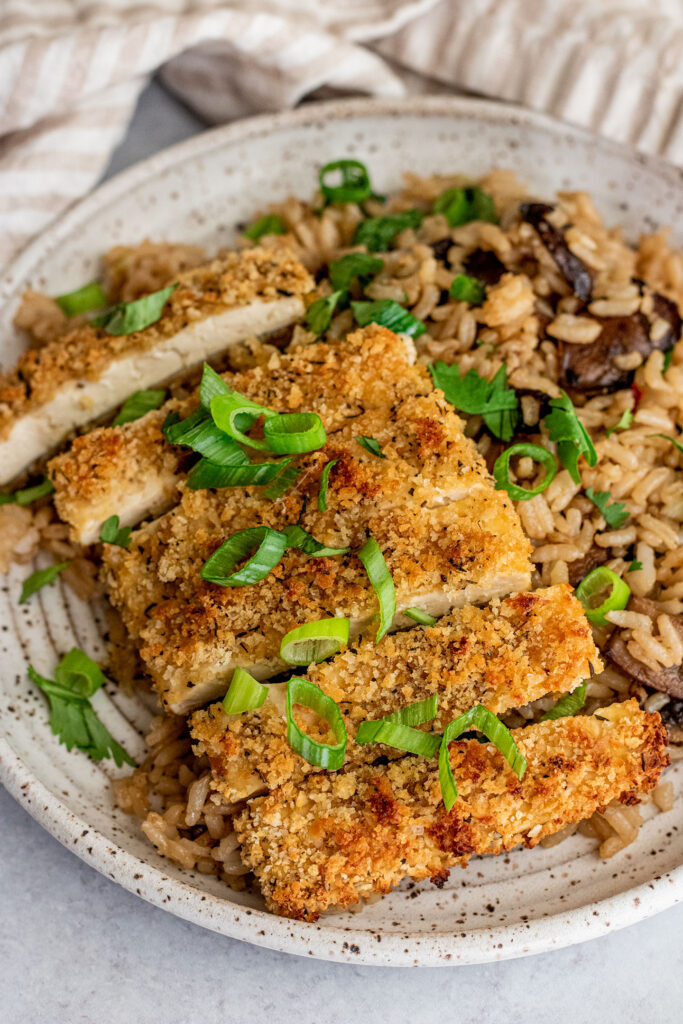
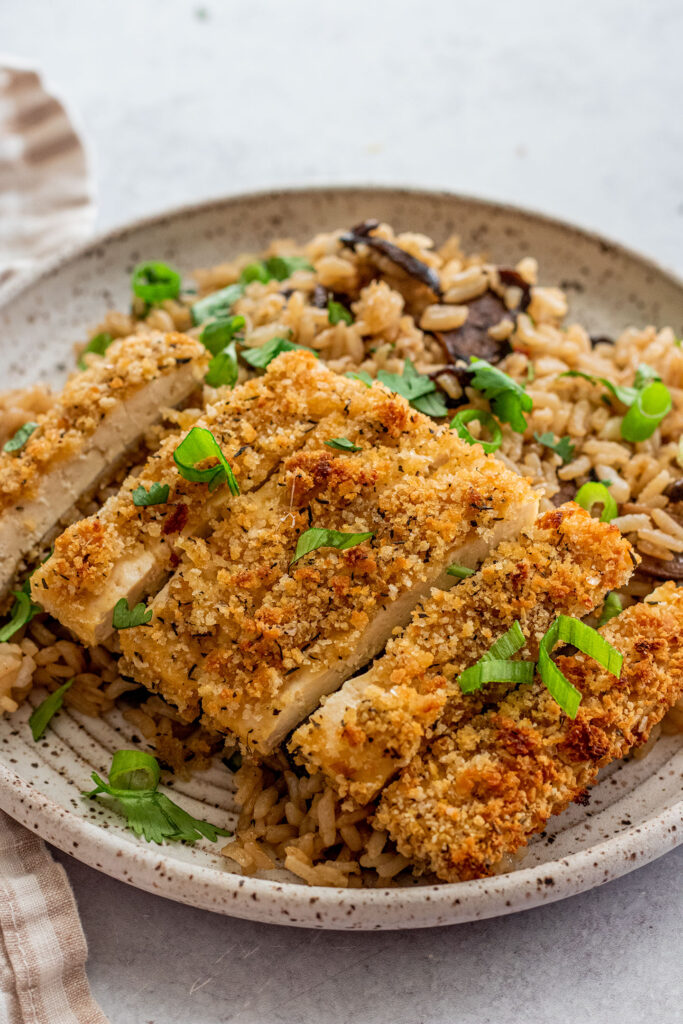
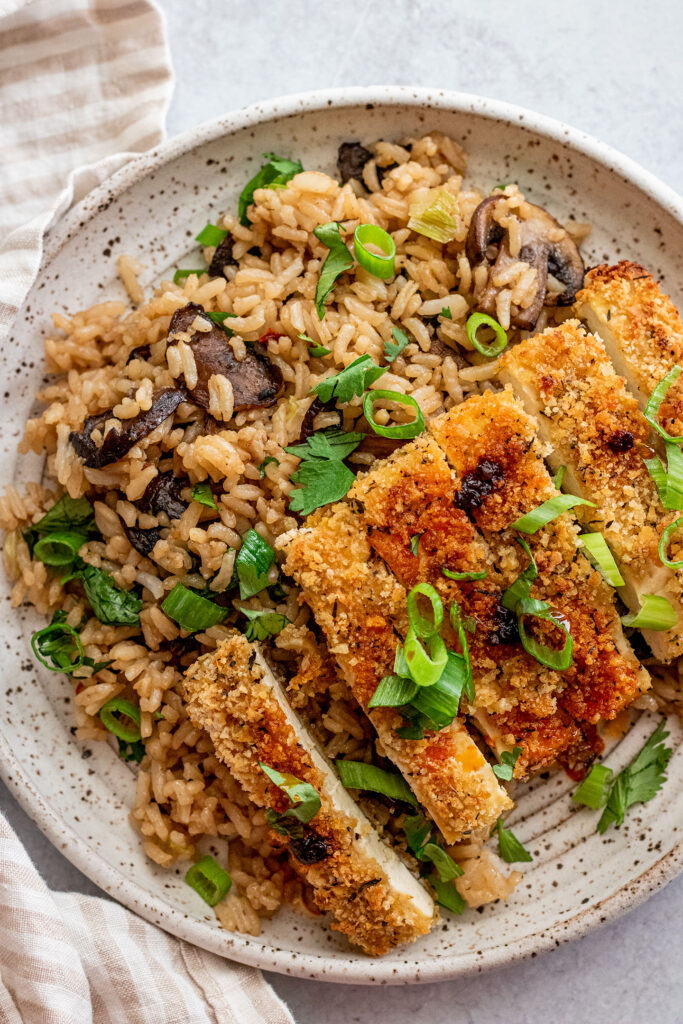
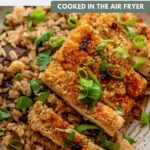
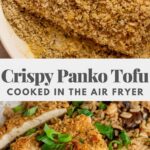
Crispy Panko Tofu
Crispy Panko Tofu baked in the air fryer for a healthier, less messy way to enjoy breaded tofu. Easy to make in 30 minutes.
Marinated, coated in sauce, or stuffed in your favorite sandwich, there are so many ways I enjoy eating tofu. So let’s add a breaded tofu to the mix. This one is coated in a delicious panko crumb, and air-fried (can be baked too) because I am not a big fan of cleaning up big oily messes.
And if you haven’t been a huge fan of tofu, be mindful that sometimes it can take multiple tries before you learn to love any food. I find when tofu is flavored just right and you use good quality pressed tofu, the world of delicious tofu treats starts to open up.
Key Ingredients and Substitutions
- Tofu: Don’t use just any tofu. Aim for either extra firm tofu or super firm tofu. My favorite brands are Nasoya, House Foods, and Soy Boy for best chewy texture.
- Panko Bread Crumbs: These are lighter than regular bread crumbs, which lends to a crispier exterior when cooked. I’ve tried with other bread crumbs, but it doesn’t always come out the same, so just use that as caution. For a gluten-free alternative, use Kikkoman’s gluten-free panko that is also vegan.
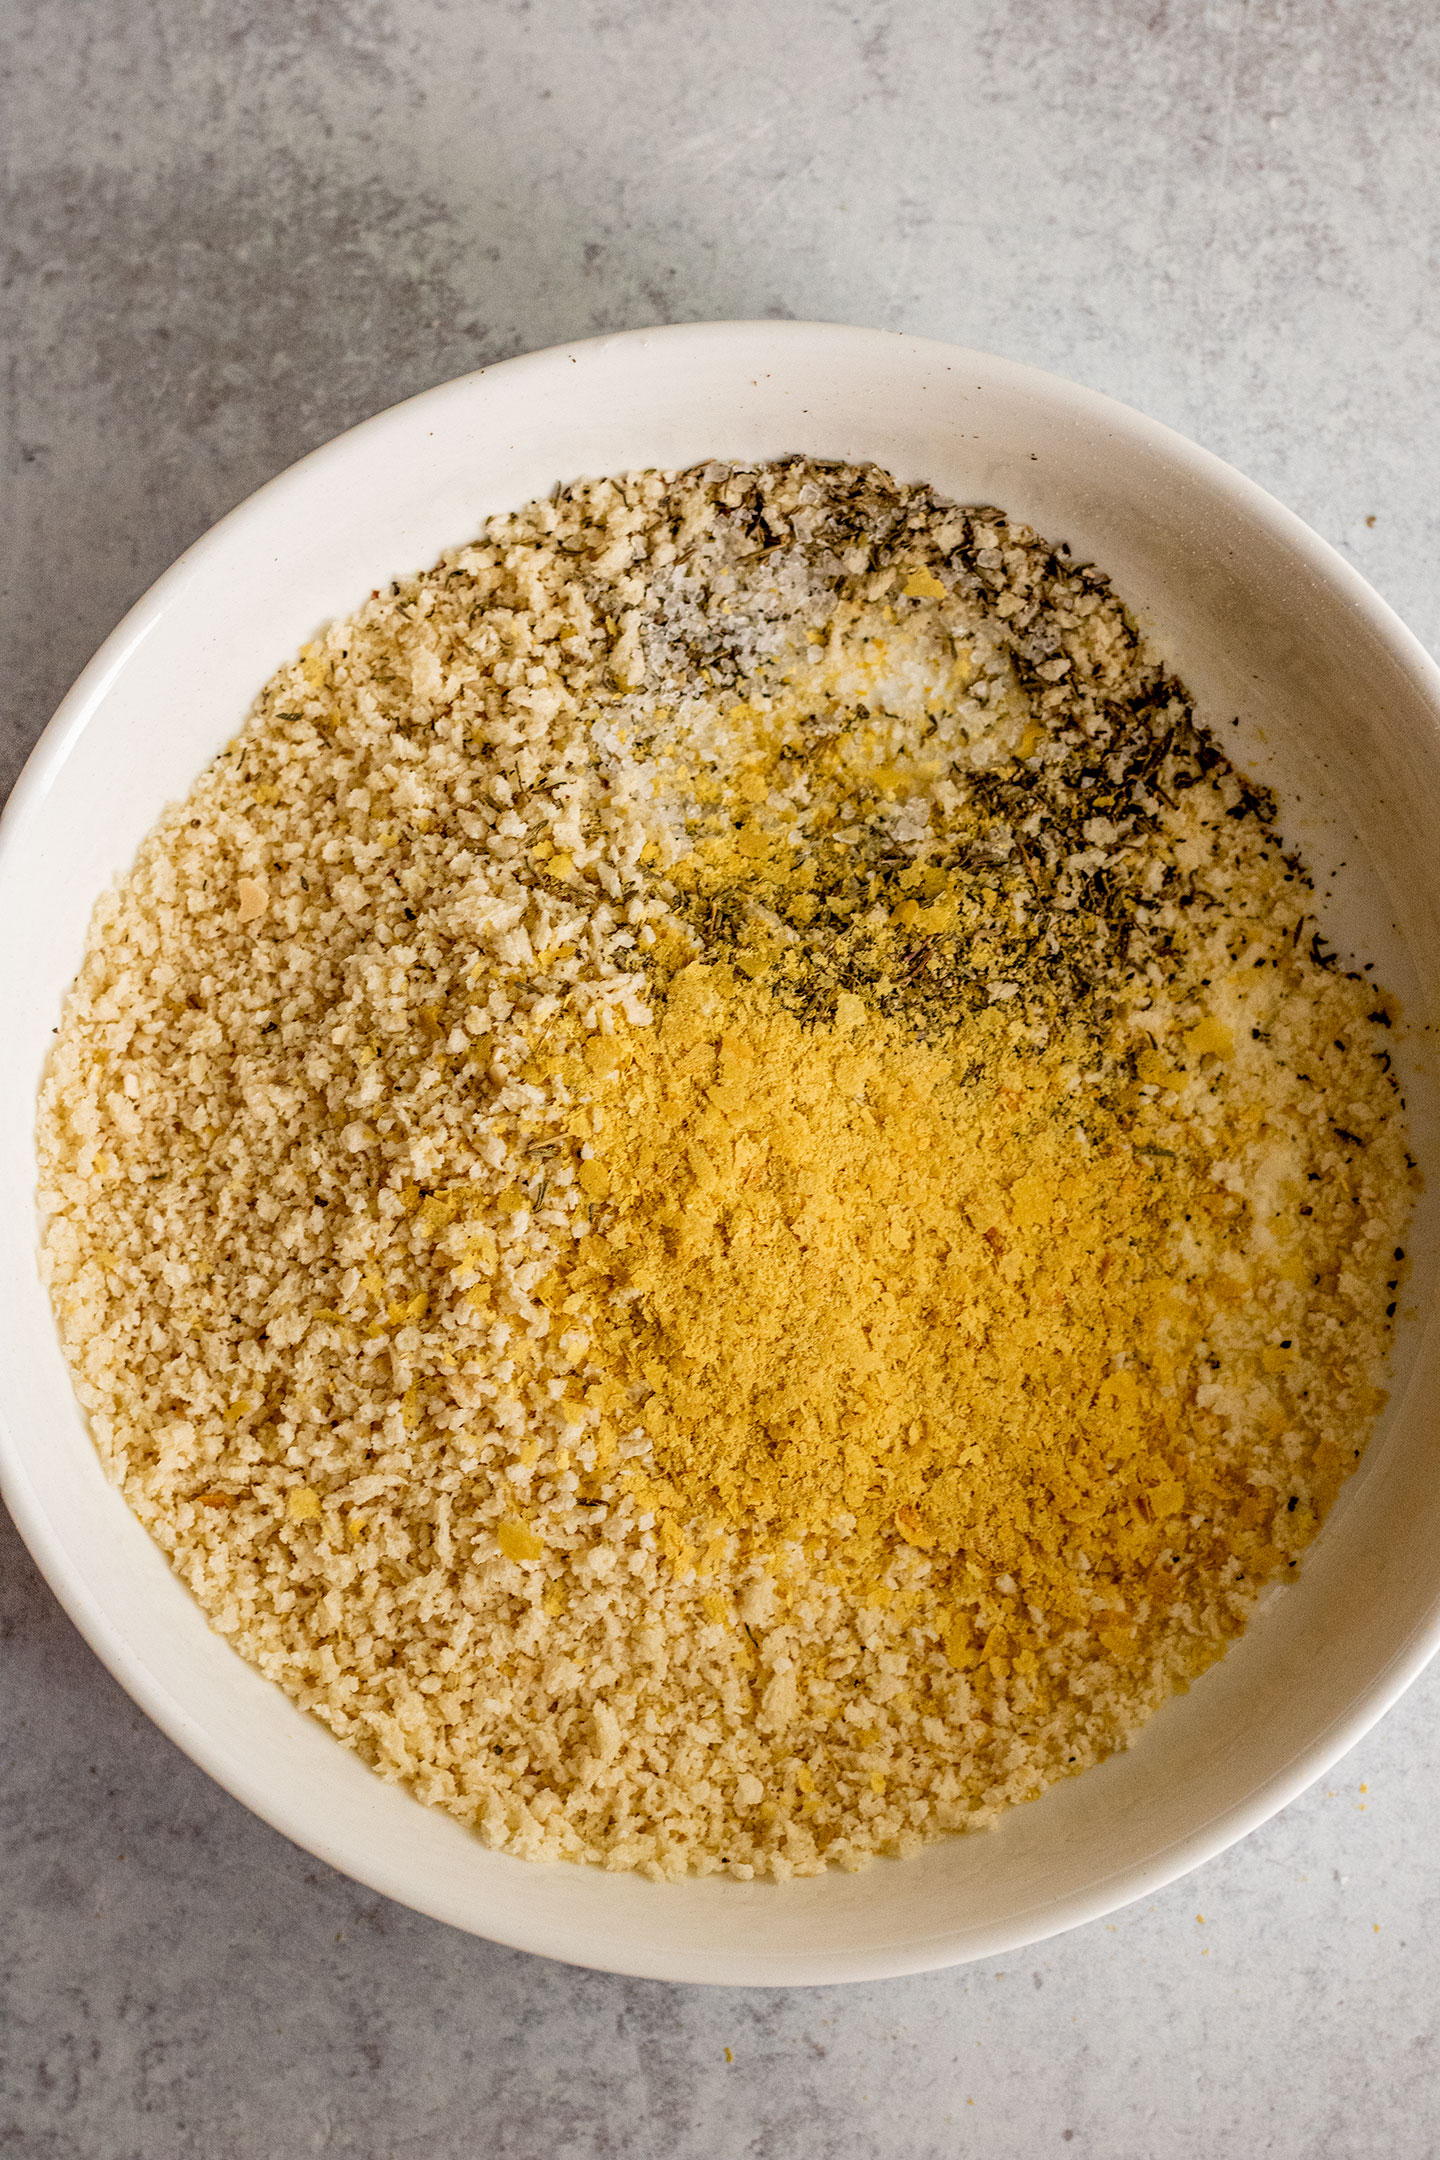
- Seasoning: Garlic, thyme, nutritional yeast, salt and black pepper. You can modify this and add more or less based on your own preference. The nutritional yeast gives us an extra bit of savory flavor to the crust.
- Flour: I use all-purpose flour, but you can swap this out for cornstarch or arrowroot flour instead to make this gluten-free.
- Yogurt: Of course, using a plant-based yogurt. When making recipes, I tend to always use plain unsweetened cashew yogurt from Forager Project. This should still work with other plant-based yogurts. We just want to have a slightly thickened wet mixture to make it easier for the crumbs to stick to the tofu.
- Soy Sauce: This is for more flavor. Feel free to swap with a wheat-free tamari or coconut aminos.
How to Make Crispy Panko Tofu in the Air Fryer
Set up your dredging stations! Mix your dry crumb ingredients together in one large bowl and then the wet batter ingredients in a separate bowl.

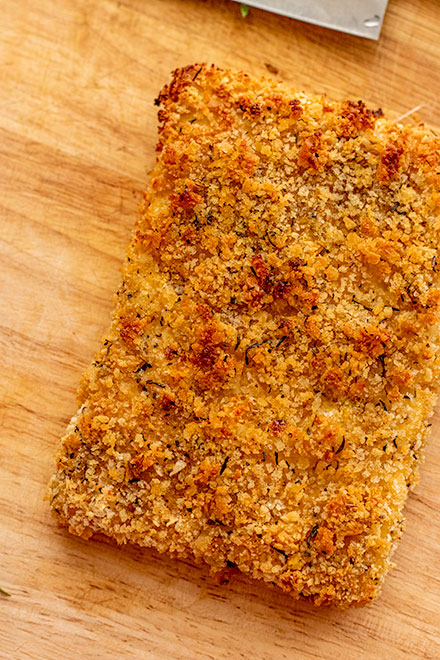
Take your tofu block and cut it into 1 cm thick slabs. Take each slab and dib into the wet batter and shake off any excess. Then carefully press the tofu into the panko crumbs, making sure the tofu is well coated. For a thicker crust, repeat the process with the coated tofu, dipping it back into the batter and coating again in the crumb.

Place your coated tofu in your air fryer basket or on a baking sheet and spray generously with oil on both sides. Bake your tofu in the air fryer or oven as directed until golden and crispy, making sure to flip and spray again half way through the baking process.
Expert Tips
- Press your tofu. There are many ways to do this. For the easiest option, just use a super firm tofu that is already pressed. You can use a tofu press to remove excess water from the tofu or cut the tofu into slabs, place on some paper towels and cover with additional paper towels and place something heavy on top like a textbook to press out excess water for a few minutes.
- If your panko is not sticking, the crumbs might be too big. Feel free to blitz the panko a few times in a food processor to break it down.
- For even more crunch and flavor, opt for freshly crushed black pepper. I like to crush black peppercorns in a mortar and pestle, and the fresh pepper really takes it over the top. Optional, but makes a difference for flavor and texture.
- Adjust seasonings for the crumb to your taste! You can absolutely change the seasonings based on your own preference.
- Feel free to fry the tofu. I am providing the air fried and baking instructions for this recipe, but you can absolutely fry in oil for 2-3 minutes on both sides until nice and golden.
Frequently Asked Questions
Make sure that your tofu is properly coated. I like to make sure to press the battered tofu into the bread crumbs on both sides to make sure it sticks. Repeating the battering process will also give you an even thicker crust. Also note your baking time. Since a lot of ovens especially air fryers can vary you may need to bake for a little longer until the coating looks more golden and toasted.
I find that the best reviews I’ve seen for air fryers tends to be for Ninja Air Fryers and Corsi Air Fryers. I like using my Ninja Foodi because it has a larger basket that makes it easier to cook more food at a time.
The brand Kikkoman makes a gluten-free and vegan panko bread crumb. Use this and swap out the flour for cornstarch or arrow root flour and you are set.
Similar to many crispy options, they will taste best day of making. You can store leftovers in an air tight container for up to 3 days. To reheat, I highly recommend placing the cutlet into the air fryer or a toaster oven to crisp back up for 4-5 minutes or until warmed through.
How to Serve
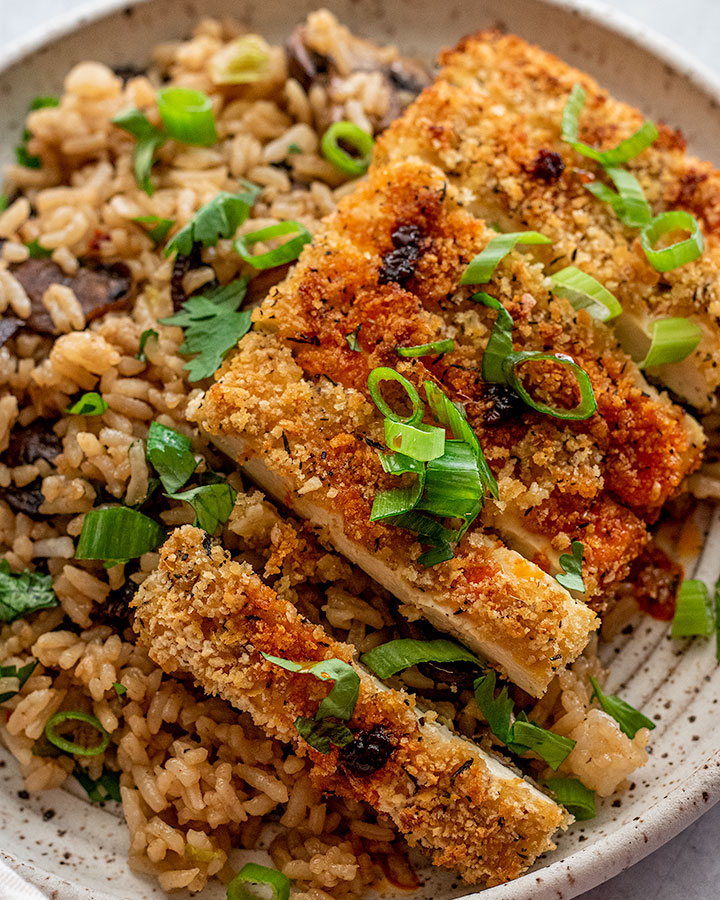
- Takeout at home: You can slice up your crispy tofu into strips and serve with this Mushroom Fried Rice or these Spicy Sriracha Noodles to give you takeout vibes.
- Get saucy: Drizzling some chili oil overtop is optional, but gives this tofu extra flavor. You can coat it with your favorite Buffalo Sauce or top with my favorite Creamy Cilantro Lime Sauce.
- Use in a sandwich or salads: This tofu can work really well in my Red Pesto Sandwich or my favorite Kale Crunch Salad.
More Delicious Tofu Recipes to Try
- Orange Tofu
- Lemon Pepper Tofu
- Peanut Red Curry Tofu
- Tofu Broccoli Stir Fry with Garlic Ginger Sauce
- Easy Balsamic Tofu
- 15-Minute Tofu Teriyaki

Crispy Panko Tofu
- Prep Time: 15 minutes
- Cook Time: 22 minutes
- Total Time: 37 minutes
- Yield: 4 servings 1x
- Category: Main Dish
- Method: Air Fryer
- Cuisine: American
- Diet: Vegan
Description
Crispy Panko Tofu baked in the air fryer for a healthier, less messy way to enjoy breaded tofu. Easy to make in 30 minutes.
Ingredients
- 1 block extra firm tofu, pressed for 15 minutes and drained or use super firm tofu to avoid pressing
- 1 1/2 cups panko bread crumbs
- 4 tbsp nutritional yeast, divided
- 1 tsp dry thyme
- 1 tsp garlic powder
- 1/2 tsp freshly cracked black pepper
- 1/4 tsp kosher salt
- 1/4 cup cornstarch or all-purpose flour
- 1/4 cup vegan yogurt or vegan mayo
- 3 tbsp plant based milk
- 1 tbsp soy sauce
- High heat spray oil, I use avocado oil
Instructions
- Cut your tofu into 4 wide even pieces that are about 1 cm in thickness. Pat dry with a paper towel and set aside.
- Combine the panko bread crumbs, 3 tablespoons of nutritional yeast, thyme, garlic powder, black pepper and salt in a large flat dish or mixing bowl and give it a good mix.
- Whisk together the cornstarch, 1 tablespoon of nutritional yeast, yogurt, milk, and soy sauce in a separate large bowl.
- Take your tofu slice and submerge it in the wet batter, then place in the panko mixture. Flip to tofu and gently press it into the panko mixture to make sure the bread crumbs are sticking. For extra crispy crust, repeat the process to double coat the tofu. Dip the coated tofu in the batter again, shake off excess and coat again with the panko making sure it is fully crusted, pressing the tofu into the bread crumbs.
- Place the coated tofu in single layer in your air fryer basket and generously spray with a high heat oil. Place the tofu in the air fryer at 375F for 15 minutes, flip and spray again with oil and bake for an extra 7 minutes or until the tofu is golden around the edges before serving.
Notes
To bake in the oven, spray your tofu on both sides with high oil and place on a parchment lined baking tray. Place the tofu in a preheated oven set to 425F and bake for 20-25 minutes. Flip the tofu, spray again with oil and cook for an additional 15 minutes.
This tofu can also be pan fried. Heat up your oil in a pan with deep sides and cook your tofu 2-3 minutes on both sides until nice and golden. Remove and place on a paper towel until all tofu is cooked.
If you tried this recipe or any other recipe on the blog, then let me know what you thought in the comments below! And if you loved it, don’t forget to rate it too. Feel free to follow on Instagram, Pinterest, and TikTok for the latest nutrition tips and recipe videos.
★ Catherine
This post contains affiliate links which means I will make a small commission if you purchase from those links. I only recommend and share products that I know, trust and personally use myself!


Thanks for the crispy panko tofu recipe.