

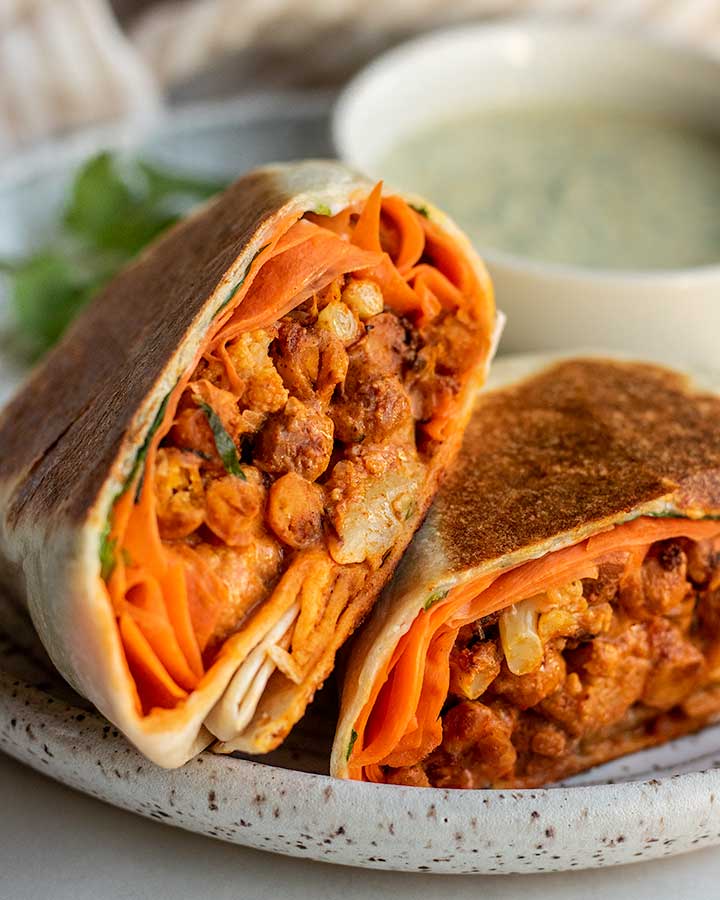
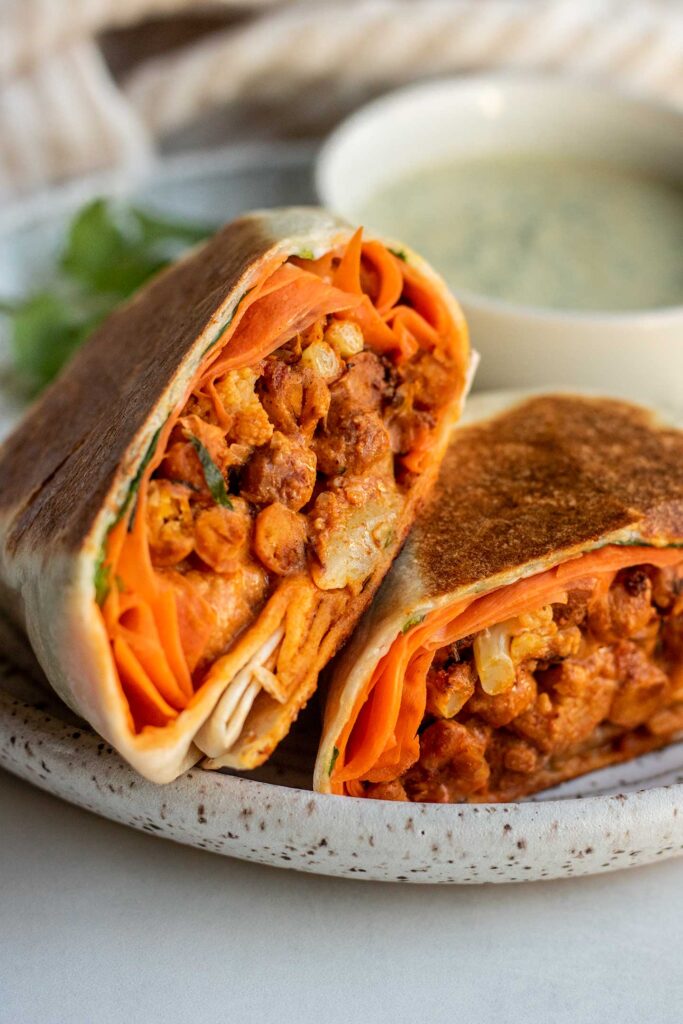
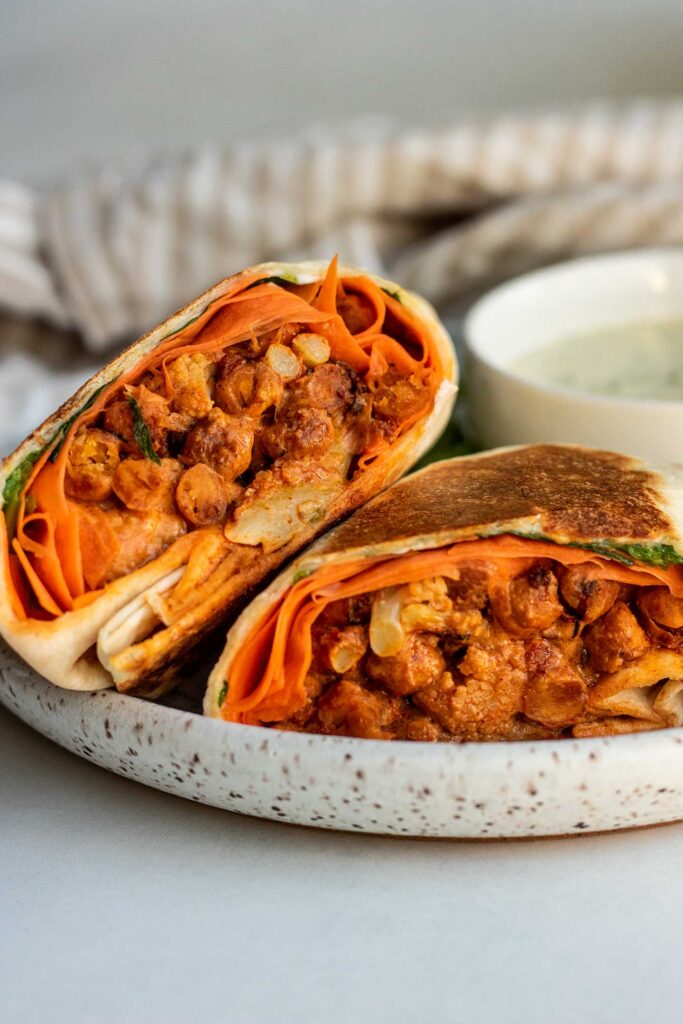
Buffalo Chickpea Wraps
These buffalo chickpea wraps are loaded with seasoned oven baked cauliflower and chickpeas then tossed in a sweet and spicy buffalo sauce. A satisfying meal you can make ahead for lunches during the week.
Flavor is king. And if you want to enjoy more nutritious foods like beans and vegetables, make them tasty and you will enjoy eating them. So it’s important to learn some simple ways to do this.
I recently shared my favorite easy Avocado White Bean Sandwich as a simple example of mixing in more flavor to nutritious foods. And now, we can add buffalo sauce and seasoned roasted veggies to the list.
Why You’ll Love These Buffalo Chickpea Wraps
- Packed with flavor. Between the seasoned chickpeas and the accompanying buffalo sauce, these wraps are loaded with flavor.
- Easy to make. The filling for the wraps roasts on one single sheet pan. Just toss the roasted veggies in the sauce and it’s ready to use in wraps for easy lunches.
- Loaded with fiber and protein. This boost in nutrition helps to make you feel full and satisfied after your meal and better control your energy levels.
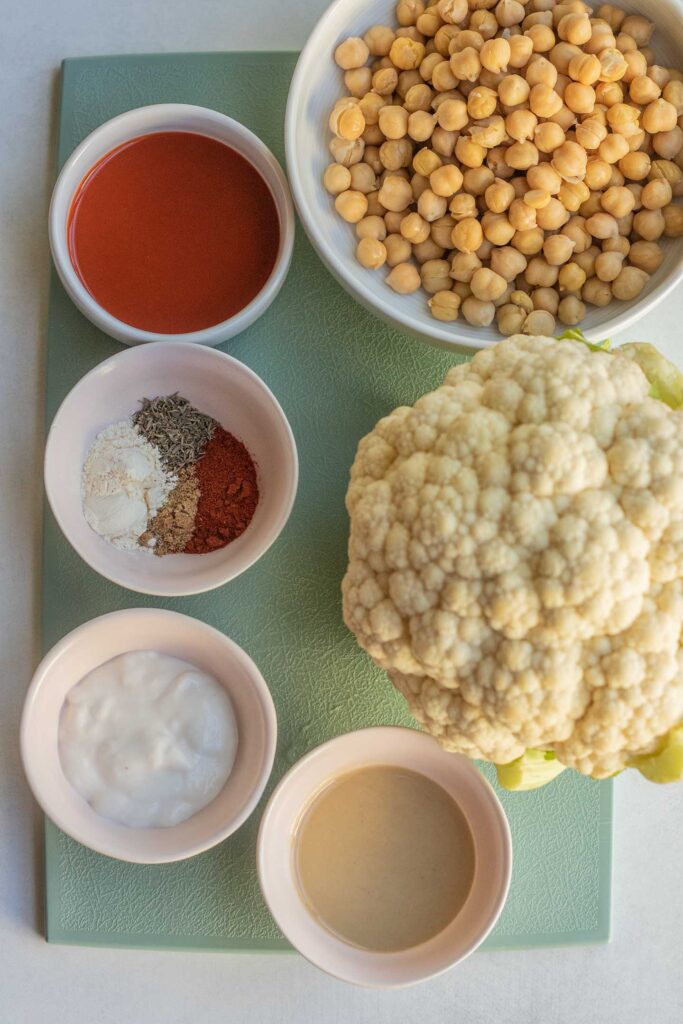
Key Ingredients and Substitutions
- Chickpeas: I used canned chickpeas to make this easier, but feel free to use freshly cooked chickpeas. You can also swap for white beans or butter beans if needed.
- Cauliflower: A small head of cauliflower should be enough. You can also use frozen veggies, but please note tips below for how to do this.
- Buffalo Sauce: For a vegan or a dairy-free version, I always use Frank’s Red Hot Buffalo wing sauce.
- Tahini: Good quality tahini makes a big difference as it will have less of a bitter taste to it. I highly recommend Soom Foods tahini. If not a fan of tahini, feel free to just use more yogurt.
- Yogurt: Aim for your favorite plain unsweetened plant based yogurt to keep it dairy-free. I love using Forager Project.
- Sweetener: Choose the liquid sweetener you like best. I tend to go with either maple syrup or agave.
- Seasonings: For the chickpeas and cauliflower we are coating them in smoked paprika, garlic powder, thyme and coriander. Feel free to add more or less of the seasonings you like.
How to Make Buffalo Chickpea Wraps
Preheat the oven to 425F. Place your chickpeas on a clean kitchen towel and pat dry to remove excess moisture. Place the chickpeas and cauliflower on a large baking tray and in a small bowl whisk together the spice blend.
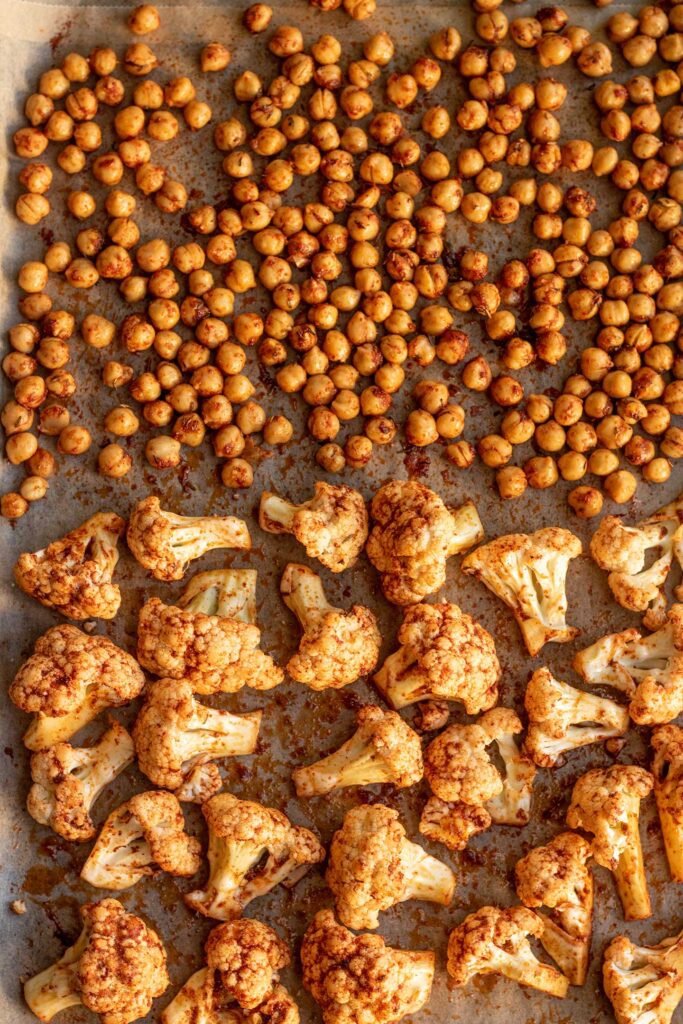
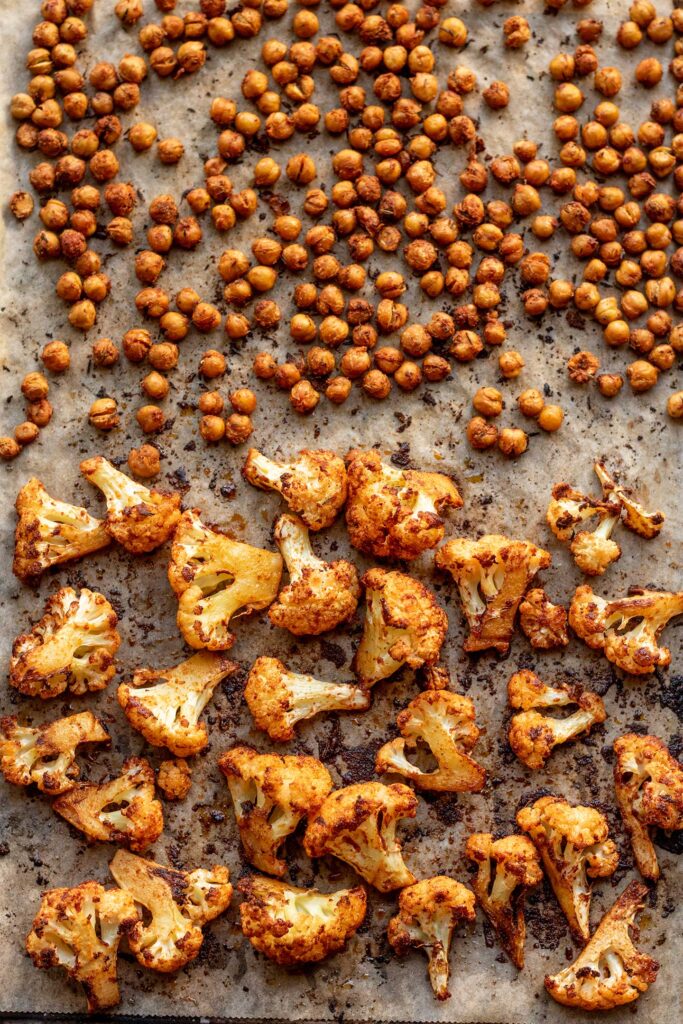
Sprinkle the spice blend, oil and a generous pinch of salt evenly over the chickpeas and cauliflower, then toss everything together until well coated. For even roasting, make sure to place the cauliflower florets cut side down on the baking tray and spread everything out evenly into a single layer.
Place the baking tray on the middle rack of the oven and roast for 30 minutes, flipping the chickpeas and cauliflower half way through.
Meanwhile, prepare your sauce. Combine the buffalo sauce, yogurt, tahini, lemon and maple syrup together in a small bowl and whisk until smooth.

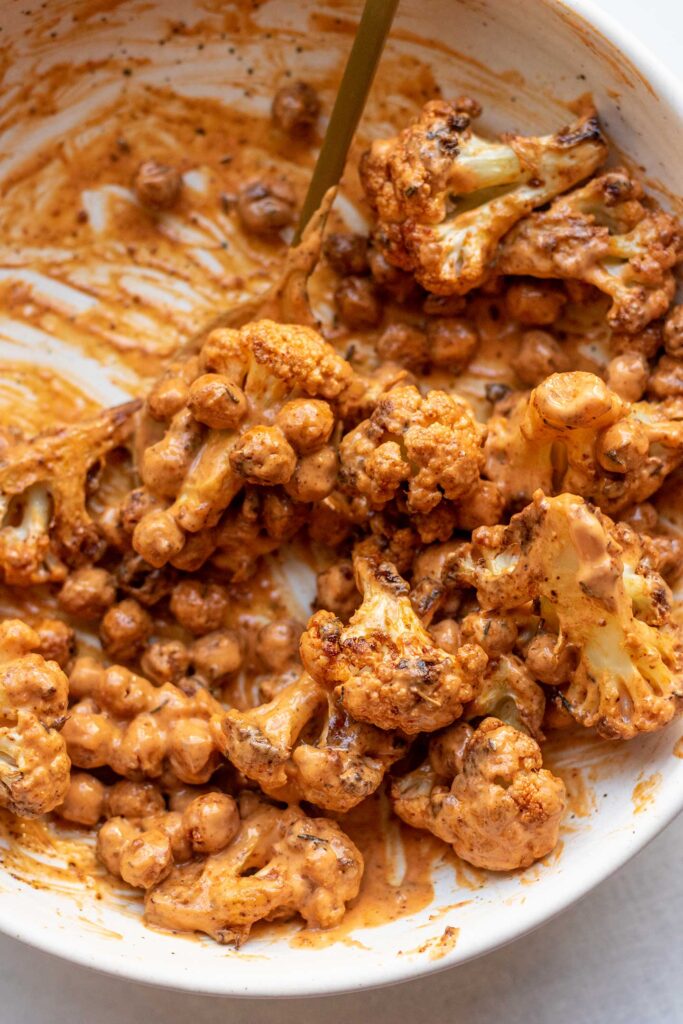
Place the roasted chickpeas and cauliflower in a mixing bowl then pour the buffalo sauce overtop and mix to coat.
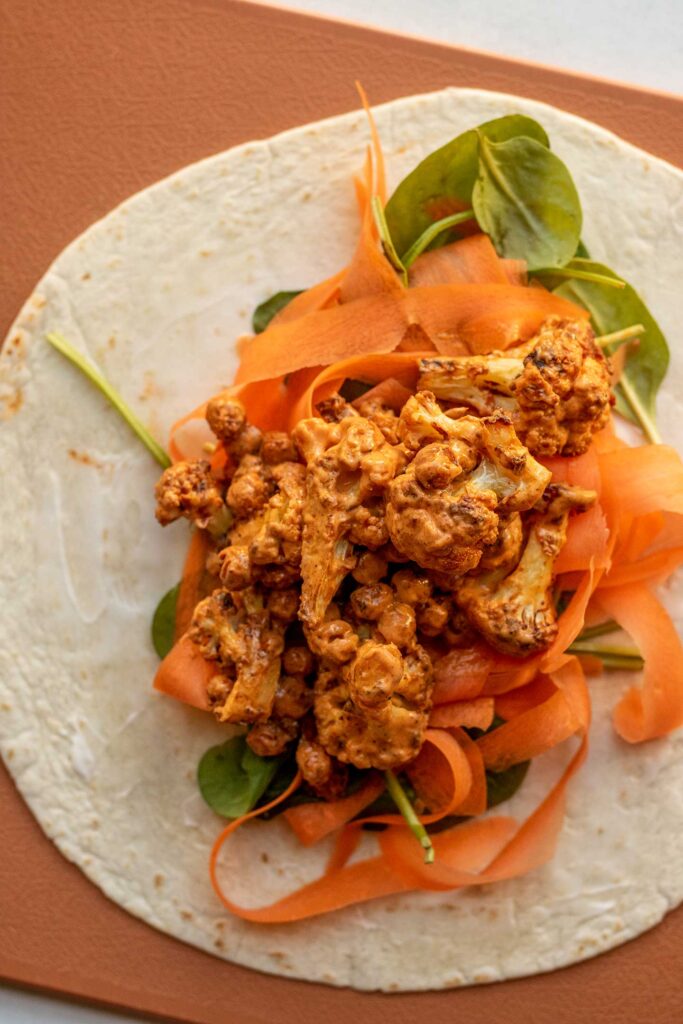
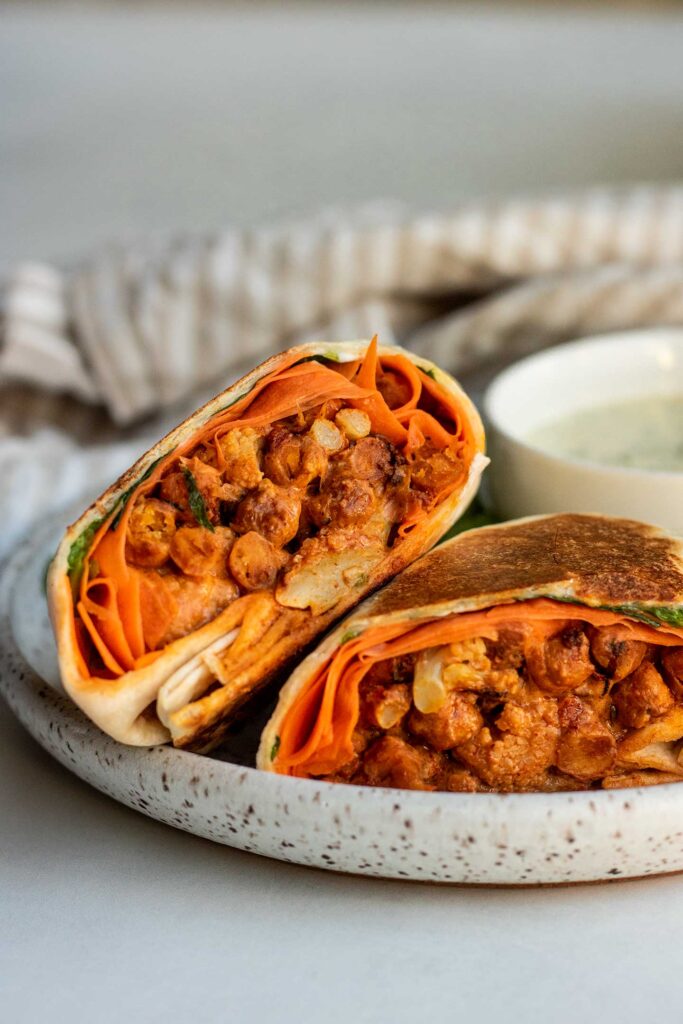
Now assemble your wrap. Warm up your tortilla to make it pliable, then lay it on a flat surface. Top with greens and carrots then spoon on the cauliflower and chickpea mixture. Tuck and roll the burrito tight and place in a pan over medium low heat seam side down for 2-3 minutes, flip and cook another 2-3 minutes until both sides are golden then serve.
Expert Tips
- Cut your cauliflower into even 1 inch pieces. Having more uniform pieces of cauliflower will help the cauliflower roast more evenly and cook all the way through.
- Place your cauliflower florets cut side down on the baking tray. This may take an extra minute, but it leads to the best even sear for your cauliflower.
- Avoid overcrowding your pan. Make sure there is enough room on the pan to spread everything out into a single layer with some space between, so nothing is overlapping. If everything doesn’t fit in one pan, just use a second sheet pan.
- Warm your tortilla wraps before using. Add your wraps to a preheated griddle or pan and warm them for 30 seconds on both sides before stuffing and rolling. This will help make them more pliable and less likely to break.
- Make it gluten-free. Swap the flour tortilla wrap for a gluten-free variety. Or serve the filling over quinoa or lettuce wraps.
- Adjust the spice level. Use less or more buffalo sauce based on your heat tolerance. Always start with less as it’s easier to adjust to your liking versus adding a lot in the beginning.
Frequently Asked Questions
Yes! There are two things to note. Frozen cauliflower might come in more inconsistent sizes, which means the cooking time may vary. Place on a separate baking tray from the chickpeas so you can cook them longer if needed. Second thing, because of the freezing process, the texture of the cauliflower will be slightly softer in comparison to fresh.
Aim to use burrito sized tortilla wraps. Brands will vary, but most can be made more pliable prior to stuffing by warming the tortillas up first for 30 seconds on both sides in a pan.
If you don’t have access to buffalo sauce, swap with a flavorful hot sauce. Note that heat level can vary between brands, so start with a tablespoon and add more based on your specific spice tolerance level.
Yes! Make the filling and sauce in advance and store in an airtight container. When ready to assemble, add the filling to a fresh tortilla, roll it into a burrito and toast it. If you make a full burrito, wrap it well and place in the fridge to store for 2-3 days. You can eat it cold or reheat the burrito if desired in a toaster oven before enjoying.
How to Serve
These wraps are a complete meal. For a contrast in texture and freshness, I love to add some fresh greens like spinach and raw shredded carrots. Feel free to mix and match your fillings based on preference.
For a fun dipping sauce, I have included a make your own vegan tahini ranch in the notes of the recipe card.
More Vegan Lunch Ideas to Try
- Herby Avocado White Bean Salad
- Homemade Peanut Miso Instant Noodles
- Balsamic Glaze Marinated Chickpea Salad
- Cucumber Boats with Crispy Chickpeas
- 15 Minute Gochujang Noodles

Buffalo Chickpea Wraps
- Prep Time: 10 minutes
- Cook Time: 35 minutes
- Total Time: 45 minutes
- Yield: 3–4 wraps 1x
- Category: Lunch
- Method: Baking
- Cuisine: American
- Diet: Vegan
Description
These buffalo chickpea wraps are loaded with seasoned oven baked cauliflower and chickpeas then tossed in a sweet and spicy buffalo sauce. A satisfying meal you can make ahead for lunches during the week.
Ingredients
- 1, 15 oz can chickpeas, drained and rinsed
- 2 cups of cauliflower florets (about 1 small head of cauliflower), cut into 1 inch pieces
- 1 1/2 tsp smoked paprika
- 1/2 tsp ground coriander
- 1/2 tsp dry thyme
- 1 1/2 tsp garlic powder
- 2 tbsp avocado oil
- Salt to taste
Sweet and Spicy Buffalo Sauce
- 3 tbsp buffalo sauce
- 2 tbsp tahini
- 2 tbsp plain unsweetened dairy-free yogurt
- Juice of half a lemon
- 2 tsp maple syrup
Assemble
- 3 Burrito Sized Tortillas
- Spinach
- Shredded Carrots
- Optional dipping sauce
Instructions
- Preheat the oven to 425F. Place your chickpeas on a clean kitchen towel and pat dry to remove excess moisture. Place the chickpeas and cauliflower on a large baking tray and in a small bowl whisk together the spice blend.
- Sprinkle the spice blend, oil and a generous pinch of salt evenly over the chickpeas and cauliflower, then toss everything together until well coated. For even roasting, make sure to place the cauliflower florets cut side down on the baking tray and spread everything out evenly into a single layer.
- Place the baking tray on the middle rack of the oven and roast for 30 minutes, flipping the chickpeas and cauliflower half way through.
- Meanwhile, prepare your sauce. Combine the buffalo sauce, yogurt, tahini, lemon and maple syrup together in a small bowl and whisk until smooth.
- Place the roasted chickpeas and cauliflower in a mixing bowl then pour the buffalo sauce overtop and mix to coat.
- Now assemble your wrap. Warm up your tortilla to make it pliable, then lay it on a flat surface. Top with greens and carrots then spoon on the cauliflower and chickpea mixture. Tuck and roll the burrito tight and place in a pan over medium low heat seam side down for 2-3 minutes, flip and cook another 2-3 minutes until both sides are golden then serve.
Notes
Cut your cauliflower into even 1 inch pieces. Having more uniform pieces of cauliflower will help the cauliflower roast more evenly and cook all the way through.
Place your cauliflower florets cut side down on the baking tray. This may take an extra minute, but it leads to the best even sear for your cauliflower.
Avoid overcrowding your pan. Make sure there is enough room on the pan to spread everything out into a single layer with some space between, so nothing is overlapping. If everything doesn’t fit in one pan, just use a second sheet pan.
Warm your tortilla wraps before using. Add your wraps to a preheated griddle or pan and warm them for 30 seconds on both sides before stuffing and rolling. This will help make them more pliable and less likely to break.
Make it gluten-free. Swap the flour tortilla wrap for a gluten-free variety. Or serve the filling over quinoa or lettuce wraps.
Adjust the spice level. Use less or more buffalo sauce based on your heat tolerance. Always start with less as it’s easier to adjust to your liking versus adding a lot in the beginning.
For the optional ranch dipping sauce combine 2 tbsp tahini, 2 tbsp plain unsweetened dairy-free yogurt, 1 tbsp nutritional yeast, Juice of half a lemon, generous pinch of salt (I used a heaping 1/4 tsp), 1/2 tsp garlic powder, 1 tsp onion powder, a tbsp fresh dill (or about 1/2 tsp dry) and 2-3 tbsp water. Whisk to combine and adjust seasonings to taste.
If you tried this recipe or any other recipe on the blog, then let me know what you thought in the comments below! And if you loved it, don’t forget to rate it too. Feel free to follow on Instagram, Pinterest, and TikTok for the latest nutrition tips and recipe videos.
★ Catherine
This post contains affiliate links which means I will make a small commission if you purchase from those links. I only recommend and share products that I know, trust and personally use myself!


Delicious! Didn’t bother w/ dipping ranch cus already so flavorful! Thank you!!
Delicious! So easy and tasty that we made these two weekends in a row. Do you have a particular brand of tortillas you like to use? I was looking for some good whole-wheat ones but couldn’t find any in burrito size.