

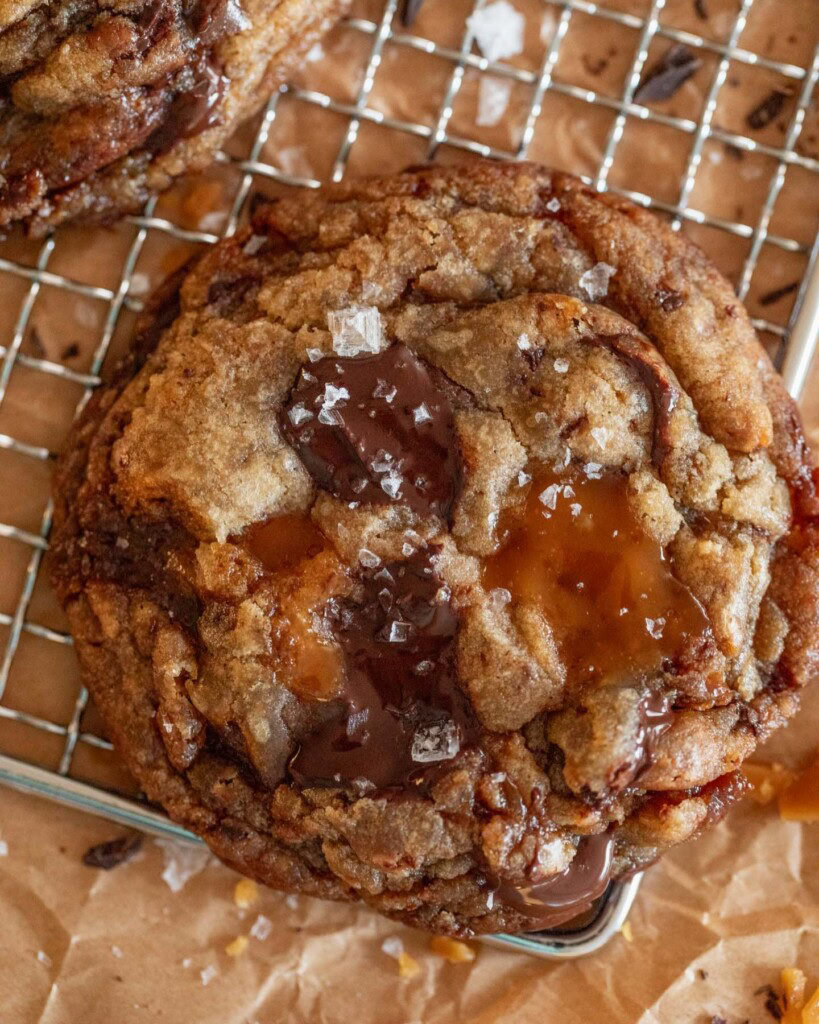
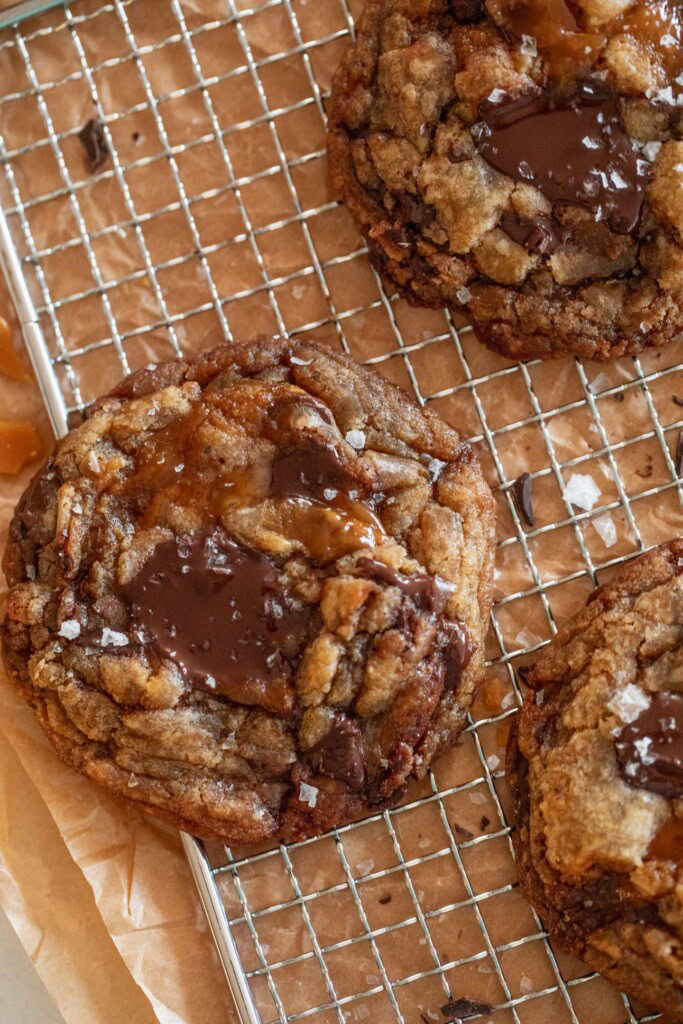
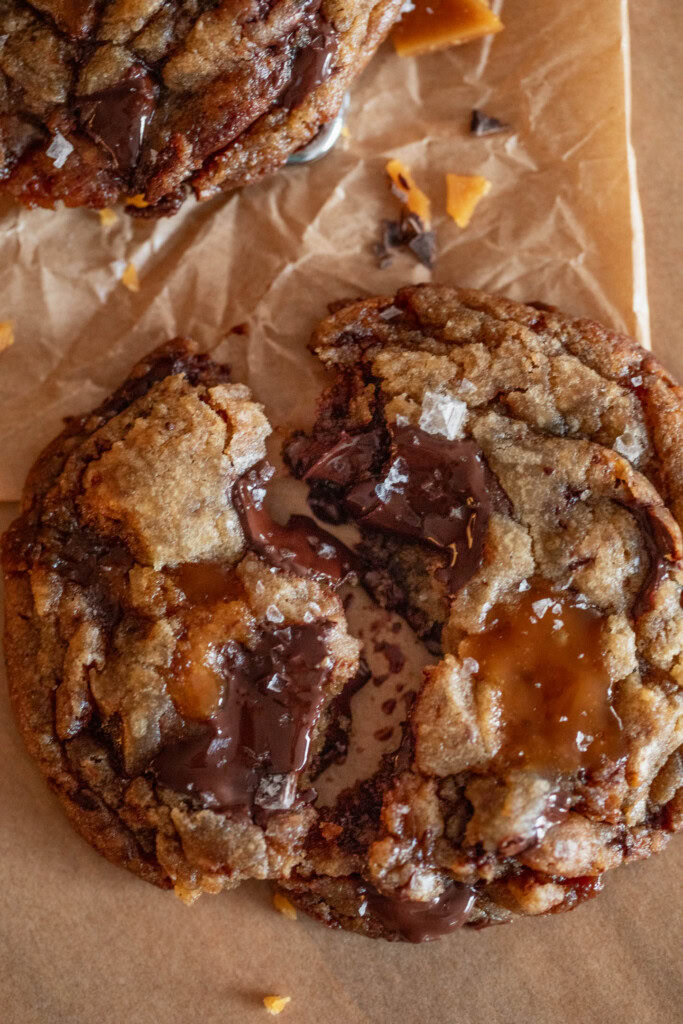
Brown Butter Toffee Chocolate Chip Cookies
These brown butter toffee chocolate chip cookies are loaded with caramelized toffee bits and nutty buttery flavors. The perfect dairy-free cookie with crispy edges and a chewy gooey center.
I’ve been dying to make these cookies for a while. I am a big lover of chocolate chip cookies and became extra obsessed at the concept of brown butter chocolate chip cookies. Mix that with some optional toffee bits, and you have made my dream cookies, these brown butter toffee chocolate chip cookies to be specific. Now, the only issue is trying to recreate a veganized version of that glory because vegan butter and dairy butter behave incredibly different.
Luckily, I’ve tested things out for you, so if you want a yummy brown butter chocolate chip cookie on it’s own, it’s yours! And if you dare to take it over the top and add some toffee, I’ll show you how to make that toffee too.
Why You’ll Love These Brown Butter Toffee Chocolate Chip Cookies
- An incredible flavor combo. Having both the caramelized and buttery flavors of the toffee together with the toasted nutty notes of the browned butter leads to an incredibly delicious cookie.
- Crispy edges, chewy gooey center. The combo of chocolate and toffee leads to an incredible chewy and melty cookie. The textures of this cookie really make it an even better experience.
- You can simplify it! Don’t feel like making toffee bits? I have some alternatives that you can replace them with. You can also choose to omit them and have a simpler brown butter chocolate chip cookie that is just as delicious.
What is Brown Butter?
Regular dairy butter contains milk solids, a combo of sugar and fat, that when in contact with heat will start to naturally brown and toast. These toasted solids bring out nutty flavors and lends a more complex depth of flavor to baked goods.
Not all vegan butters are the same, and will not behave the same when trying to brown. Many vegan butters are primarily made with a combination of different oils and may not always contain protein bits or sugars that can brown the same way regular butter does. I recommend the brands Miyoko’s and VIolife. Both brown very well and are composed in a way that works best for brown butter and toffee making.
What is Toffee?
Toffee is a sweet treat made by cooking sugar and butter together until it reaches a high temperature or hard crack stage, typically around 300°F (150°C), which causes it to harden into a brittle texture. The resulting sweet has a rich, buttery flavor with a slightly caramelized taste. It is often broken up into bits that can be used in a variety of desserts.
This type of confection is similar, but very different to caramel and butterscotch, but involves slightly different methods:
- Caramel: Made by melting sugar and then adding butter and cream to create a smooth, rich mixture. It is typically cooked at a lower temperature than toffee, which results in a chewy or creamy texture. The flavor is sweet, buttery, and creamy, with a smooth mouthfeel.
- Butterscotch: Made by cooking brown sugar and butter together, often with a touch of vanilla, at a lower temperature than toffee. The use of brown sugar gives it a unique flavor, with a slight molasses undertone that makes it richer and more complex.
Butter Quality Matters
Again, butter quality does impact the result of these types of confections. You want to make sure that the butter you use has coconut oil as the first ingredient and that it also has a good buttery flavor. Again, high quality butter makes a big difference here and still recommend either Miyoko’s or Violife for this.
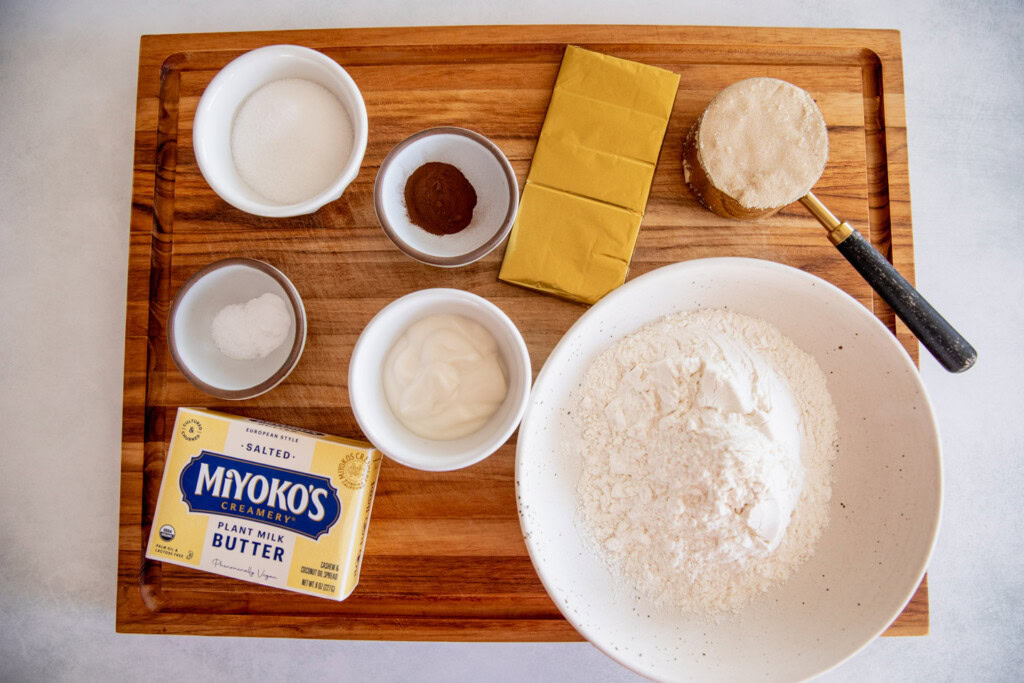
Key Ingredients and Substitutions
- Butter: This is the only ingredient I will say is the most important. Not all vegan butters behave the same, so the higher quality ones will be the best to use here. Look for butter varieties that have coconut oil as their first ingredient and contain some type of protein/sugar that can be browned (look for some type of nut based milk or pea protein solids listed). My favorite brands to use are Miyoko’s and Violife. You can also find a comprehensive review of different vegan butters here.
- Sugars: I used a mix of brown sugar and regular granulated sugar. Used light brown sugar for the cookie dough helps to give you a nice soft and chewy cookie while the granulated sugar helps with the cookie structure and will also result in a slightly crispy edge around the cookie.
- Yogurt: In place of eggs, you can use a plant-based yogurt. Preferably a thicker style plain yogurt will work best here. My go to brands are Silk’s Plain Soy Yogurt, Forager Project’s Plain Unsweetened Cashew Yogurt, and Cocojune.
- Flour: I used all-purpose flour for these cookies. If you decide to attempt to make these gluten-free, I would recommend using King Arthur’s 1:1 gluten-free all-purpose flour (just make sure the gluten-free flour you use has xanthan gum in it).
- Espresso: This is optional, but it helps amplify those chocolate notes in these cookies. It also pairs really well with the sweet, caramelized and buttery flavors in this cookie.
- Vanilla: I love using vanilla bean paste for the cookie dough, but using vanilla extract works just as well.
- Chocolate Chips: I like to do a combination of semi-sweet chocolate chips and a chopped up 70% cocoa chocolate bar. The chocolate chips usually keep their shape while the chopped up bar creates lovely pools of chocolate when it bakes. Feel free to just use chocolate chips and add more based on your own preference.
- Toffee Bits: We are making our own here, but feel free to leave them out! The brown butter chocolate chip cookies will still be fantastic on their own. Alternatively, if you don’t want to go through the process of making toffee bits, you can also chop up some chocolate toffee bars (this is a dairy-free variety) or use some chopped candied nuts of your choice.
How to Make a Brown Butter Toffee Chocolate Chip Cookies
Making the Toffee
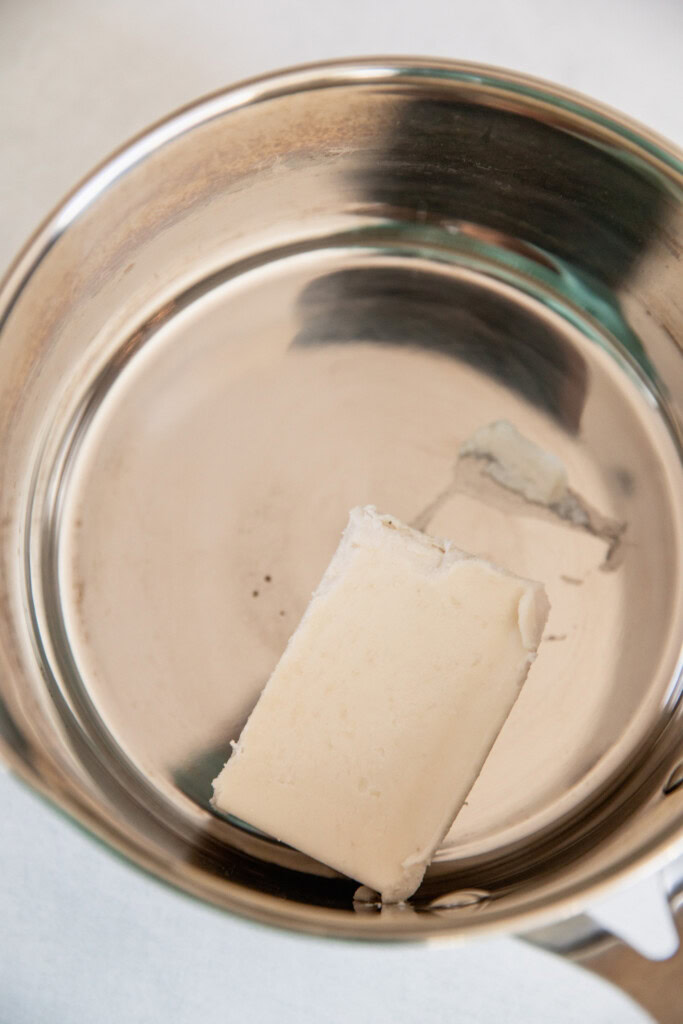
If making the toffee bits, line a small baking tray with parchment and set to the side. Place a small heavy bottomed saucepan with tall sides over medium low heat and add the butter to melt.
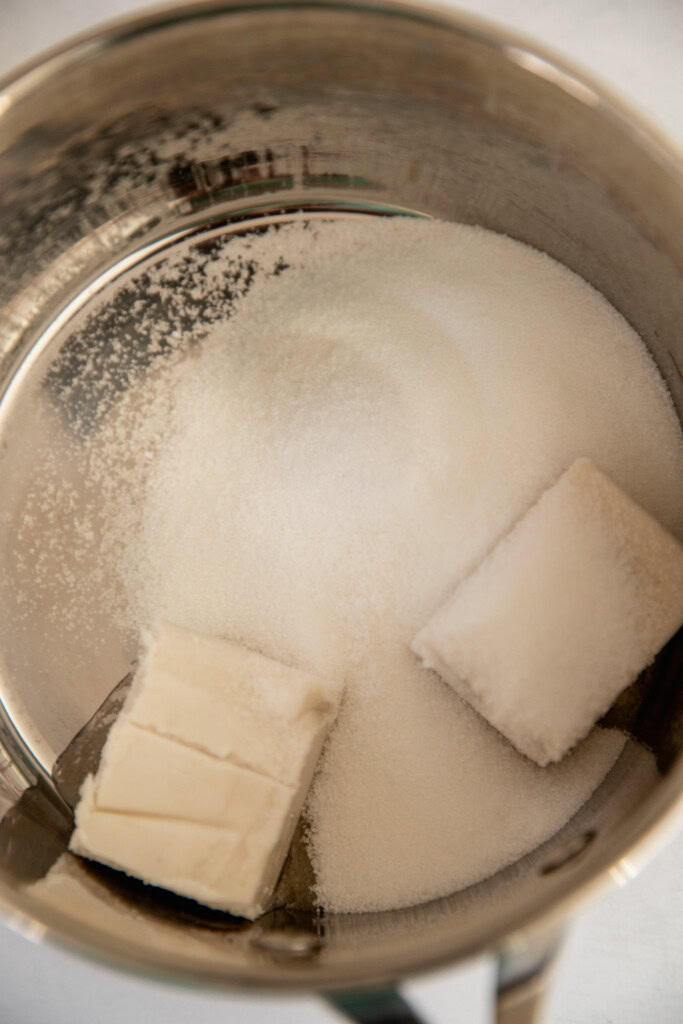
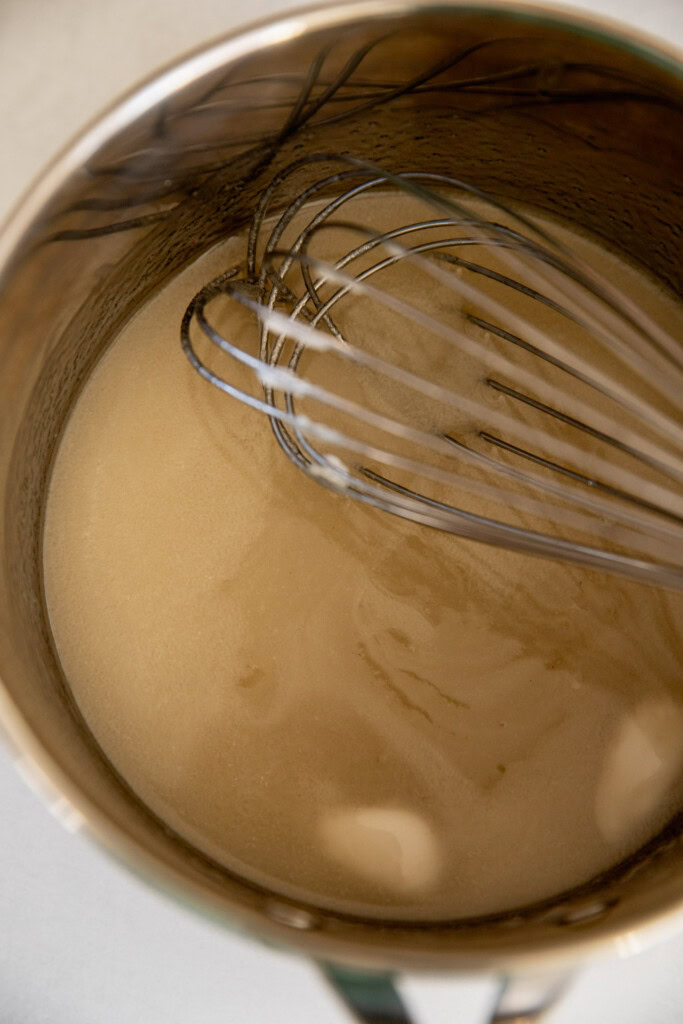
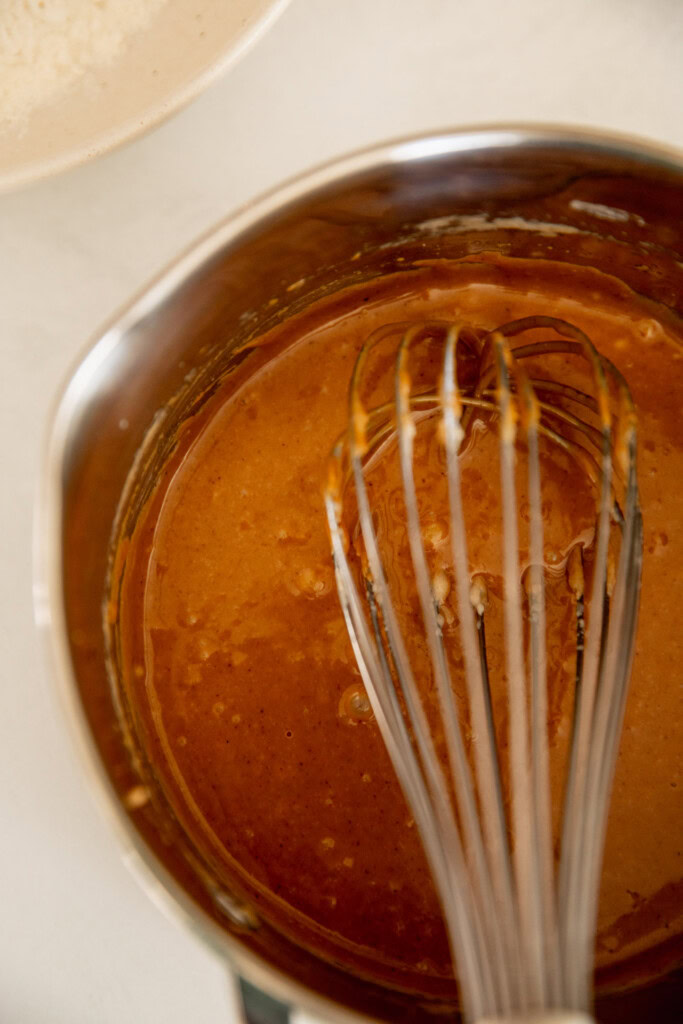
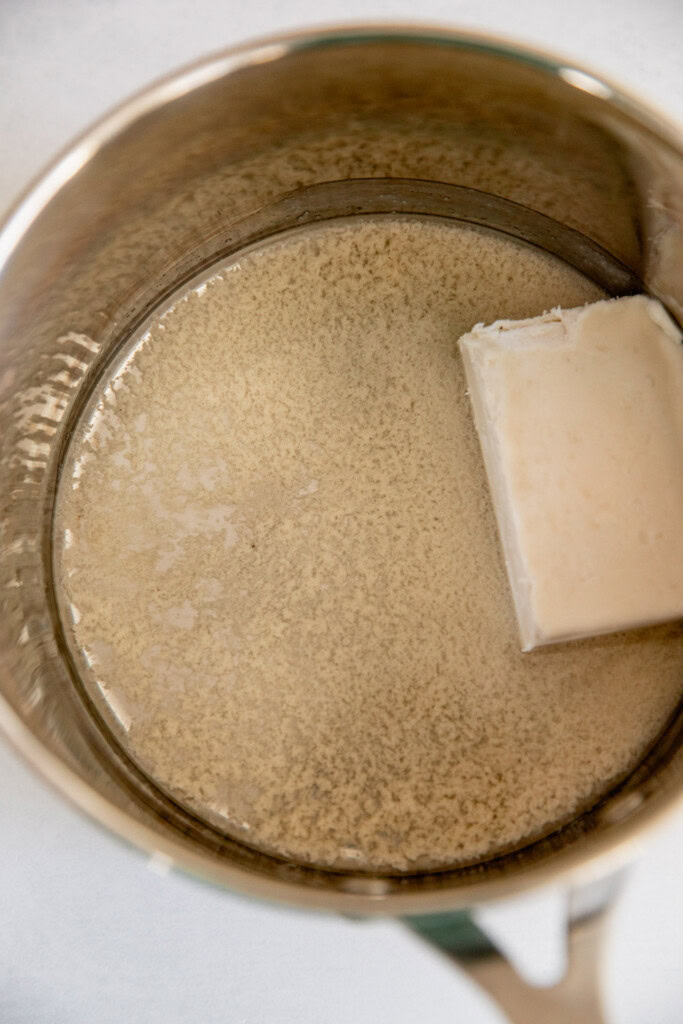
Pour in the sugar and salt and whisk continuously for a minute until combined. Continue stirring constantly as the sugar mixture gradually turns more golden brown in color. Eventually, as you continue to stir the sugar mixture, it will start to look like runny peanut butter (if using a candy thermometer, it should reach 295-305F). This process should take about 10 minutes. Before removing from heat, whisk in the vanilla.

Being careful, immediately pour the toffee onto the baking tray, allowing it to spread into an even layer (try to work quickly as the toffee will begin to stiffen immediately). Let the toffee fully cool and harden for 15-20 minutes in the fridge.

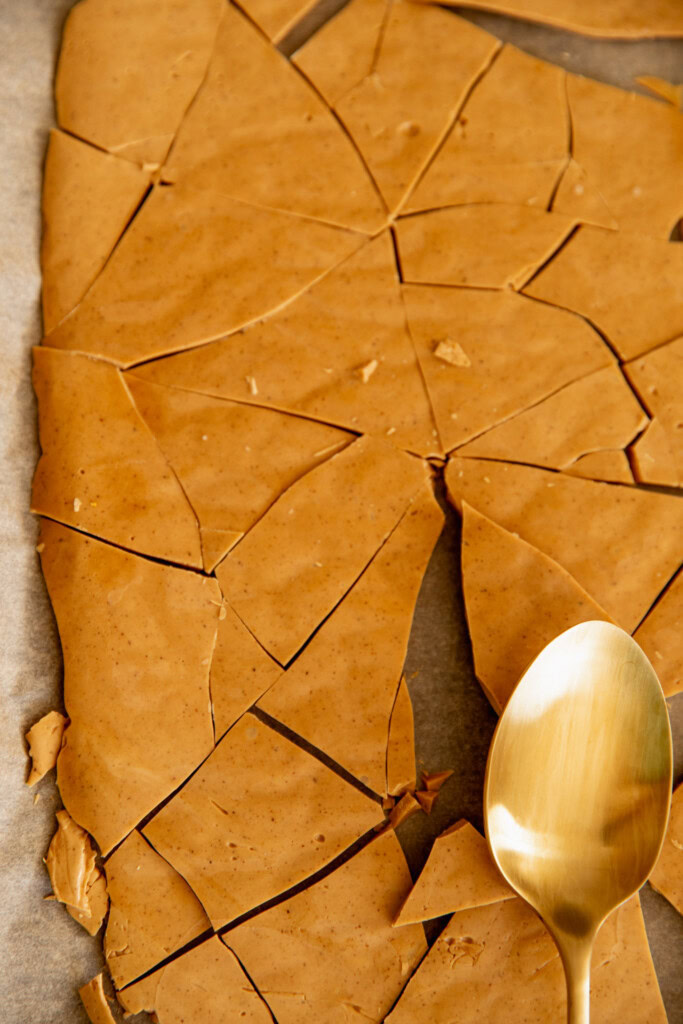
Once it is fully hardened, carefully peel the toffee from the parchment paper and place in a large resealable bag. Use a heavy spoon or rolling pin to carefully tap the toffee and shatter it into smaller bits.
To Make the Brown Butter
To brown the butter, place a small saucepan with tall sides over medium low heat then add your butter and allow it to completely melt. Use a spatula to continuously stir the melted butter until it begins to foam. Lower the heat slightly until the foam decreases, continuously stirring until you begin to see the butter start to turn a shade more golden brown in color.
You will see tiny brown flecks sinking and accumulating to the bottom of the pan. Remove from the stove top then pour into a large mixing bowl to cool.


Making the Brown Butter Toffee Chocolate Chip Cookies
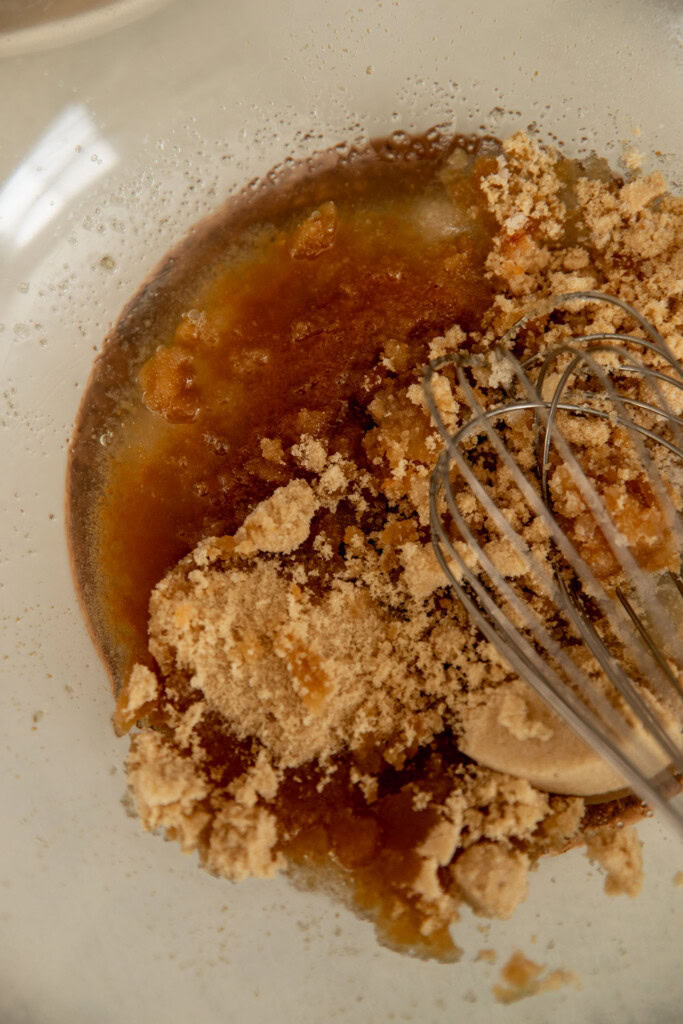
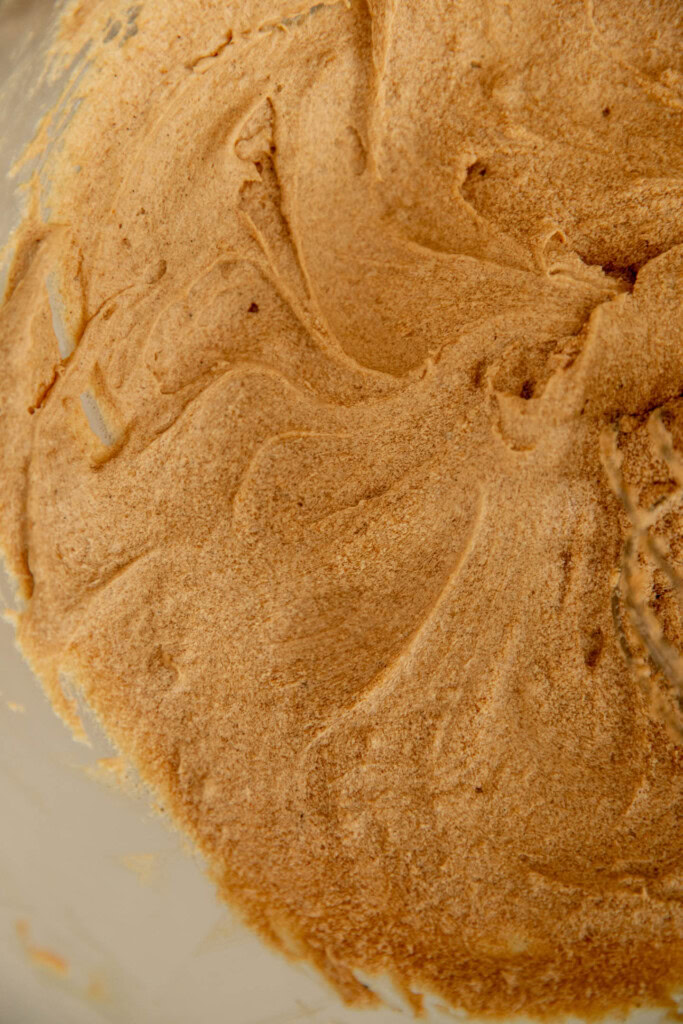
To the bowl with the cooled brown butter, add the light brown sugar, and granulated sugar then use a hand mixer or whisk to mix everything together until combined.
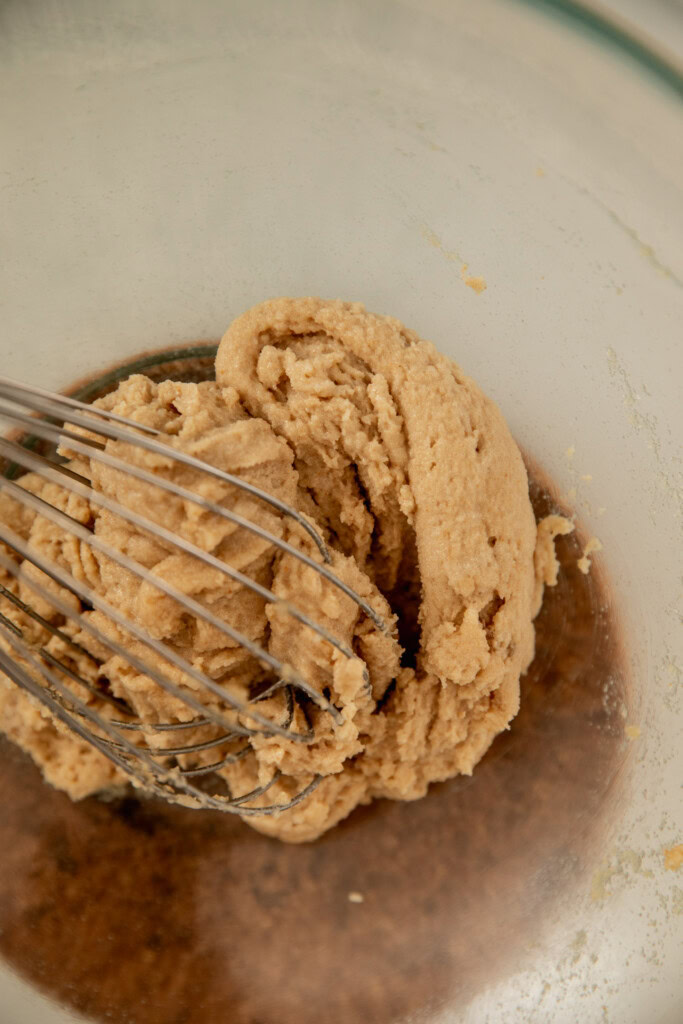
Add the yogurt, vanilla, and espresso powder then use the hand mixer or whisk to whip together until smooth.
To a separate bowl, combine the flour, baking soda and salt and whisk to combine.
Pour the flour mix into the wet ingredients, then use a spatula to scoop the sides of the bowl and fold inward to mix the batter until just about combined.
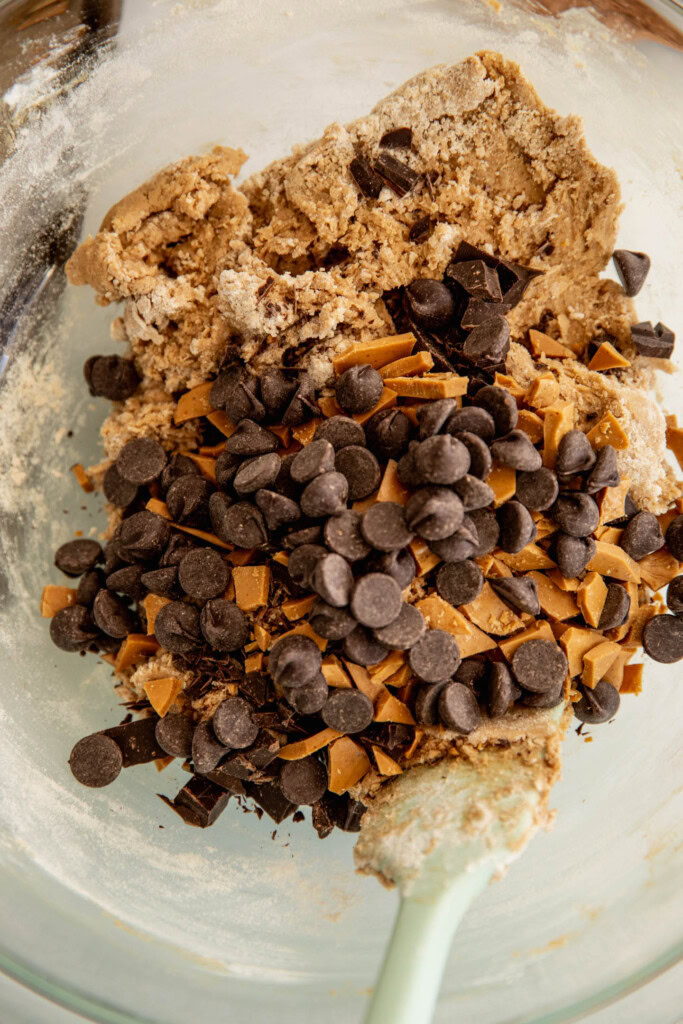
Next, add in the chocolate chips, chopped chocolate, and toffee bits (add more if desired) then fold it into the dough making sure not to over mix. Cover the bowl and place in the fridge for 24 hours to set (if you are in a rush, chill the dough for at least 2 hours so it can firm up before baking).
When ready to bake, remove the bowl from the fridge, preheat the oven to 350F and line two half baking trays with parchment paper.
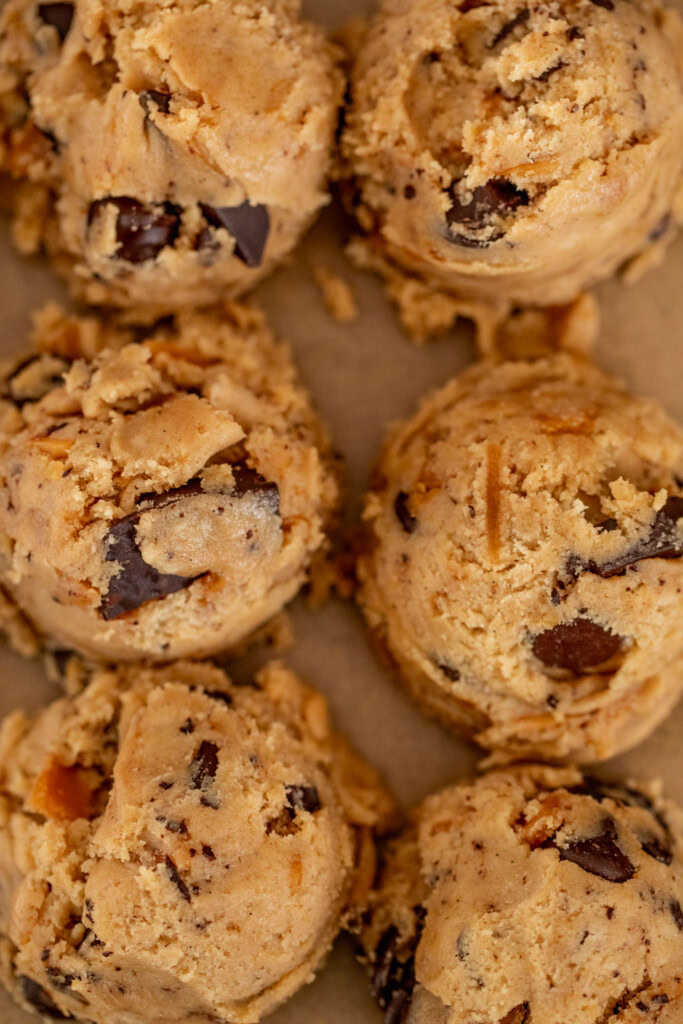
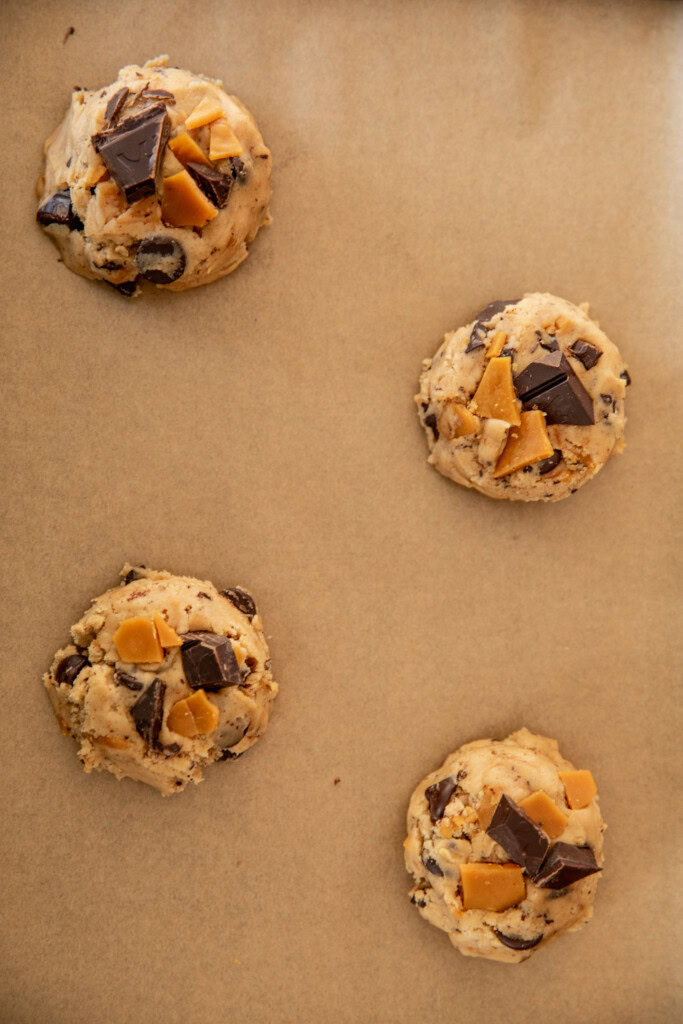
Use a large cookie scoop (about 3 tbsp of the cookie dough) to scoop the dough then roll them into balls and place on the tray making sure there is about 2 inches of space between each dough ball. Press a few more chocolate chunks and toffee bits on top of each cookie as desired.
Place the tray in the oven for 10-12 minutes until the cookie edges appear golden and the centers still appear slightly underdone.
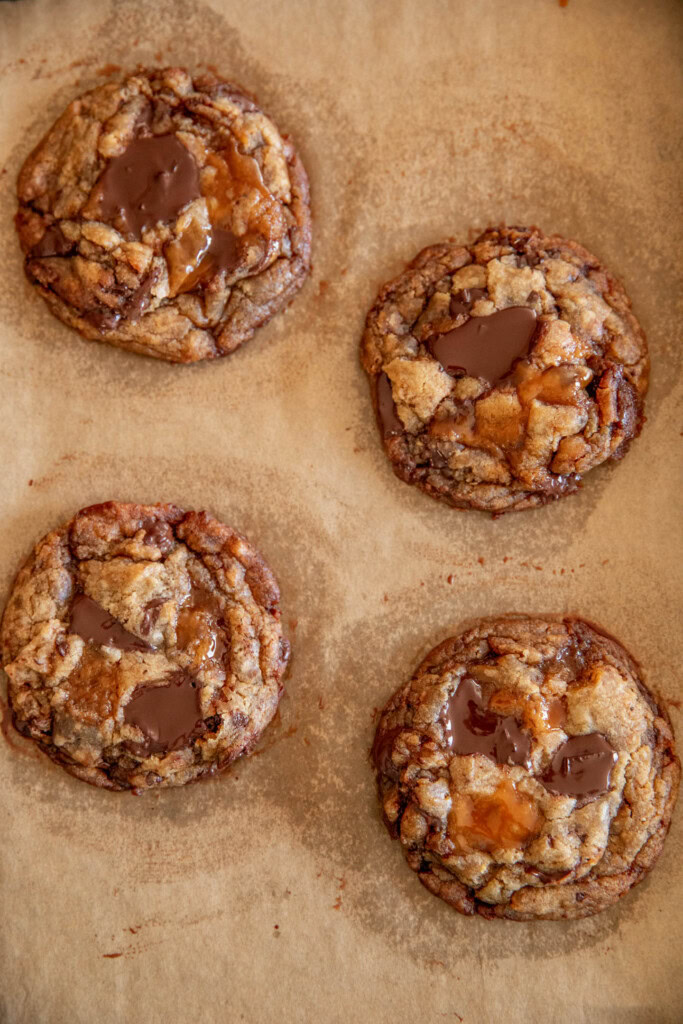

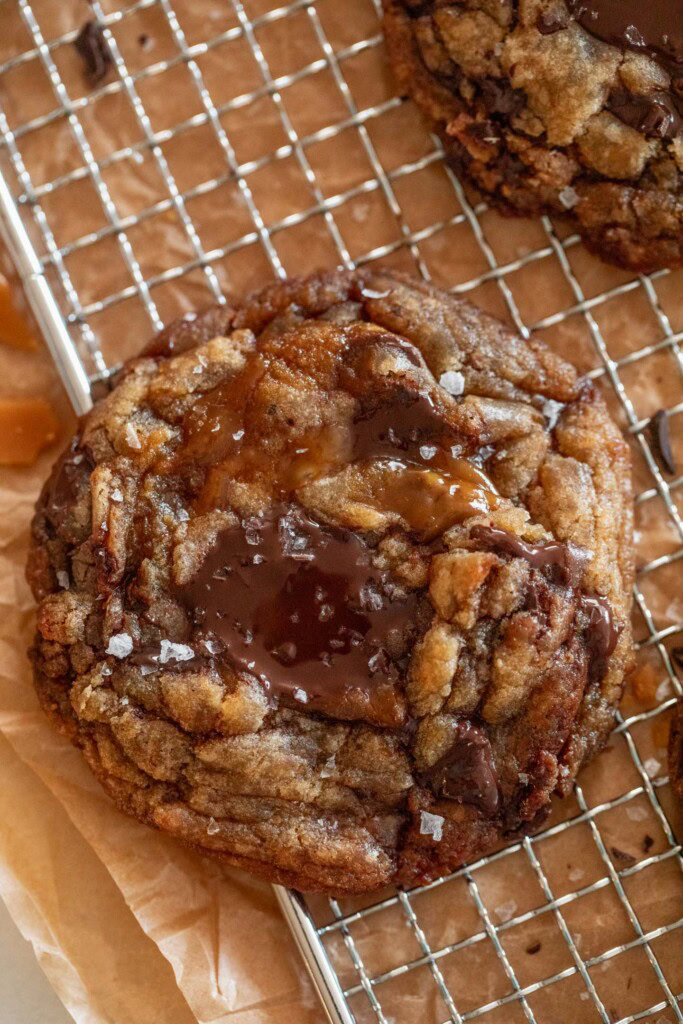
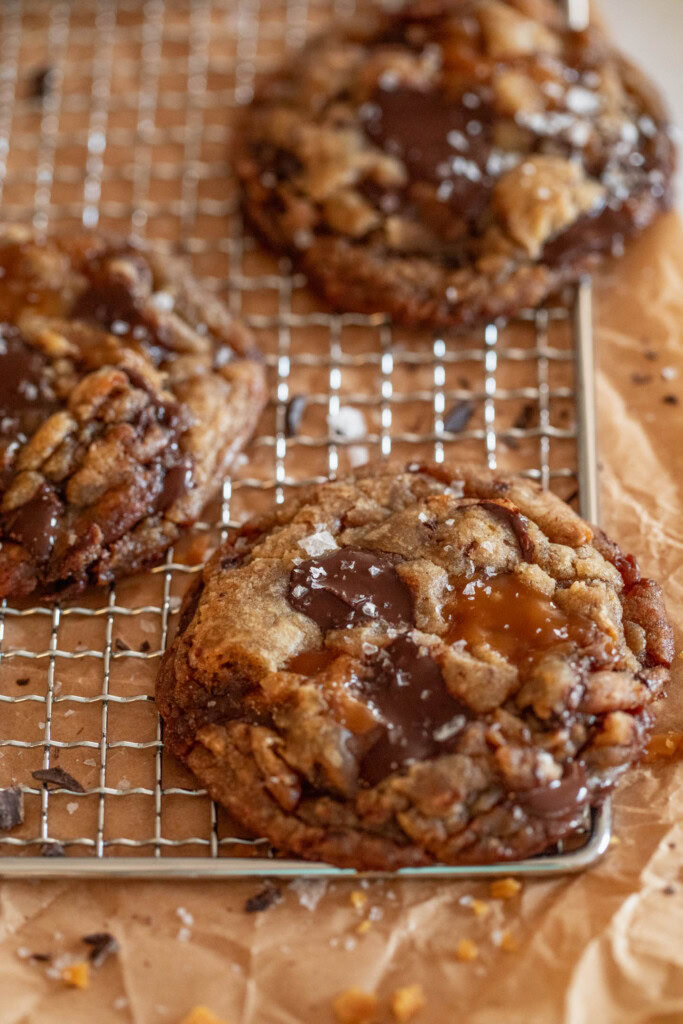
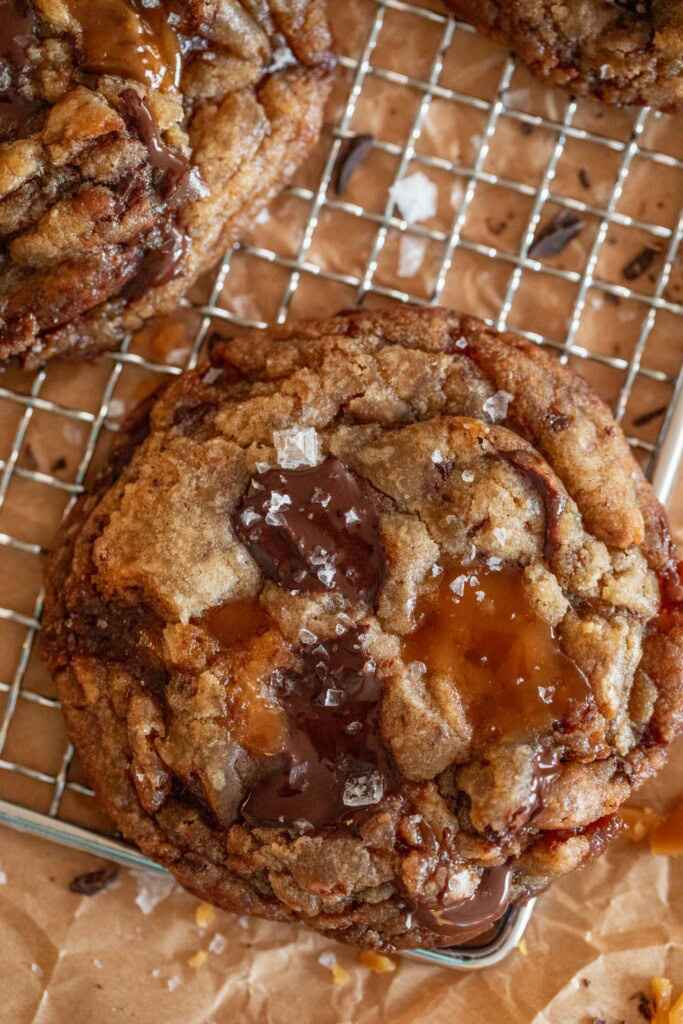
When the cookies are out of the oven, you may notice some cookies aren’t in perfect circles. Fix the edges by placing a cookie cutter overtop of the cookie and moving it in a circular motion to round out the cookie. Allow the cookies to cool on the baking tray for 10 minutes then transfer to a wire cooling rack to completely cool and firm up. Sprinkle with flaky salt then enjoy!
My Recommended Process for Making the Cookie Dough in One Go
- Brown the butter then pour it into your mixing bowl to let it cool.
- Use the same pot to make your toffee as you are waiting for your butter to cool.
- Pour the toffee on to your tray and place in the fridge to fully harden. As you wait, proceed to make the cookie dough.
- After the dough is mostly combined, work on the inclusions. Cut up your chocolate bar and break up the toffee into small bits.
- Fold in the inclusions then let your dough rest before baking.
Expert Tips
Ingredients and Tools
- I tested this recipe with Miyoko’s Salted Cultured Butter and Violife’s Salted Plant Butter. Make sure you use the sticks not the tub butter.
- You need salt. The salt in the toffee is critical and helps to keep the butter and sugar together as it is creaming together. Don’t skip it!
- Use a candy thermometer. While you can eyeball the process of heating your sugar and butter together, sometimes it’s easier to know based off of temperature.
- Ideas to replace the toffee. You can use some Smart Sweet Caramels (they are dairy-free) or swap entirely for some candied pecans.
- Make the toffee ahead of time. If you plan to make these cookies, I would recommend making the toffee a day or two in advance. This will save you a step and help you avoid stress the day you do want to make these cookies. The toffee can be stored at room temperature for up to a month, in the fridge for 3 months and in the freezer for 6 months.
Making the Best Brown Butter Toffee Chocolate Chip Cookies
- Do not walk away from the stovetop. Trust me, I get it. You will think that you have just enough time to grab something from across the room in between watching your butter or toffee browning, but you really don’t. It’s important to keep an eye on things, so that you avoid burning your good quality ingredients. You can also better adjust if things go wrong. For example, you can catch your toffee if it starts separating or if it’s browning too quickly.
- Chill your dough. This step makes a really big difference to the end result of your cookie. Chilling your dough serves 2 purposes in this recipe. It helps firm up your cookie and control it’s spread. Chilling allows the flour to properly hydrate and deepen the flavor of the dough. For best results, I recommend chilling the dough for 24 hours. Realistically, I know it can be hard to wait this long, so in the least try to chill for 2-4 hours before baking.
- If the cookies spread out too much. It’s rare to get cookies to come out of the oven in perfect circles. They will spread and sometimes those cookies may spread in odd shapes. To fix this, immediately after baking, use a circular cookie cutter or mug that is slightly larger than the cookie. Fit it over top and move it in a circular motion around the cookie to help round out the shape.
Frequently Asked Questions
Absolutely! Feel free to swap with more chocolate chips or some candied nuts like chopped candied pecans or these caramel pieces from Smart Sweets.
Yes! After the dough has set, let it come to room temperature then scoop the dough balls onto a parchment lined baking tray. Place the tray in the freezer for an hour then transfer the dough balls into a freezer bag. These can last in the freezer for up to 1 month.
If it starts to seperate while it cooks, remove it from the heat and start to whisk vigorously until the mixture comes back together then place it back over the heat to continue cooking as instructed.
Make It Balanced
Oops! You had “too many cookies.” What do you do? First, you’re human. It’s okay to enjoy sweets from time to time. In an ideal world, many of us would be able to slowly enjoy and stop eating sweets at will. For those of us that are either working towards more mindful eating or struggle with a chronic condition, here are some things you can consider doing to create more balanced eating habits around your sweets.
The Game Plan
- Pair it. Plan your treat with something that can help balance your blood sugars. Cookies are primarily made up of sugar and fat. Consider enjoying your cookie with some fiber or protein as both will help to slow down the digestion of the glucose. This can look like enjoying the cookie along with an apple, berries or maybe something salt like a handful of crispy chickpeas.
- Walk. Plan a short 10-15 minutes. Based on research, a light leisurely walk
- Take your time. I feel like this can be the hardest part sometimes and that is to really chew between bites. Taking your time with something you like means you get to savor the flavor and truly enjoy it. Sometimes living in a fast paced world robs us of that opportunity, which does impact how we view and approach food in general. So if you can, take your time.
More Plant-Based Cookie Recipes to Try
- Chocolate Peanut Butter Stuffed Cookies
- Hotteok Cookies
- Cowboy Cookies
- Chewy Ginger Molasses Cookies
- Healthier Snickerdoodle Cookies
If you tried this recipe or any other recipe on the blog, then let me know what you thought in the comments below! And if you loved it, don’t forget to rate it too. Feel free to follow on Instagram, Pinterest, and TikTok for the latest nutrition tips and recipe videos.
Print
Brown Butter Toffee Chocolate Chip Cookies
- Prep Time: 30 minutes
- Rest TIme: 12 hours
- Cook Time: 12 minutes
- Total Time: 12 hours 42 minutes
- Yield: 11 large cookies 1x
- Category: Sweets
- Method: Baking
- Cuisine: American
- Diet: Vegan
Description
These brown butter toffee chocolate chip cookies are loaded with caramelized toffee bits and nutty buttery flavors. The perfect dairy-free cookie with crispy edges and a chewy gooey center.
Ingredients
Homemade Toffee Bits**
- 1/2 cup (112g) high quality salted vegan butter**
- 1/2 cup (100g) light brown sugar or granulated sugar
- 1/2 tsp kosher salt
- 1 tsp vanilla extract
Brown Butter Toffee Chocolate Chip Cookies
- 1/2 cup (112g) high quality salted vegan butter**
- 1/2 cup (100g) light brown sugar, packed
- 1/4 cup (50g) granulated sugar
- 1/4 cup (60g) plain unsweetened plant-based yogurt
- 2 tsp vanilla bean paste or extract
- 1 tsp instant espresso powder (optional)
- 1 1/4 cup (170g) all-purpose flour
- 1/2 tsp baking soda
- 1/2 tsp kosher salt
- 1/3 cup dairy-free chocolate chips
- 2 oz 70% dark chocolate bar, chopped
- 1/3 cup toffee bits
- Flaky salt for topping (optional)
Instructions
Making the Toffee
- If making the toffee bits, line a small baking tray with parchment and set to the side. Place a small heavy bottomed saucepan with tall sides over medium low heat and add the butter to melt. Pour in the sugar and salt and whisk continuously for a minute until combined. Continue stirring constantly as the sugar mixture gradually turns more golden brown in color. Eventually, as you continue to stir the sugar mixture, it will start to look like runny peanut butter (if using a candy thermometer, it should reach 295-305F). This process should take about 10 minutes. Before removing from heat, whisk in the vanilla.
- Being careful, immediately pour the toffee onto the baking tray, allowing it to spread into an even layer (try to work quickly as the toffee will begin to stiffen immediately). Let the toffee fully cool and harden for 15-20 minutes in the fridge. Once it is fully hardened, carefully peel the toffee from the parchment paper and place in a large resealable bag. Use a heavy spoon or rolling pin to carefully tap the toffee and shatter it into smaller bits.
To Make the Brown Butter
- To brown the butter, place a small saucepan with tall sides over medium low heat then add your butter and allow it to completely melt. Use a spatula to continuously stir the melted butter until it begins to foam. Lower the heat slightly until the foam decreases, continuously stirring until you begin to see the butter start to turn a shade more golden brown in color. You will see tiny brown flecks sinking and accumulating to the bottom of the pan. Remove from the stove top then pour into a large mixing bowl to cool.
Making the Cookies
- To the bowl with the cooled brown butter, add the light brown sugar, and granulated sugar then use a hand mixer or whisk to mix everything together until combined.
- Add the yogurt, vanilla, and espresso powder then use the hand mixer or whisk to whip together until smooth.
- To a separate bowl, combine the flour, baking soda and salt and whisk to combine.
- Pour the flour mix into the wet ingredients, then use a spatula to scoop the sides of the bowl and fold inward to mix the batter until just about combined.
- Next, add in the chocolate chips, chopped chocolate, and toffee bits (add more if desired) then fold it into the dough making sure not to over mix. Cover the bowl and place in the fridge for 24 hours to set (if you are in a rush, chill the dough for at least 2 hours so it can firm up before baking).
- When ready to bake, remove the bowl from the fridge, preheat the oven to 350F and line two half baking trays with parchment paper.
- Use a large cookie scoop (about 3 tbsp of the cookie dough) to scoop the dough then roll them into balls and place on the tray making sure there is about 2 inches of space between each dough ball. Press a few more chocolate chunks and toffee bits on top of each cookie as desired.
- Place the tray in the oven for 10-12 minutes until the cookie edges appear golden and the centers still appear slightly underdone.
- When the cookies are out of the oven, you may notice some cookies aren’t in perfect circles. Fix the edges by placing a cookie cutter overtop of the cookie and moving it in a circular motion to round out the cookie. Allow the cookies to cool on the baking tray for 10 minutes then transfer to a wire cooling rack to completely cool and firm up. Sprinkle with flaky salt and enjoy!
Notes
I tested this recipe with Miyoko’s Salted Cultured Butter and Violife’s Salted Plant Butter. Make sure you use the sticks not the tub butter.
Don’t skip the salt. The salt in the toffee is critical and helps to keep the butter and sugar together as it is creaming together.
Do not walk away from the stovetop. This will almost guarantee that you will burn your toffee and brown butter. Keep your eyes on things so you can keep note of important visual clues.
Use a candy thermometer. While you can eyeball the process of heating your sugar and butter together, sometimes it’s easier to know when your toffee is done based off of temperature.
Ideas to replace the toffee. You can use some Smart Sweet Caramels (they are dairy-free) or swap entirely for some candied pecans.
Chill your dough. This impacts flavor and spread. For best results, I do recommend chilling 24 hours. Realistically, I know it can be hard to wait this long, so if you can spare 2-4 hours of chill time in the fridge at the very least then I can respect that.
About cookie spread. It’s very rare to get cookies to come out of the oven in perfect circles. They will spread and sometimes those cookies may spread in some odd shapes. To fix this, immediately after removing the cookies from the oven, use a circular cookie cutter or mug that is slightly larger than the cookie, fit it over top the cookie and move it in a circular motion around the cookie to help round out the shape.
Make the toffee ahead of time. If you plan to make these cookies, I would recommend making the toffee a day or two in advance. This will save you a step and help you avoid stress the day you do want to make these cookies. The toffee can be stored at room temperature for up to a month, in the fridge for 3 months and in the freezer for 6 months. This also makes a lot of toffee so feel free to store the rest for the next time you want cookies.
This post contains affiliate links which means I will make a small commission if you purchase from those links. I only recommend and share products that I know, trust and personally use myself!


A real indulgence for sure. As delicious as you’d imagine. A lot of work and I struggled with both the toffee and browning the butter, even though I used the recommended butter and followed directions to the letter. A word to the wise….medium heat as instructed for the toffee was way too hot on my stove. Unfortunately it burned and I had to start over. Low heat did the trick.
Thank you so much for making these Shelly! So sorry you had an issue with the heat. Always hard to determine how other stoves may behave, so I really appreciate the feedback. I just made a note and will elaborate more on this to hopefully help anyone else that attempts to not have their toffee burn. Thank you again!