

Herb Roasted Chickpea Vegetable Wellington
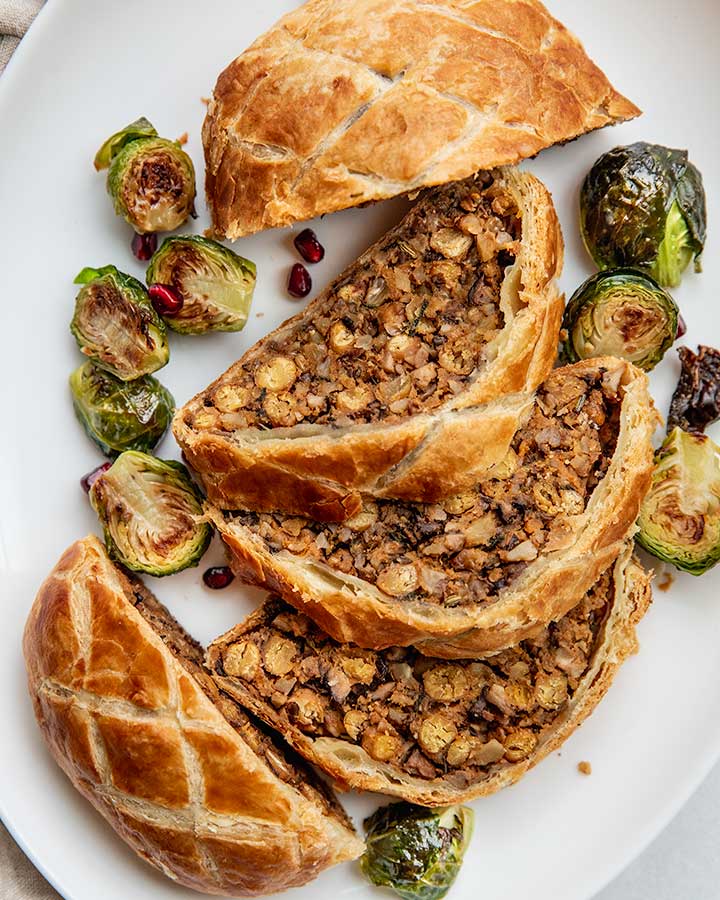
This Herb Roasted Chickpea Vegetable Wellington includes an umami packed filling wrapped in a buttery, flakey pastry dough. Satisfying and great to prep ahead of time for any holiday meals.

The holidays are overwhelming to say the least. I think that’s why I’ve become such a big fan of this veggie forward wellington. Honestly, it’s an impressive piece to put on the table minus all the hours of labor often associated with a lot of holiday fair. On top of that, this is full of flavor and a meld of all the perfect textures. It’s got a perfect flakey crust, the perfect tender bite, and a ton of umami flavor.
Why You’ll Love This Herb Roasted Chickpea Vegetable Wellington
- An impressive centerpiece. When I’m cooking for an event, I want that meal to be impressive. That’s the feeling I get when I pull this roast out of the oven. Never disappoints and really satisfies the texture and flavors I’m looking for in a centerpiece.
- Easy to prep ahead of time. Make the filling in advance that way you can cook this main in just 40 minutes. Just thaw your puff pastry, shape the filling, wrap in the pastry then pop in the oven.
- Wholesome and nourishing. This wellington includes some protein from the chickpeas as well as some wholesome veggies that provide fiber and a host of different nutrients. This makes it a more filling and satisfying main.

Key Ingredients and Substitutions
- Puff Pastry: To keep this meal dairy-free, make sure to use a vegan puff pastry dough. I like using the accidentally vegan one from Pepperidge Farms.
- Sweet Potato: If you don’t like sweet potato, you can try this with butternut squash instead.
- Chickpeas: To make this recipe easy, I used a can of chickpeas. If preferred, use your own cooked chickpeas (about 1 1/2 cups). You can also use cooked lentils if you prefer (do note, I would recommend just giving them a quick roast in the oven for 10-15 minutes to reduce any excess moisture).
- Mushrooms: I used a variety of my favorite mushrooms including baby bella mushrooms, oyster mushrooms and shiitake mushrooms. Feel free to use what you like best, but I find the texture and taste benefits from having a variety of mushrooms.
- Walnuts: I love the buttery texture they offer. Alternatively, you can also try this with pecans. For allergies, swap the walnuts for some finely chopped sunflower seeds instead.
- Breadcrumbs: I used panko breadcrumbs, but any breadcrumbs you love can work here.
- Herbs: I used a mixture of fresh thyme, sage, and rosemary. Feel free to use more or less based on your own preferences.
- Mustard: For a little tang and depth of flavor, I recommend using a little dijon mustard.
- Tamari: To make this completely soy-free, feel free to use coconut aminos.
- Maple Syrup: Helps to properly balance the savory elements of this dish.
- Aromatics: I used both onion and garlic. Feel free to adjust the amount of either based on your preference.
How to Make an Herb Roasted Chickpea Vegetable Wellington
Prep the Filling
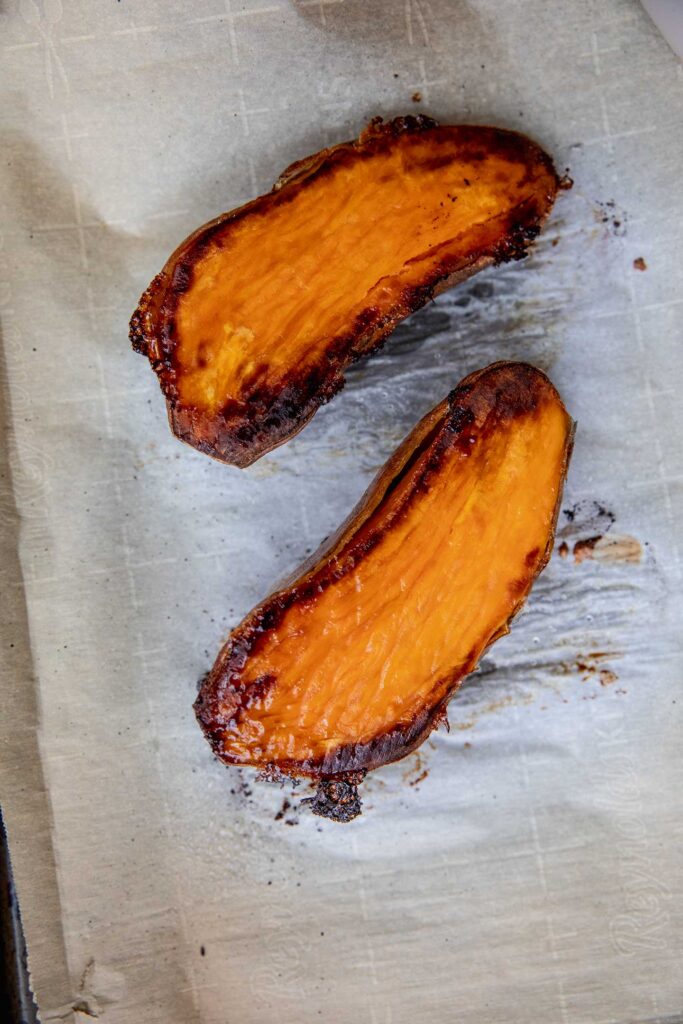
Preheat the oven to 425F then line 2 baking trays with parchment paper. Add the halved sweet potato to one tray and add a light drizzle of oil. Evenly coat each half then place the sweet potato cut side down on the tray. Place in the oven to bake for 30-35 minutes until soft and the bottoms are caramelized.
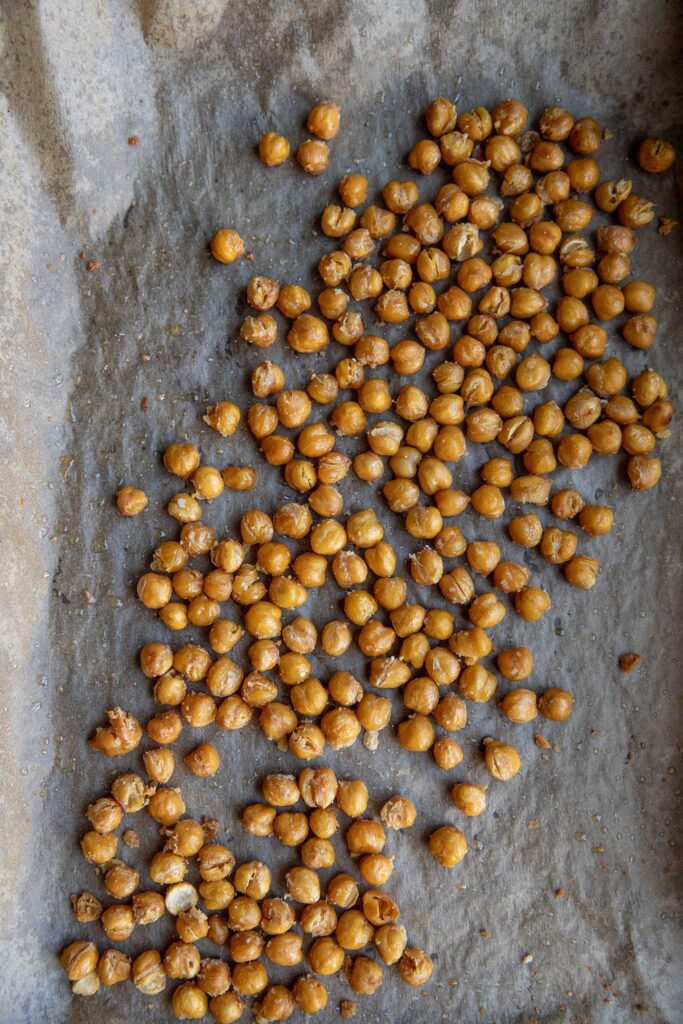
At the same time, place the rinsed chickpeas in a clean kitchen towel and pat dry, then transfer to the other baking tray. Drizzle with about 1 tablespoon of oil and a pinch of salt, toss to coat then spread out in a single layer on the tray. Bake in the oven for 30 minutes, giving the chickpeas a toss halfway through.
While that bakes, heat a skillet over medium low heat. Add the mushrooms and spread them out to coat the bottom of the pan. Allow the mushrooms to cook down undisturbed for 4-5 minutes then give the mushrooms a stir. Spread them back out on the pan then cook again for 2 minutes to cook off any remaining liquid. Add a 1/2 tablespoon of oil and a pinch of salt and sauté for 1-2 minutes. Stir in the tamari to coat then transfer the mushrooms to a bowl and set aside.


To the same pan add another drizzle of oil then add the onions and a pinch of salt and sauté until translucent. Add the garlic, sage, thyme, rosemary and fennel seeds then continue to sauté until fragrant.
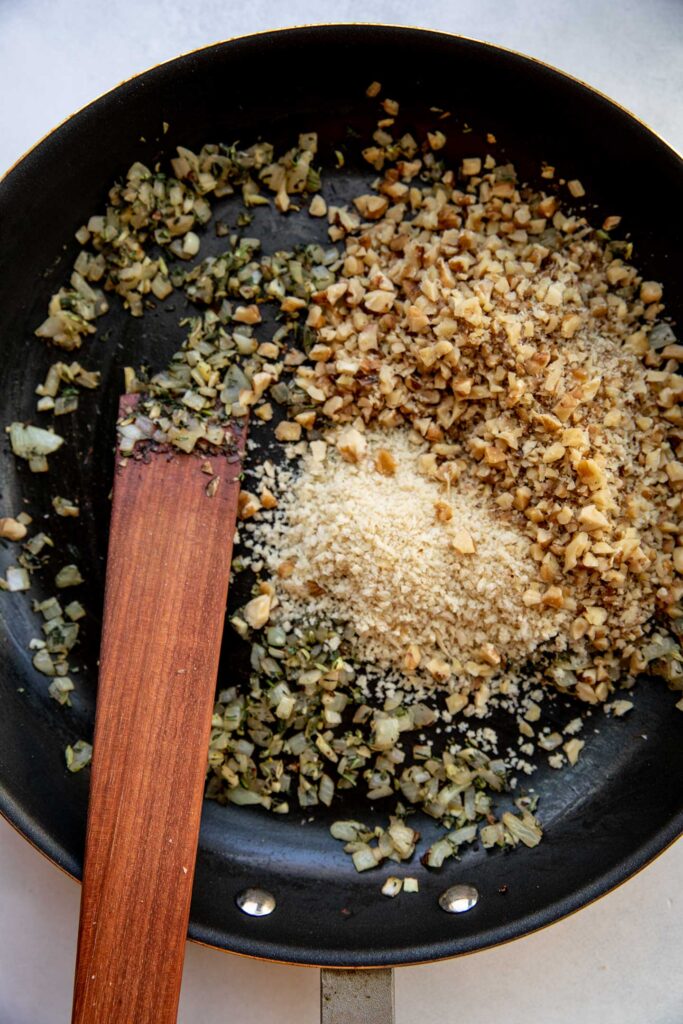

Add the walnuts and breadcrumbs then continue to sauté and toast for about 4 minutes then remove from heat.
Set the puff pastry out to thaw according to package instructions and lower the oven temperature to 400F.
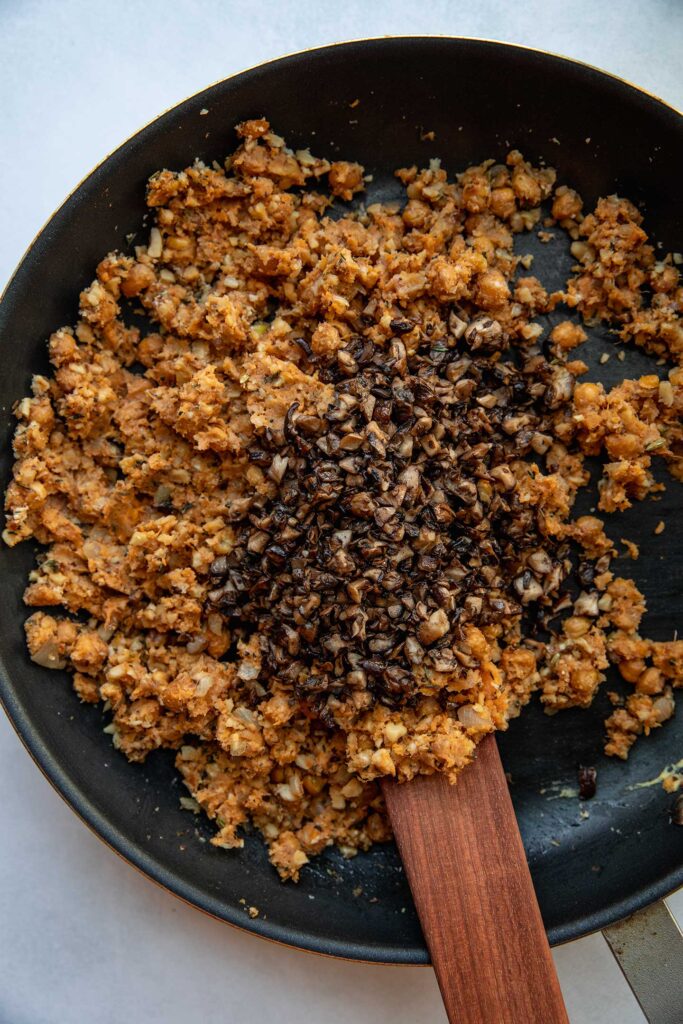

When safe to handle, scoop the sweet potato out of the skin and place in the pan along with the roasted chickpeas, 1/2 tablespoon maple syrup and mustard. Use a potato masher to mash everything together together. Fold in the mushrooms making sure the final mixture holds together.
Wrap in Puff Pastry
Lightly flour a sheet of parchment paper on top of a clean working surface and remove the puff pastry sheet from its packaging. Roll out the dough on the parchment paper into a roughly 12-in x 15-in rectangle, then carefully lift the parchment paper with puff pastry onto a baking sheet.

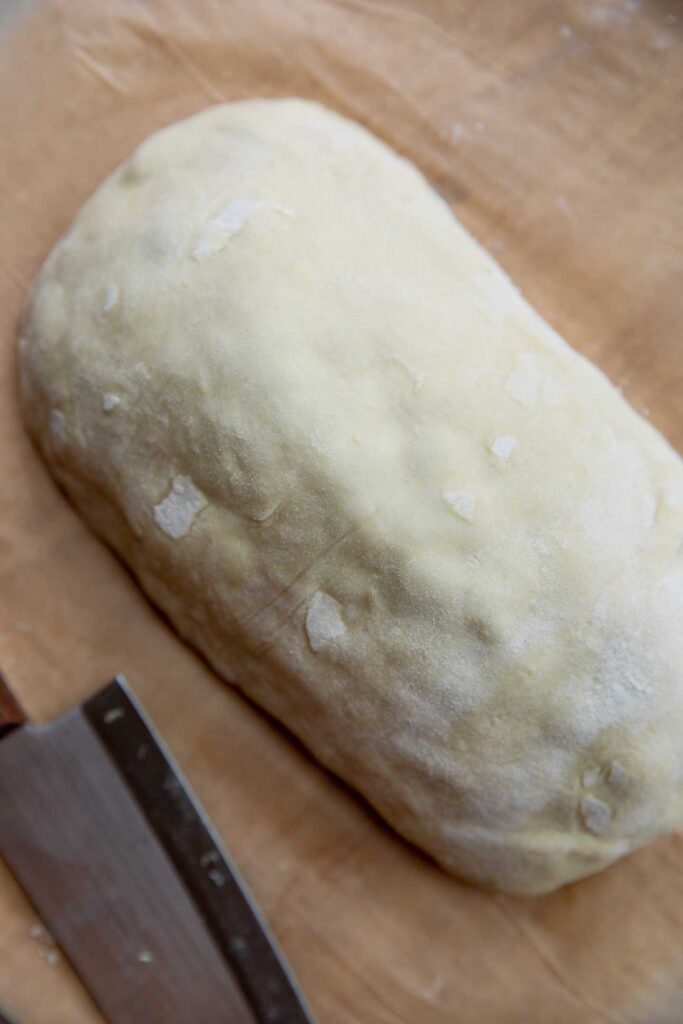
Transfer the filling to the center widthwise of the puff pastry and shape the filling into a log shape while leaving an inch of puff pastry exposed at each end.
Brush the exposed sides of puff pastry surrounding the filling with some of the milk then fold the sides up and over the log to wrap it, tucking the ends under the log. Take the remaining ends and fold them underneath the log as well. NOTE: If there is a lot of excess pastry as you are folding it over the log, trim some of it off using a knife and pinch the sides together to seal well.
Design and Bake
Add the remaining 1/2 tbsp of maple syrup to the milk and whisk together. Brush a thin layer of the milk mixture all over the pastry.
Using a sharp knife, lightly score diagonal lines from right to left over the surface of the puff pastry, making sure not to cut all the way through the pastry as best as you can. Repeat the process making diagonal lines in the opposite direction to create a crosshatch design.

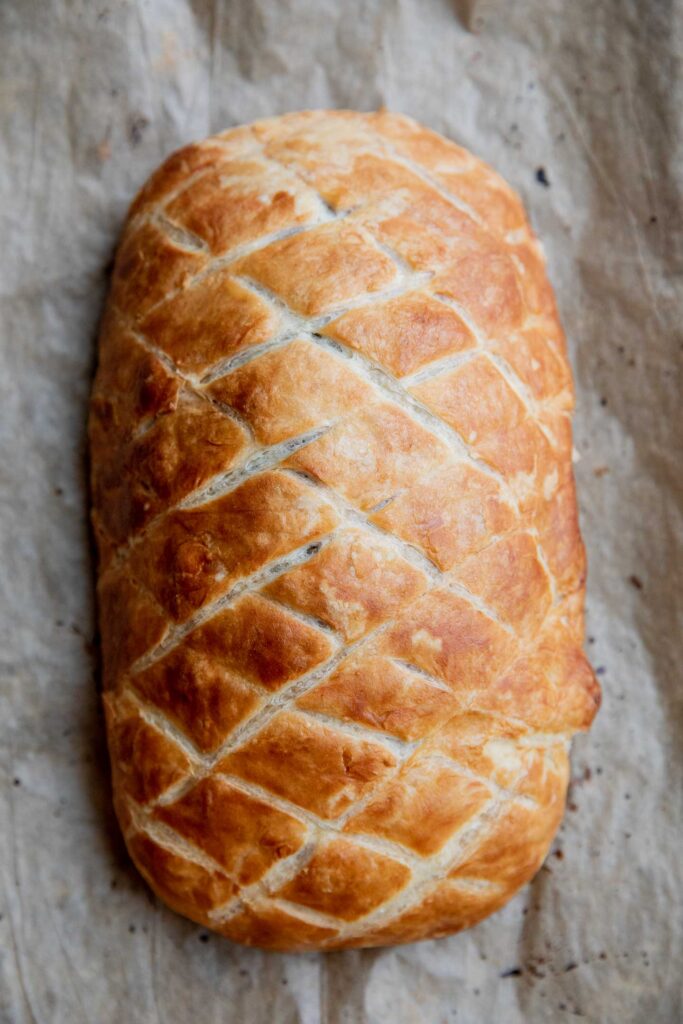
Place the wellington into the freezer for 10-15 minutes to set. When ready, bake the wellington for 35-40 minutes until the crust is golden and crispy.
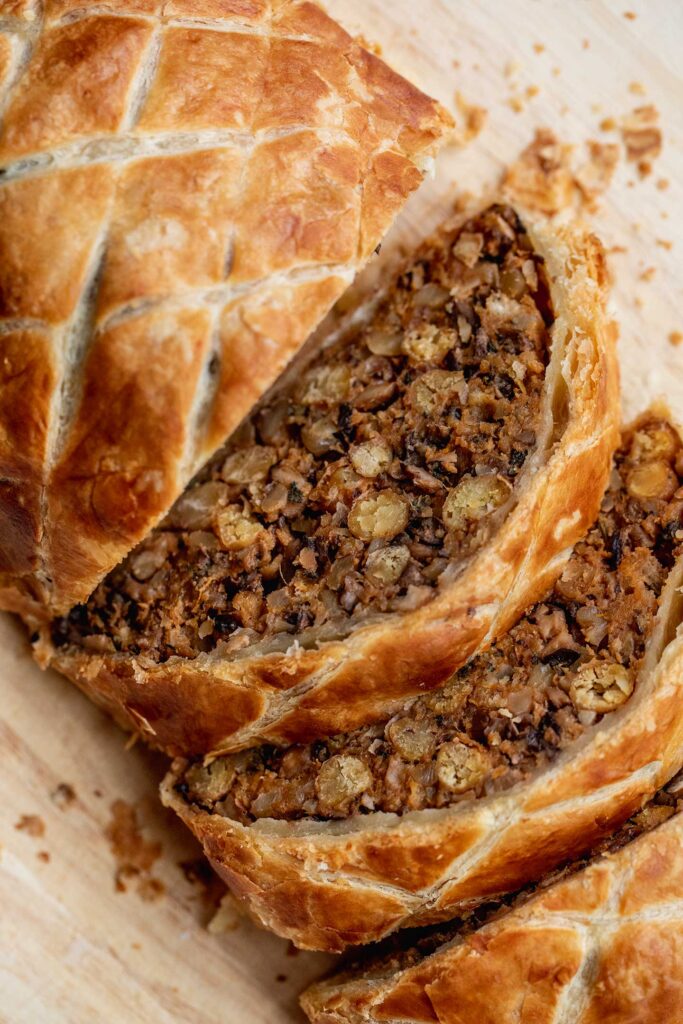
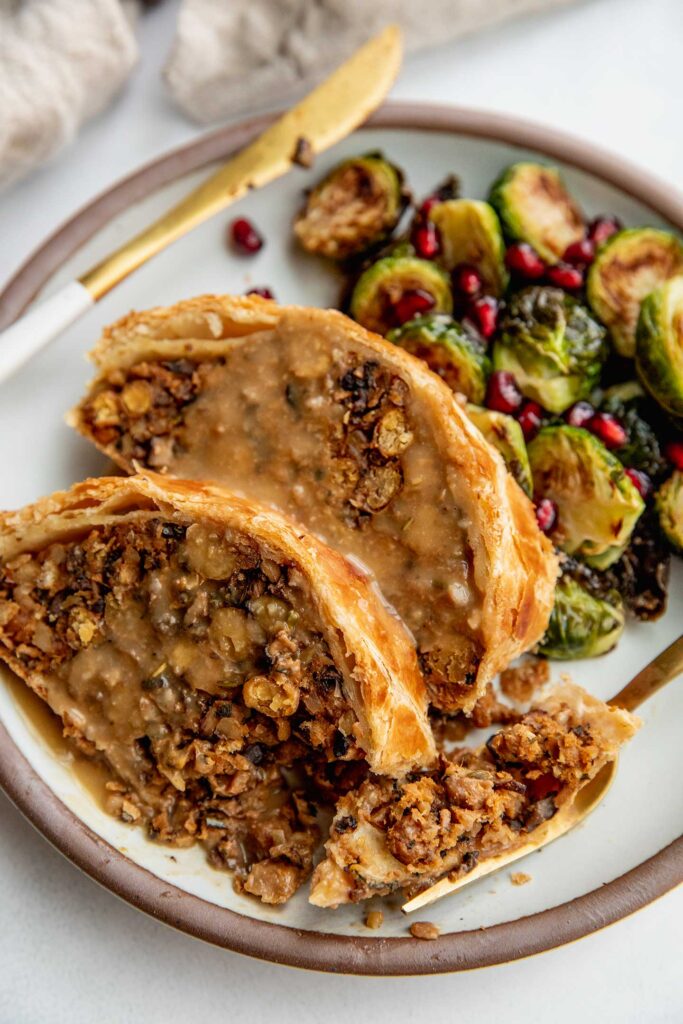
Remove from the oven and allow to cool slightly for 15 minute, then cut and serve using a serrated knife.

Expert Tips
- To avoid mushy middle, cook out the moisture. We do this by roasting the chickpeas and cooking off the moisture of the mushrooms before adding both to the filling. This results in a tender and flavorful center instead of a mushy one.
- Cook your mushrooms without oil first. This will cook off excess moisture from the mushrooms. Make sure to spread your mushrooms out in the pan and allow to cook undisturbed for a few minutes for best results. Once most of the moisture is gone, then add the oil and a pinch of salt. This will yield a meatier texture.
- Keep your pastry dough cold. The fat in the dough helps create the flaky layers when baked. If your dough is too warm, those fat pockets in the dough will melt, which will leave you with a non-flaky baked crust. To avoid this, shape your puff pastry, then place in the freezer for 20 minutes to keep the dough cold then bake.
Frequently Asked Questions
No. It is important to still read the ingredients before using. You can find a list of vegan puff pastry brands to choose from.
You can make this gluten-free with a few options. First replace the breadcrumbs with your favorite gluten-free bread crumbs. I like the Kikkoman Gluten-Free Breadcrumbs if you need an option. For the puff pastry, try this with the Sweet Loren’s Puff Pastry. Lastly, ensure you are using a gluten-free soy sauce or tamari.
I recommend cooking this recipe fresh if you can. However, you can save time by making the filling in advance. Allow the filling to cool then store in an airtight container in the fridge overnight (I would only refrigerate 1-2 days in advance). When ready to prepare, use wet hands to shape the filling and cover with puff pastry to bake.
How to Complete Your Meal
When serving this centerpiece you may want to include some additional sides to make it even more filling and satisfying.
If wanting to add something light or refreshing to this, often I will go for some vegetable loaded dishes like this Garlic Sage Toasted Quinoa Salad or this Jammy Fig Balsamic Shredded Brussels Sprout Salad.
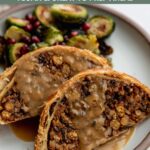
This recipe is fantastic with some gravy, so you may want to give this Miso Mushroom Gravy a try or enjoy with something that is more tangy and sweet like this Baked Cranberry Sauce.
More Plant-Based Holiday Recipes to Try
- Brown Sugar Glazed Tofu
- Lemon Glazed Roasted Carrots and Rice Salad
- Whole Roasted Cauliflower with Creamy Scallion Date Dressing
- Crispy Herb Tofu
- Herby Lentil Mushroom Stuffed Honeynut Squash
If you tried this recipe or any other recipe on the blog, then let me know what you thought in the comments below! And if you loved it, don’t forget to rate it too. Feel free to follow on Instagram, Pinterest, and TikTok for the latest nutrition tips and recipe videos.
Print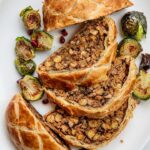
Herb Roasted Chickpea Vegetable Wellington
- Prep Time: 40 minutes
- Cook Time: 75 minutes
- Total Time: 1 hour 55 minutes
- Yield: 4–6 servings 1x
- Category: Main Dish
- Method: Roasting
- Cuisine: American
- Diet: Vegan
Description
This Herb Roasted Chickpea Vegetable Wellington includes an umami packed filling wrapped in a buttery, flakey pastry dough. Satisfying and great to prep ahead of time for any holiday meals.
Ingredients
- Avocado oil for roasting
- 1, 15 oz can chickpeas, drained and rinsed
- 1, (~300 g) medium sweet potato, cut in half lengthwise
- 12 oz mushrooms, finely diced
- 1 tbsp tamari
- 1/2 yellow onion, diced
- 4 garlic cloves, minced
- 8 leaves sage, removed from stem and minced
- 8 sprigs thyme, removed from stem and minced
- 1 sprig rosemary, removed from stem and minced
- 1/4 tsp fennel seeds
- 1/3 cup walnuts, finely chopped
- 1/3 cup panko breadcrumbs
- 1 tbsp maple syrup
- 1 tsp dijon mustard
- 1 sheet puff pastry
- 1/4 cup unsweetened plant-based milk
- Kosher salt as needed
- Mushroom Miso Gravy for serving
Instructions
Prepare the Filling
- Preheat the oven to 425F then line 2 baking trays with parchment paper. Add the halved sweet potato to one tray and add a light drizzle of oil. Evenly coat each half then place the sweet potato cut side down on the tray. Place in the oven to bake for 30-35 minutes until soft and the bottoms are caramelized.
- At the same time, place the rinsed chickpeas in a clean kitchen towel and pat dry, then transfer to the other baking tray. Drizzle with about 1 tablespoon of oil and a pinch of salt, toss to coat then spread out in a single layer on the tray. Bake in the oven for 30 minutes, giving the chickpeas a toss halfway through.
- While that bakes, heat a skillet over medium low heat. Add the mushrooms and spread them out to coat the bottom of the pan. Allow the mushrooms to cook down undisturbed for 4-5 minutes then give the mushrooms a stir. Spread them back out on the pan then cook again for 2 minutes to cook off any remaining liquid. Add a 1/2 tablespoon of oil and a pinch of salt and sauté for 1-2 minutes. Stir in the tamari to coat then transfer the mushrooms to a bowl and set aside.
- To the same pan add another drizzle of oil then add the onions and a pinch of salt and sauté until translucent. Add the garlic, sage, thyme, rosemary and fennel seeds then continue to sauté until fragrant.
- Add the walnuts and breadcrumbs then continue to sauté and toast for about 4 minutes then remove from heat.
Wrap In Puff Pastry
- Set the puff pastry out to thaw according to package instructions and lower the oven temperature to 400F.
- When safe to handle, scoop the sweet potato out of the skin and place in the pan along with the roasted chickpeas, 1/2 tablespoon maple syrup and mustard. Use a potato masher to mash everything together together. Fold in the mushrooms making sure the final mixture holds together.
- Lightly flour a sheet of parchment paper on top of a clean working surface and remove the puff pastry sheet from its packaging. Roll out the dough on the parchment paper into a roughly 12-in x 15-in rectangle, then carefully lift the parchment paper with puff pastry onto a baking sheet.
- Transfer the filling to the center widthwise of the puff pastry and shape the filling into a log shape while leaving an inch of puff pastry exposed at each end.
- Brush the exposed sides of puff pastry surrounding the filling with some of the milk then fold the sides up and over the log to wrap it, tucking the ends under the log. Take the remaining ends and fold them underneath the log as well. NOTE: If there is a lot of excess pastry as you are folding it over the log, trim some of it off using a knife and pinch the sides together to seal well.
Design and Bake
- Add the remaining 1/2 tbsp of maple syrup to the milk and whisk together. Brush a thin layer of the milk mixture all over the pastry.
- Using a sharp knife, lightly score diagonal lines from right to left over the surface of the puff pastry, making sure not to cut all the way through the pastry as best as you can. Repeat the process making diagonal lines in the opposite direction to create a crosshatch design.
- Place the wellington into the freezer for 10-15 minutes to set. When ready, bake the wellington for 35-40 minutes until the crust is golden and crispy.
- Remove from the oven and allow to cool slightly for 15 minute, then cut and serve using a serrated knife.
Notes
To avoid mushy middle, cook out the moisture. We do this by roasting the chickpeas and cooking off the moisture of the mushrooms before adding both to the filling. This results in a tender and flavorful center instead of a mushy one.
Cook your mushrooms without oil first. This will cook off excess moisture from the mushrooms. Make sure to spread your mushrooms out in the pan and allow to cook undisturbed for a few minutes for best results. Once most of the moisture is gone, then add the oil and a pinch of salt. This will yield a meatier texture.
Keep your pastry dough cold. The fat in the dough helps create the flaky layers when baked. If your dough is too warm, those fat pockets in the dough will melt, which will leave you with a non-flaky baked crust. To avoid this, shape your puff pastry, then place in the freezer for 20 minutes to keep the dough cold then bake.
Use more oil if needed. As you cook, feel free to use more or less oil based on your preference. The oil in this recipe helps to keep the filling from getting overly dry.
Trim excess puff pastry as needed. For reference, I ended up cutting at least 1 -2 servings of the puff pastry away in excess to mold the pastry over the filling as tightly as I could.
Cook time takes into account that you are preparing some items at the same time. For example, you are doing the stovetop cooking while the sweet potato and chickpeas cook in the oven.
This post contains affiliate links which means I will make a small commission if you purchase from those links. I only recommend and share products that I know, trust and personally use myself!


could this be made a day ahead ? or do you think it would get soggy?
if yes i would you cook it or assemble and cook day of ?
Hi Alex! You can make the filling a day in advance. Then day of all you have to do day of is thaw the puff pastry and wrap the filling to bake. I recommend that as the best way to avoid the puff pastry from getting soggy and to insure that you get a nice crispy crust when baked.