No Bake Chocolate Strawberry Tart
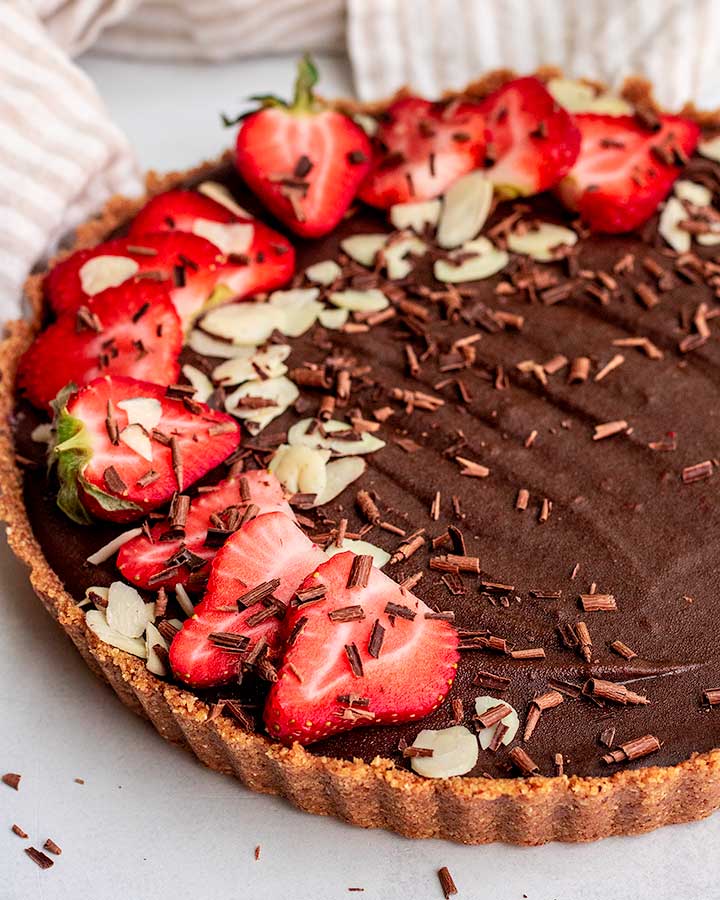
This no-bake chocolate strawberry tart is filled with a velvety strawberry truffle filling. Comes together with just 9 wholesome ingredients and is naturally gluten-free!
This post is sponsored by One Degree Organics, but all opinions are my own.
A few months ago I visited the most incredible chocolate store front. It had the best cozy hot chocolate beverages and incredibly decadent chocolate truffles in various flavors. And one of the things they did best was infusing the sweet and tart flavors of different fruits in their chocolate. I AM STILL OBSESSED.
This chocolate strawberry tart is inspired by this shop and infused with the wonderful tart and sweet flavors that strawberries have to offer now that they are in season. The best part? No baking required! Bonus, entirely gluten-free!
Why You’ll Love This Chocolate Strawberry Tart
- Gluten-free. To keep the whole tart gluten-free, I used One Degree Organic Foods’ Gluten-Free Brown Rice Crisps. This simple swap makes for a great crust that tastes delicious and is naturally gluten-free.
- Less than 10 ingredients. This recipe is incredibly simple and uses high quality ingredients to help create a decadent treat.
- No baking necessary! The crust sets in the freezer, and once chilled you just need to pour in your chocolate filling. No need to turn the oven on at all for this recipe.
Key Ingredients and Substitutions
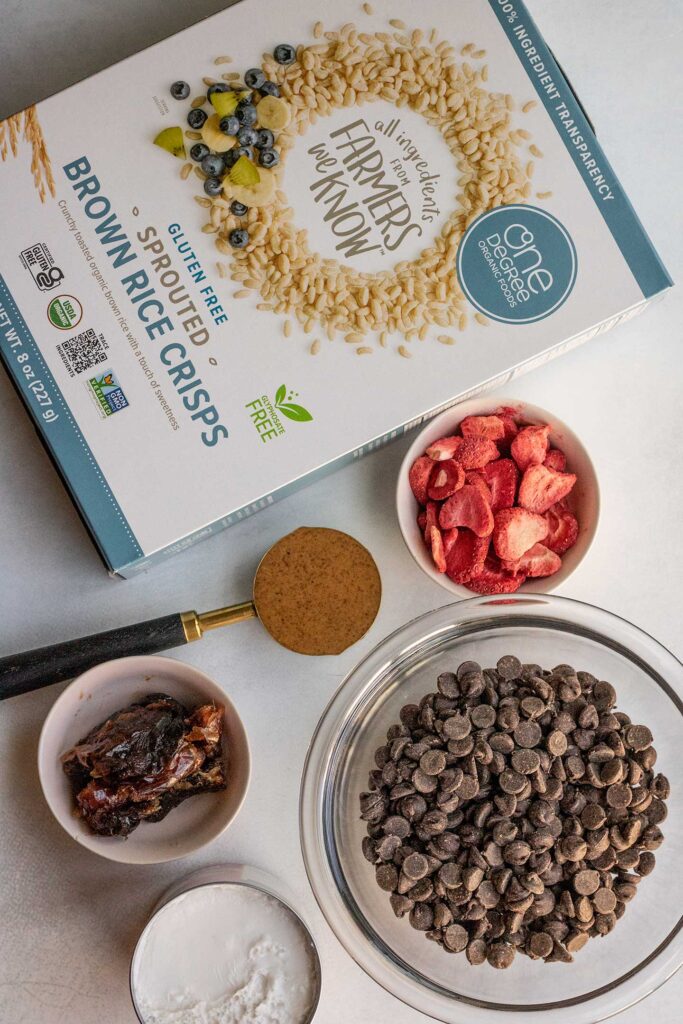
- Rice Crisps: I used One Degree Organic Foods’ Gluten Free Sprouted Brown Rice Crisps to make the crust completely gluten-free.
- Almond Butter: This will help provide more body to the filling and crust. To make this nut-free, swap the nut butter for a seed butter like tahini or sunflower seed butter instead.
- Chocolate: I used dairy-free semi-sweet chocolate chips for this recipe, but this works well with dark chocolate chips or bars as well. Do note that you may wish to adjust the sweetness of your filling based on the type of chocolate you do end up using.
- Coconut Cream: This is the top thick layer you see when opening a can of chilled coconut milk. You can also buy canned coconut cream to skip the step of chilling your coconut milk before starting.
- Strawberries: I like to add some freeze dried strawberries to the filling for a boost of complimenting flavors. You can also use fresh strawberries to garnish the top of tart before serving.
- Maple Syrup: Use any liquid sweetener of your choice and adjust the amount you use based on your own preference.
- Dates: Acts as a binder for our crust. If unable to use dates, try the crust out by adding maple syrup and a little more nut butter when blending until the crust starts to come together.
Choosing Quality Ingredients
Whenever you make a recipe that requires very few ingredients, it’s important to consider the quality of your ingredients. In this case higher quality ingredients like good quality chocolate or cereal can help you get the best texture and flavor from your dessert.
When choosing cereal, I do like opting for One Degree Organic Foods because sourcing quality ingredients is at their core. I also appreciate that their Sprouted Brown Rice Crisps (a fav) are vegan, gluten-free, organic and glyphosate-free. Their transparency is always impeccable.
How to Make a Chocolate Strawberry Tart
Add the rice crisps, medjool dates, almond butter and salt to a food processor. Pulse the mixture together until it is evenly crumbly and holds together when pressed together.
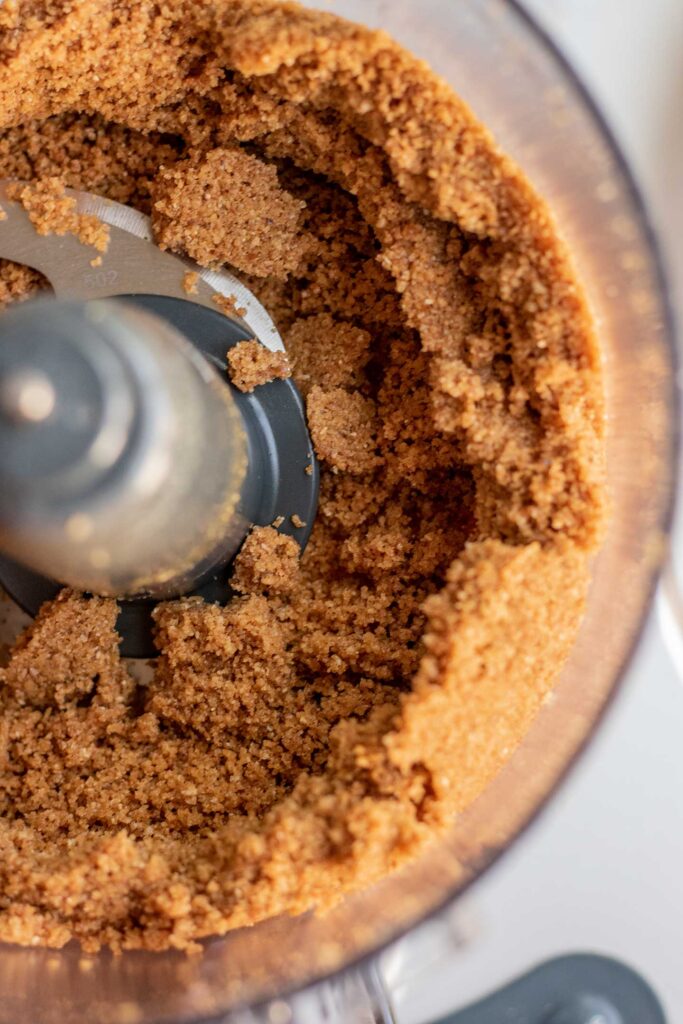

Place a 9-inch round tart pan on a large flat plate. Transfer the crumble to the tart pan and evenly press the crumble into the shape of the pan. Make sure the crumble covers the entire bottom and sides of the pan. To get it nice and smooth, use the bottom of a flat measuring cup to help press and smooth out the crust. Pop the tart into the freezer to firm up while making the filling.
Fill a large sauce pan 1/4 of the way with water and bring to a boil. Remove the pan from heat and place a heat safe bowl on top, making sure the bottom of the bowl is not touching the water.

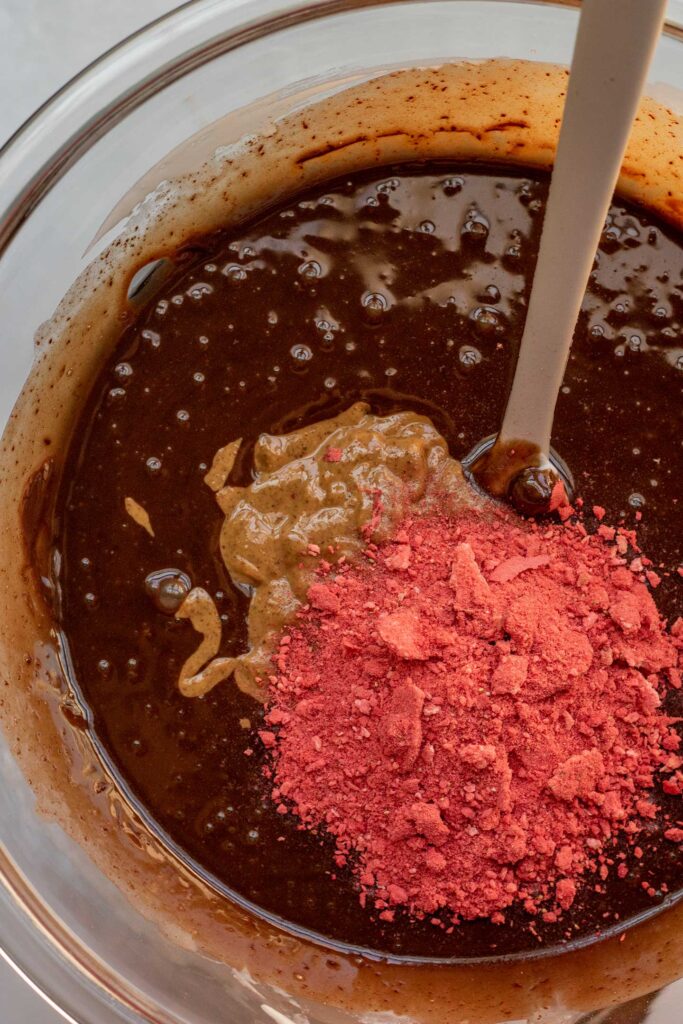
Add the chocolate chips and coconut cream to the bowl and stir continuously until the chocolate has fully melted and looks smooth and glossy then remove from heat.
Stir in the almond butter, maple syrup, the crushed freeze-dried strawberries, vanilla, and salt. Continue to stir until everything is evenly mixed (alternatively, for a smoother texture, place all the ingredients including the chocolate into a high speed blender and blend until smooth).
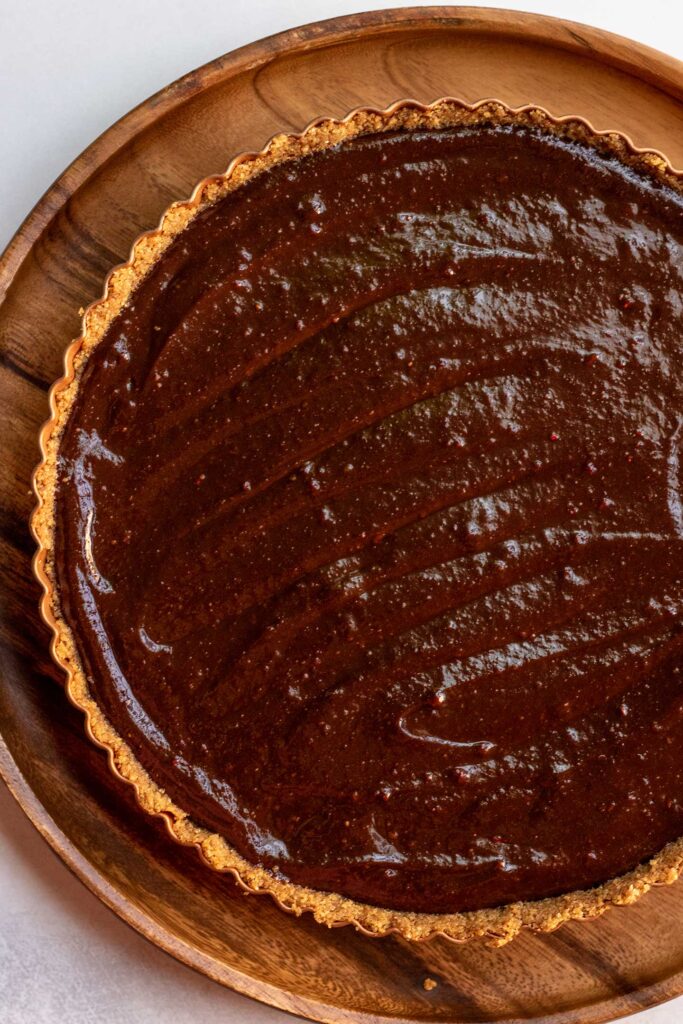
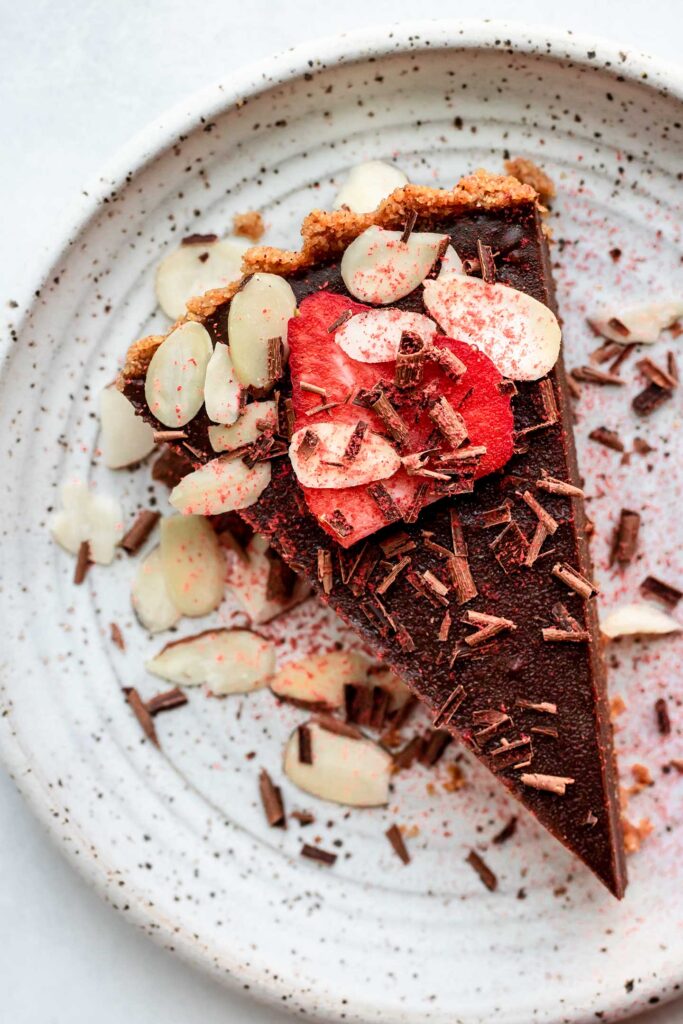
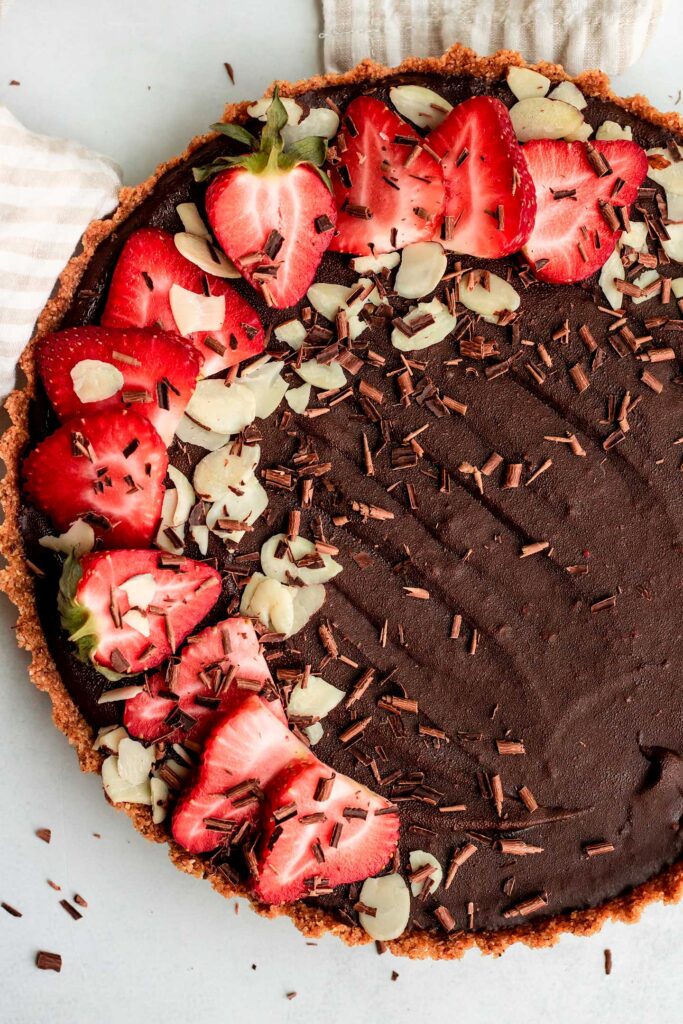
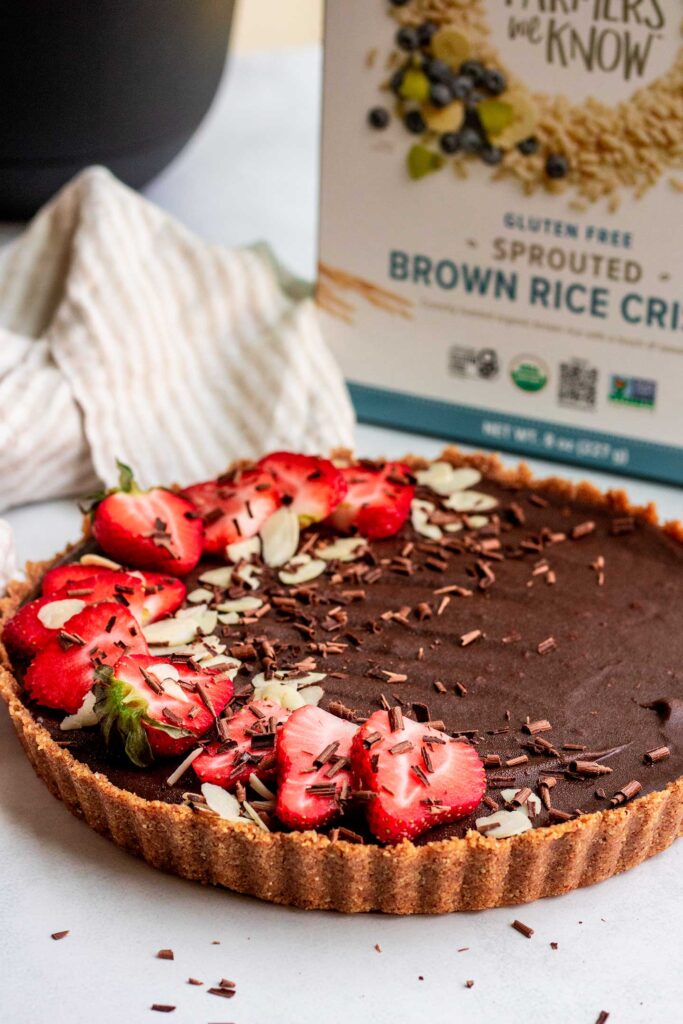
Pour the chocolate mixture into your cooled tart crust and spread the mixture out evenly with a spatula. Carefully place the tart in the freezer to set for 1 hour. For the best texture when serving, allow the tart to sit at room temperature for 10-15 minutes before slicing into it and serving. Garnish your tart with strawberries and almond slices as desired.
Expert Tips
- If you can’t find coconut cream, use 2 cans of full-fat coconut milk. Place the cans in the fridge for at least 4-6 hours prior to starting so that it’s easier to separate the cream from the water. Scoop out the cream from the top and measure in a measuring cup.
- If your dates are not soft, soak them in boiling water for 10 minutes. Drain then use in the recipe as instructed.
- Change up the flavors. Give your tart a Nutella flavor by swapping the almond butter with some homemade vegan nutella instead.
- Adjust the sweetness to your liking. Dark chocolate often has a more bitter flavor, so depending on the type you use, feel free to add more liquid sweetener as desired until the flavor is to your liking.
- For a smoother filling, try blending it! I personally opted to keep everything to one bowl as I didn’t want another dish to clean, but if you want the ultimate smooth velvety texture to your filling, add the melted chocolate along with the remaining filling ingredients to a high speed blender and blend until silky smooth.
Frequently Asked Questions
Yes! It’s important to note that chocolate chips tend to have a coating to them that can make it a little more difficult to melt compared to a bar of chocolate. To melt, place the chocolate chips plus 1/4 cup of your coconut cream into a heatproof bowl and microwave for 30 seconds. Stir the mixture well, then place in the microwave again for 25-30 seconds. Stir again and continue heating the mixture in 15 second intervals, stirring in between until the chocolate has fully melted and is smooth.
You can pour the coconut milk into ice cube trays and freeze to use in different recipes like curries or to make this quick and easy coconut rice.
Swap the almond butter for equal amounts of tahini or sunflower seed butter.
How to Serve
Once the tart has set, allow it to sit at room temperature for at least 15 minutes before slicing. You can serve this tart topped with almond slices and fresh strawberries to further compliment the flavors of the tart and add more fiber.
More Vegan Treats to Try
- Chocolate Peanut Butter Stuffed Cookies
- Vegan Orange Poppy Seed Muffins
- Healthy Strawberry Crumble
- Chili Lime Mango Sorbet
- Chickpea Cookie Dough Bites


No Bake Chocolate Strawberry Tart
- Prep Time: 20 minutes
- Cook Time: 10 minutes
- Total Time: 30 minutes
- Yield: 8 servings 1x
- Category: Dessert
- Method: Stove Top
- Cuisine: American
- Diet: Vegan
Description
This no-bake chocolate strawberry tart is filled with a velvety strawberry truffle filling. Comes together with just 9 wholesome ingredients and is naturally gluten-free!
Ingredients
Crust
- 3 cups One Degree Organic Foods’ Gluten-Free Sprouted Brown Rice Crisps
- 1/3 cup soft medjool dates, pits removed**
- 1/3 cup almond butter
- 1/4 tsp kosher salt
Filling
- 10 oz dairy-free dark chocolate chips
- 1 cup canned coconut cream**
- 3/4 cup natural smooth almond butter
- 2 tbsp maple syrup
- 1/2 cup freeze dried strawberries, crushed into a fine powder (optional)
- 1 tsp vanilla extract
- 1/4 tsp kosher salt
Instructions
- Add the rice crisps, medjool dates and almond butter to a food processor. Pulse the mixture together until t
- Place a 9-inch round tart pan on a large flat plate. Transfer the crumble to the tart pan and evenly press the crumble into the shape of the pan. Make sure the crumble covers the entire bottom and sides of the pan. To get it nice and smooth, use the bottom of a flat measuring cup to help press and smooth out the crust. Pop the tart into the freezer to firm up while making the filling.
- Fill a large sauce pan 1/4 of the way with water and bring to a boil. Remove the pan from heat and place a heat safe bowl on top, making sure the bottom of the bowl is not touching the water.
- Add the chocolate chips and coconut cream to the bowl and stir continuously until the chocolate has fully melted and looks smooth and glossy then remove from heat.
- Stir in the almond butter, maple syrup, the crushed freeze-dried strawberries, vanilla, and salt. Continue to stir until everything is evenly mixed (alternatively, for a smoother texture, place all the ingredients including the chocolate into a high speed blender and blend until smooth).
- Pour the chocolate mixture into your cooled tart crust and spread the mixture out evenly with a spatula. Carefully place the tart in the freezer to set for 1 hour. For the best texture when serving, allow the tart to sit at room temperature for 10-15 minutes before slicing into it and serving. Garnish your tart with strawberries and almond slices as desired.
Notes
If you can’t find coconut cream, use 2 cans of full-fat coconut milk. Place the cans in the fridge for at least 4-6 hours prior to starting so that it’s easier to separate the cream from the water. Scoop out the cream from the top and measure in a measuring cup.
If your dates are not soft, soak them in boiling water for 10 minutes. Drain then use in the recipe as instructed.
Change up the flavors. Give your tart a Nutella flavor by swapping the almond butter with some homemade vegan nutella instead.
Adjust the sweetness to your liking. Dark chocolate often has a more bitter flavor, so depending on the type you use, feel free to add more liquid sweetener as desired until the flavor is to your liking.
For a smoother filling, try blending it! I personally opted to keep everything to one bowl as I didn’t want another dish to clean, but if you want the ultimate smooth velvety texture to your filling, add the melted chocolate along with the remaining filling ingredients to a high speed blender and blend until silky smooth.
If you tried this recipe or any other recipe on the blog, then let me know what you thought in the comments below! And if you loved it, don’t forget to rate it too. Feel free to follow on Instagram, Pinterest, and TikTok for the latest nutrition tips and recipe videos.
★ Catherine
This post contains affiliate links which means I will make a small commission if you purchase from those links. I only recommend and share products that I know, trust and personally use myself!
