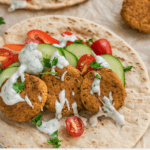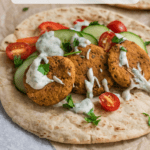


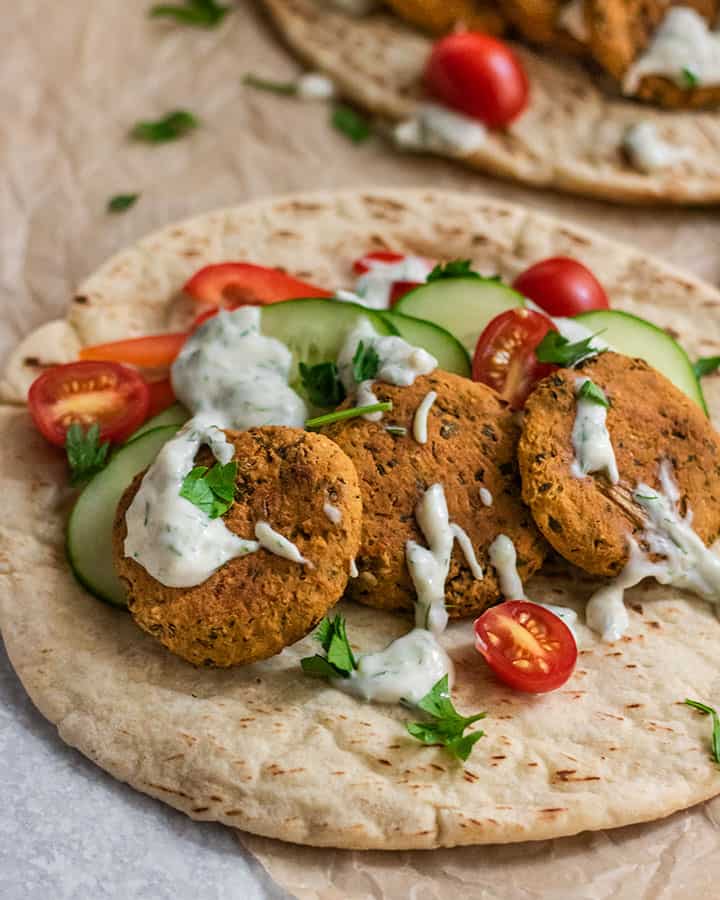
Sun-Dried Tomato Chickpea Patties
These Sun-Dried Tomato Chickpea Patties have a delicious tang and herby flavor to them similar to falafel. Baked with a beautiful golden outside and tender inside, they will become a favorite. They are also easy to make with simple ingredients and work great for lunches for the week.
I’m not sure if you can tell by my recipes, but I really love chickpeas. One of my most favorite ways to enjoy them is in falafel form. Between the herbs, spices and sauces you can add on top, they are easily one of the most flavorful ways to enjoy them. Drawing inspiration from traditional falafel, I wanted to create a fun and tasty chickpea patty as well.
I decided to call these chickpea patties instead of calling these falafel because traditional falafels do not include some of the following ingredients like canned chickpeas, flaxseed or oats. They are also normally fried, while these are baked. One of the reasons I chose to bake them is because I’m scared of burning myself with the frying oil. Can anyone relate?
For a more traditional understanding of falafel that also shares some unique takes and explanations of the preparation, I highly recommend looking towards this post on falafel.
Why You’ll Love These Chickpea Patties
- Deliciously herby with a unique twist thanks to the sun-dried tomatoes. Between the sun-dried tomatoes and herbs, you get a lovely earthy and tangy resulting flavor that is delicious.
- Easy to make and bakes in just 25 minutes. Just requires a few pulses in your food processor to get started. Mold them into your preferred shape and then bake.
- Firm on the outside and soft in the middle. I love the textures of these patties. They still brown wonderfully on the outside and maintain a delicious textured center.
Key Ingredients
- Chickpeas: This recipe was made using canned chickpeas. To help provide the best texture, make sure to rinse and drain your chickpeas and pat them really dry to help remove excess moisture. This will help prevent your chickpea patties from falling apart.
- Spring Onion: I chose spring onion because I didn’t want the onion to overpower the patties, but feel free to use red onion as a replacement if you like a strong onion flavor.
- Sun-Dried Tomatoes: Adds a lovely tang to this recipe. To help keep the falafels tender in the center, use sun-dried tomatoes packed in oil.
- Fresh Herbs: This recipe uses a combination of cilantro and parsley. If you are not a fan of cilantro you can replace with basil or a little mint.
- Spices: Cumin, coriander and a tiny pinch of cardamom. This combination provides the best flavors in these patties, but feel free to experiment with a blend that works best for your palate.
- Binders: Our binders for the recipe include ground flaxseed and tahini.
How to Make This Recipe for Chickpea Patties
I will touch on this a number of times, but make sure you dry off as much moisture from your chickpeas as possible. One trick that works really well is to just place your rinsed and drained chickpeas into a dry non-stick pan and cook off some of the moisture. Allow the chickpeas to then cool before processing them.
If you have a good food processor, place all of your ingredients into it and pulse it a number of times until you have a moldable mixture. Don’t over process to avoid creating a paste or hummus like consistency.
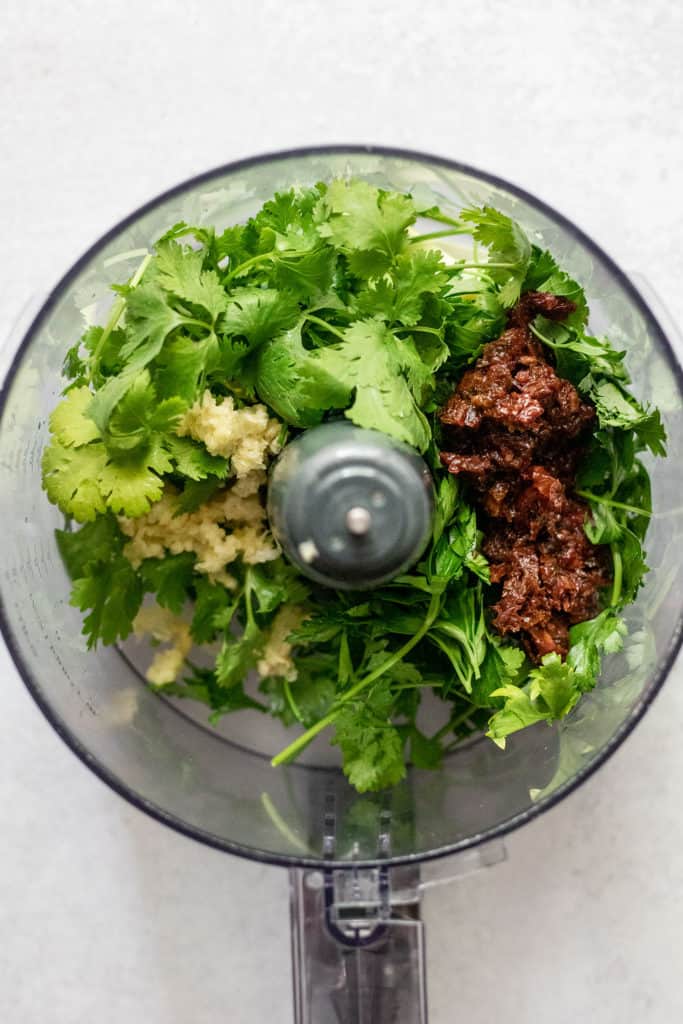
If you have a weak food processor, I recommend processing your herbs, sun-dried tomato, onions and garlic together first to finely mince it, then add in the remaining ingredients, pulsing together until the moldable mixture is present.

Take a scoop of your mixture and mold into a small patty shape then place on a lined baking sheet. Spray your patties with oil and then place in the oven to bake for 25 minutes, making sure to flip when you have 10 minutes left in your cook time.


Remove from oven and allow them to rest for a few minutes before serving.
Tips for the Perfect Chickpea Patties
- Remove as much liquid from the ingredients as you can before starting this recipe. You can do so by placing the chickpeas in a clean dish towel and patting them dry. If you have a bit of patience, I would suggest placing your chickpeas on a dry skillet, in the oven or air fryer for five minutes to help cook off some additional moisture to help improve the texture of the chickpea patties.
- Don’t over process your chickpea mixture. If you pulse your patty mixture too much, you’ll just end up with hummus. We want a moldable mixture that we can bake that will become firm and still have texture in the center.
- To get the lovely golden color on your chickpea patties, make sure to brush or spray your patties with oil before placing them in the oven.
What to Serve Your Chickpea Patties With
You can serve these chickpea patties a number of different ways:
- Enjoy as an individual snack as desired.
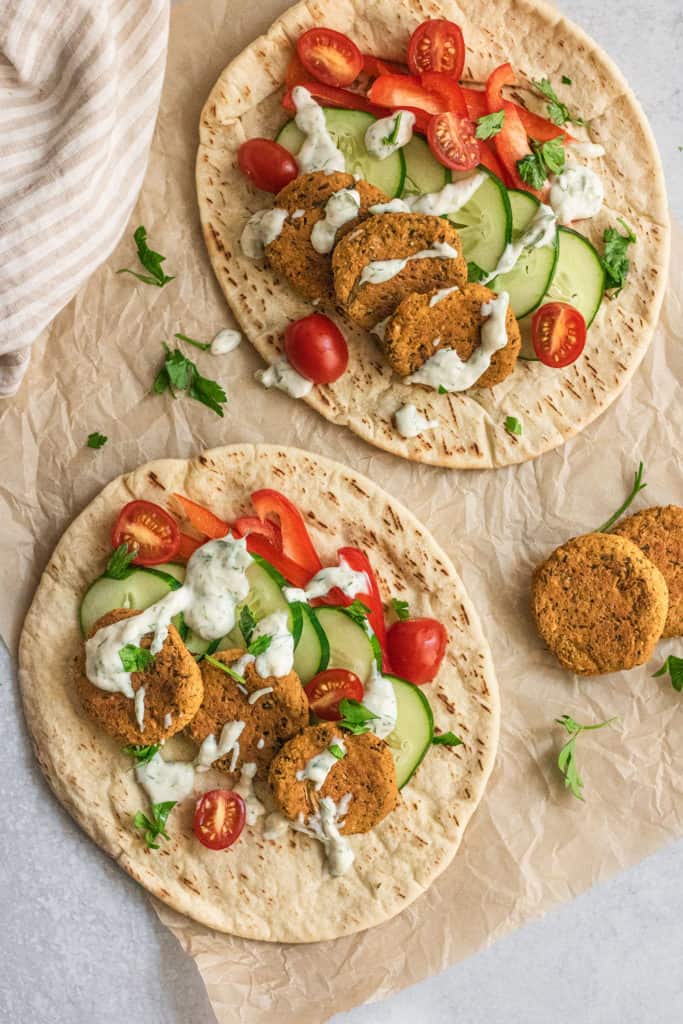
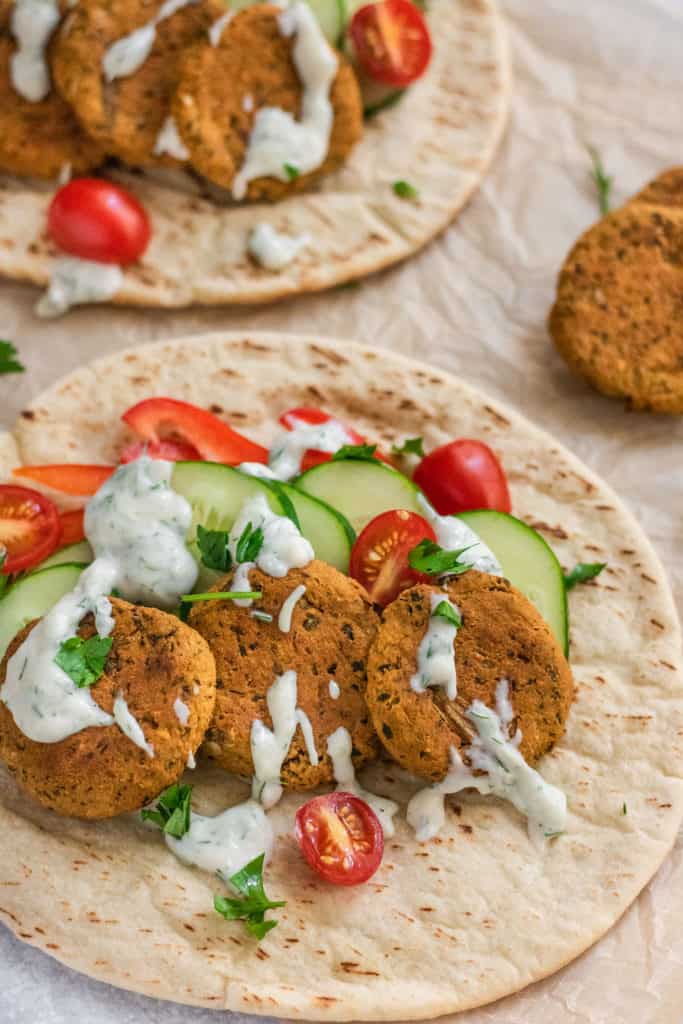
- Serve in pita with hummus and extra chopped vegetables like tomatoes and cucumbers and serve drizzled with sauce.
- As a rice addict, I also very much enjoy these patties served with some rice and additional greens and raw vegetables.
- You can also enjoy these in a salad or served with Tabbouleh.
- Sometimes I will also enjoy these dipped with a garlic lemon tahini sauce.
Storing and Saving Your Chickpea Patties
You can save these chickpea bites for later or use them to meal prep some yummy containers for the week. Completely cool your chickpea patties and then place in an airtight container to store in the fridge for up to 5 days. To reheat, you can place them in a toaster oven and warm them back up to enjoy as desired.
You can also freeze these patties. Just make sure to separate the patties in an air tight container with parchment paper before placing in the freezer.
If meal prepping, I like to serve these with hummus, quinoa tabbouleh and some fresh cut raw vegetables like cucumber, cherry tomatoes and diced red onion.
More Chickpea Recipes
- Chipotle Orange Chickpeas
- Marinated Lentil Chickpea Salad
- Chickpea Cookie Dough Bites
- Cilantro Lime Chickpeas

Sun-Dried Tomato Chickpea Patties
- Prep Time: 10 minutes
- Cook Time: 25 minutes
- Total Time: 35 minutes
- Yield: 12 patties 1x
- Category: Main Dish
- Method: Baking
- Cuisine: American
- Diet: Vegan
Description
These Sun-Dried Tomato Chickpea Patties have a delicious tang and herby flavor to them similar to falafel. Easy to make with simple ingredients and great to prep for lunches for the week.
Ingredients
- 2 spring onions or 1/4 red onion, roughly chopped
- 1/3 cup parsley
- 1/4 cup cilantro
- 4 sun-dried tomatoes packed in oil, roughly chopped
- 3 cloves garlic, roughly chopped
- 1 can of Chickpeas, rinse and drained (pat dry with a towel)
- 1 tbsp tahini
- 1 tbsp ground flaxseed
- 3 tbsp rolled or quick oats
- 2 tsp cumin
- 1 tsp coriander
- Pinch of cardamom (optional)
- 1/4 tsp salt
Instructions
- Set oven to 400F. Make sure chickpeas are pat really dry before starting this recipe.
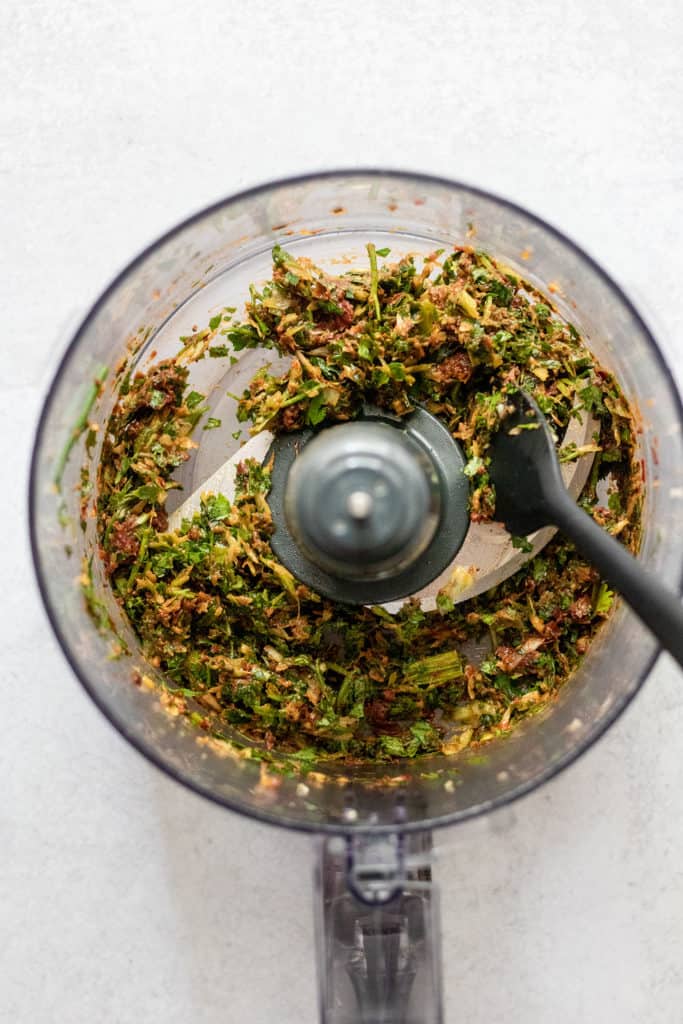
- In a food processor add in your onions, parsley, cilantro, sun-dried tomatoes, and garlic into a food processor and pulse together until all of the ingredients are broken down into a uniform herby mixture.
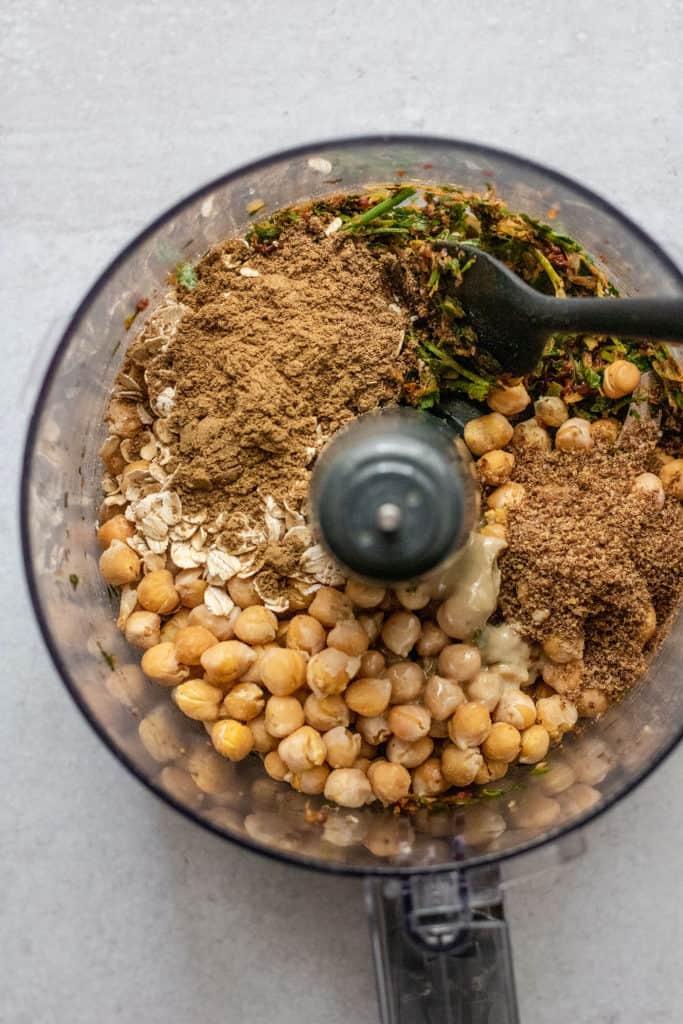
- Add in your chickpeas, tahini, ground flaxseed, cumin, coriander, salt and cardamom and pulse to combine and break down the chickpeas into a moldable dough.
- With a tablespoon measure or cookie scoop, scoop out a portion of the dough and roll it well together to form a ball.
- To a lined baking tray, place dough on top and lightly press down with your palm to slightly flatten it, pinching any ends around the dough ball that appear to break apart. Then repeat the process with the remaining chickpea mixture.
- Place your chickpea patties into the oven and back for a total of 25 minutes, making sure to flip when there’s 10 minutes left on your timer.
Notes
Remove as much liquid from the ingredients as you can before starting this recipe. You can do so by placing the chickpeas in a clean dish towel and patting them dry. If you have a bit of patience, I would suggest placing your chickpeas on a dry skillet, in the oven or air fryer to help cook off some additional moisture for a few minutes to help improve the texture of the chickpea patties. If doing this method, do allow chickpeas to cool before using in the recipe.
Don’t over process your chickpea mixture. If you pulse your patty mixture too much, you’ll just end up with hummus. We want a moldable mixture that we can bake that will become firm and still have texture in the center.
To get the lovely golden color on your chickpea patties, make sure to brush or spray your patties with oil before placing them in the oven.
If your dough is not coming together, add an additional tablespoon of tahini and pulse it again until it fully combines.
If you tried this recipe or any other recipe on the blog, then let me know what you thought in the comments below! And if you loved it, don’t forget to rate it too. Feel free to follow on Instagram, Pinterest, and TikTok for the latest nutrition tips and recipe videos.
★ Catherine
This post contains affiliate links which means I will make a small commission if you purchase from those links. I only recommend and share products that I know, trust and personally use myself!