

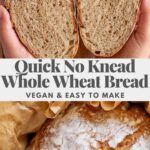
No-Knead Whole Wheat Bread
This No Knead Whole Wheat Bread is healthy, soft, flavorful and bakes to perfection in a Dutch oven. Made using a quick rise method and perfect for beginners.
This post is sponsored by One Degree Organics, but all opinions are my own.
Do you know where your bread comes from? Many of us are often disconnected from the process in which our food is grown, picked, produced, packaged and delivered to us. Knowing more of this process can help us not only make better decisions for ourselves and our families, but it also helps to connect us better to the food we are eating and enjoying.
That’s why I am partnering with One Degree Organics to make bread with you. Bread is something we all enjoy, and I feel this bread in particular can help us connect back to our roots.
Why You’ll Love This Fast No Knead Bread
- Only 7 ingredients, including both salt and water
- A 2 hour no knead bread that doesn’t require an overnight rise
- Perfect for bread making beginners
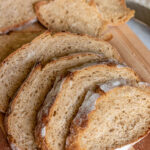
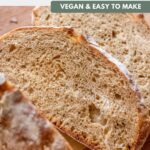
- Chewy with the perfect crust
- Soft and flavorful
- Loaded with whole sprouted grains and fiber for extra nutrition
- Can help improve your connection to the food you are eating
Add More Transparent Ingredients
One of the best ways to improve our connection with food is to build more trust in the process. One Degree Organics does this by making sure that all of its flours and cereals have no more than one degree of separation between you and the source of the ingredients. And each bag allows you to scan a QR code that helps you see this exact process.
Transparent ingredients mean that you can trace every single ingredient back to where it was farmed and who farmed it. You can feel comfortable knowing that all of their ingredients are certified organic and grown using veganic farming practices. This means all the food is grown using only plant-based fertilizers using respect for the land and people growing the food.
If you are able and have the choice, choosing more foods that share similar practices can further help improve the health of humans, animals and the planet.

Key Ingredients and Substitutions
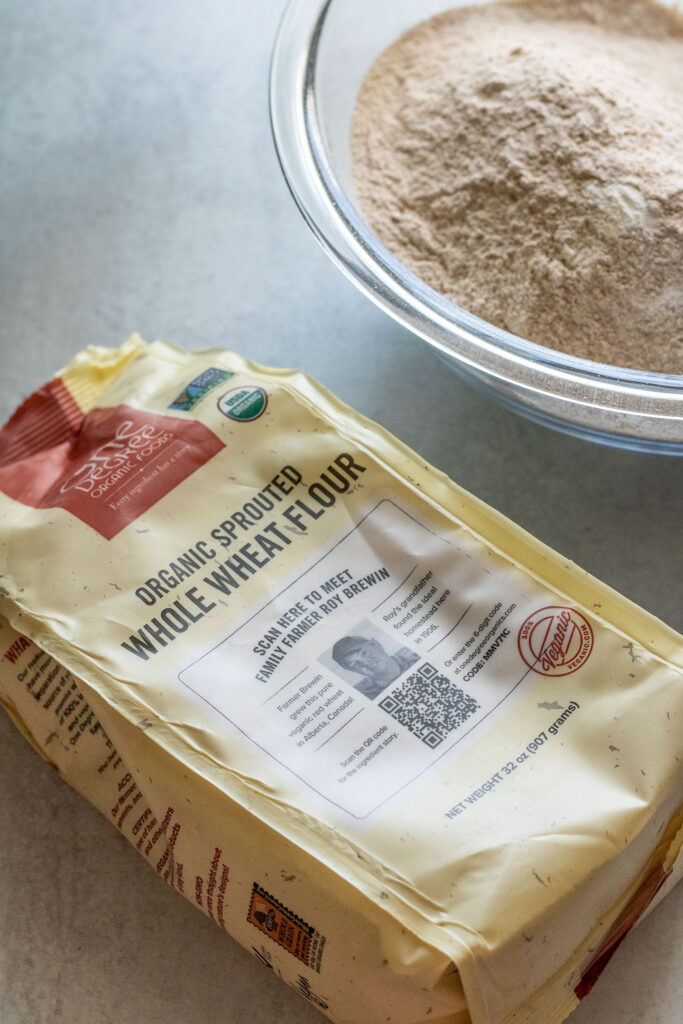
- Whole Wheat Flour: To truly amp up our nutrition in this bread we are using One Degree Organics Whole Wheat Sprouted Flour. So you get the benefits of whole grains and even more of a nutrition boost thanks to the grains being sprouted. To learn more about the benefits of using sprouted grains you can read my Chocolate Chip Zucchini Muffins Post.
- White Flour: This will help soften our dough and make sure we are left with a perfectly chewy slice of bread.
- Vital Wheat Gluten: You can find this in the baking aisle of your local grocery store. This is great to add to breads that use low protein flours like whole wheat flour to help improve the bread’s structure and elasticity.
- Yeast: For this method, only use dry active yeast. Do not use instant yeast.
- Sweetener: I used maple syrup, but you can also use regular cane sugar. This is to help feed the yeast and balance the flavor of the wheat flour.
How to Make No Knead Whole Wheat Bread
Start by adding all of your dry ingredients in a large mixing bowl. When adding your yeast, make sure it is not old or expired. Mix the water and maple syrup together separately and add it into the dry ingredients.

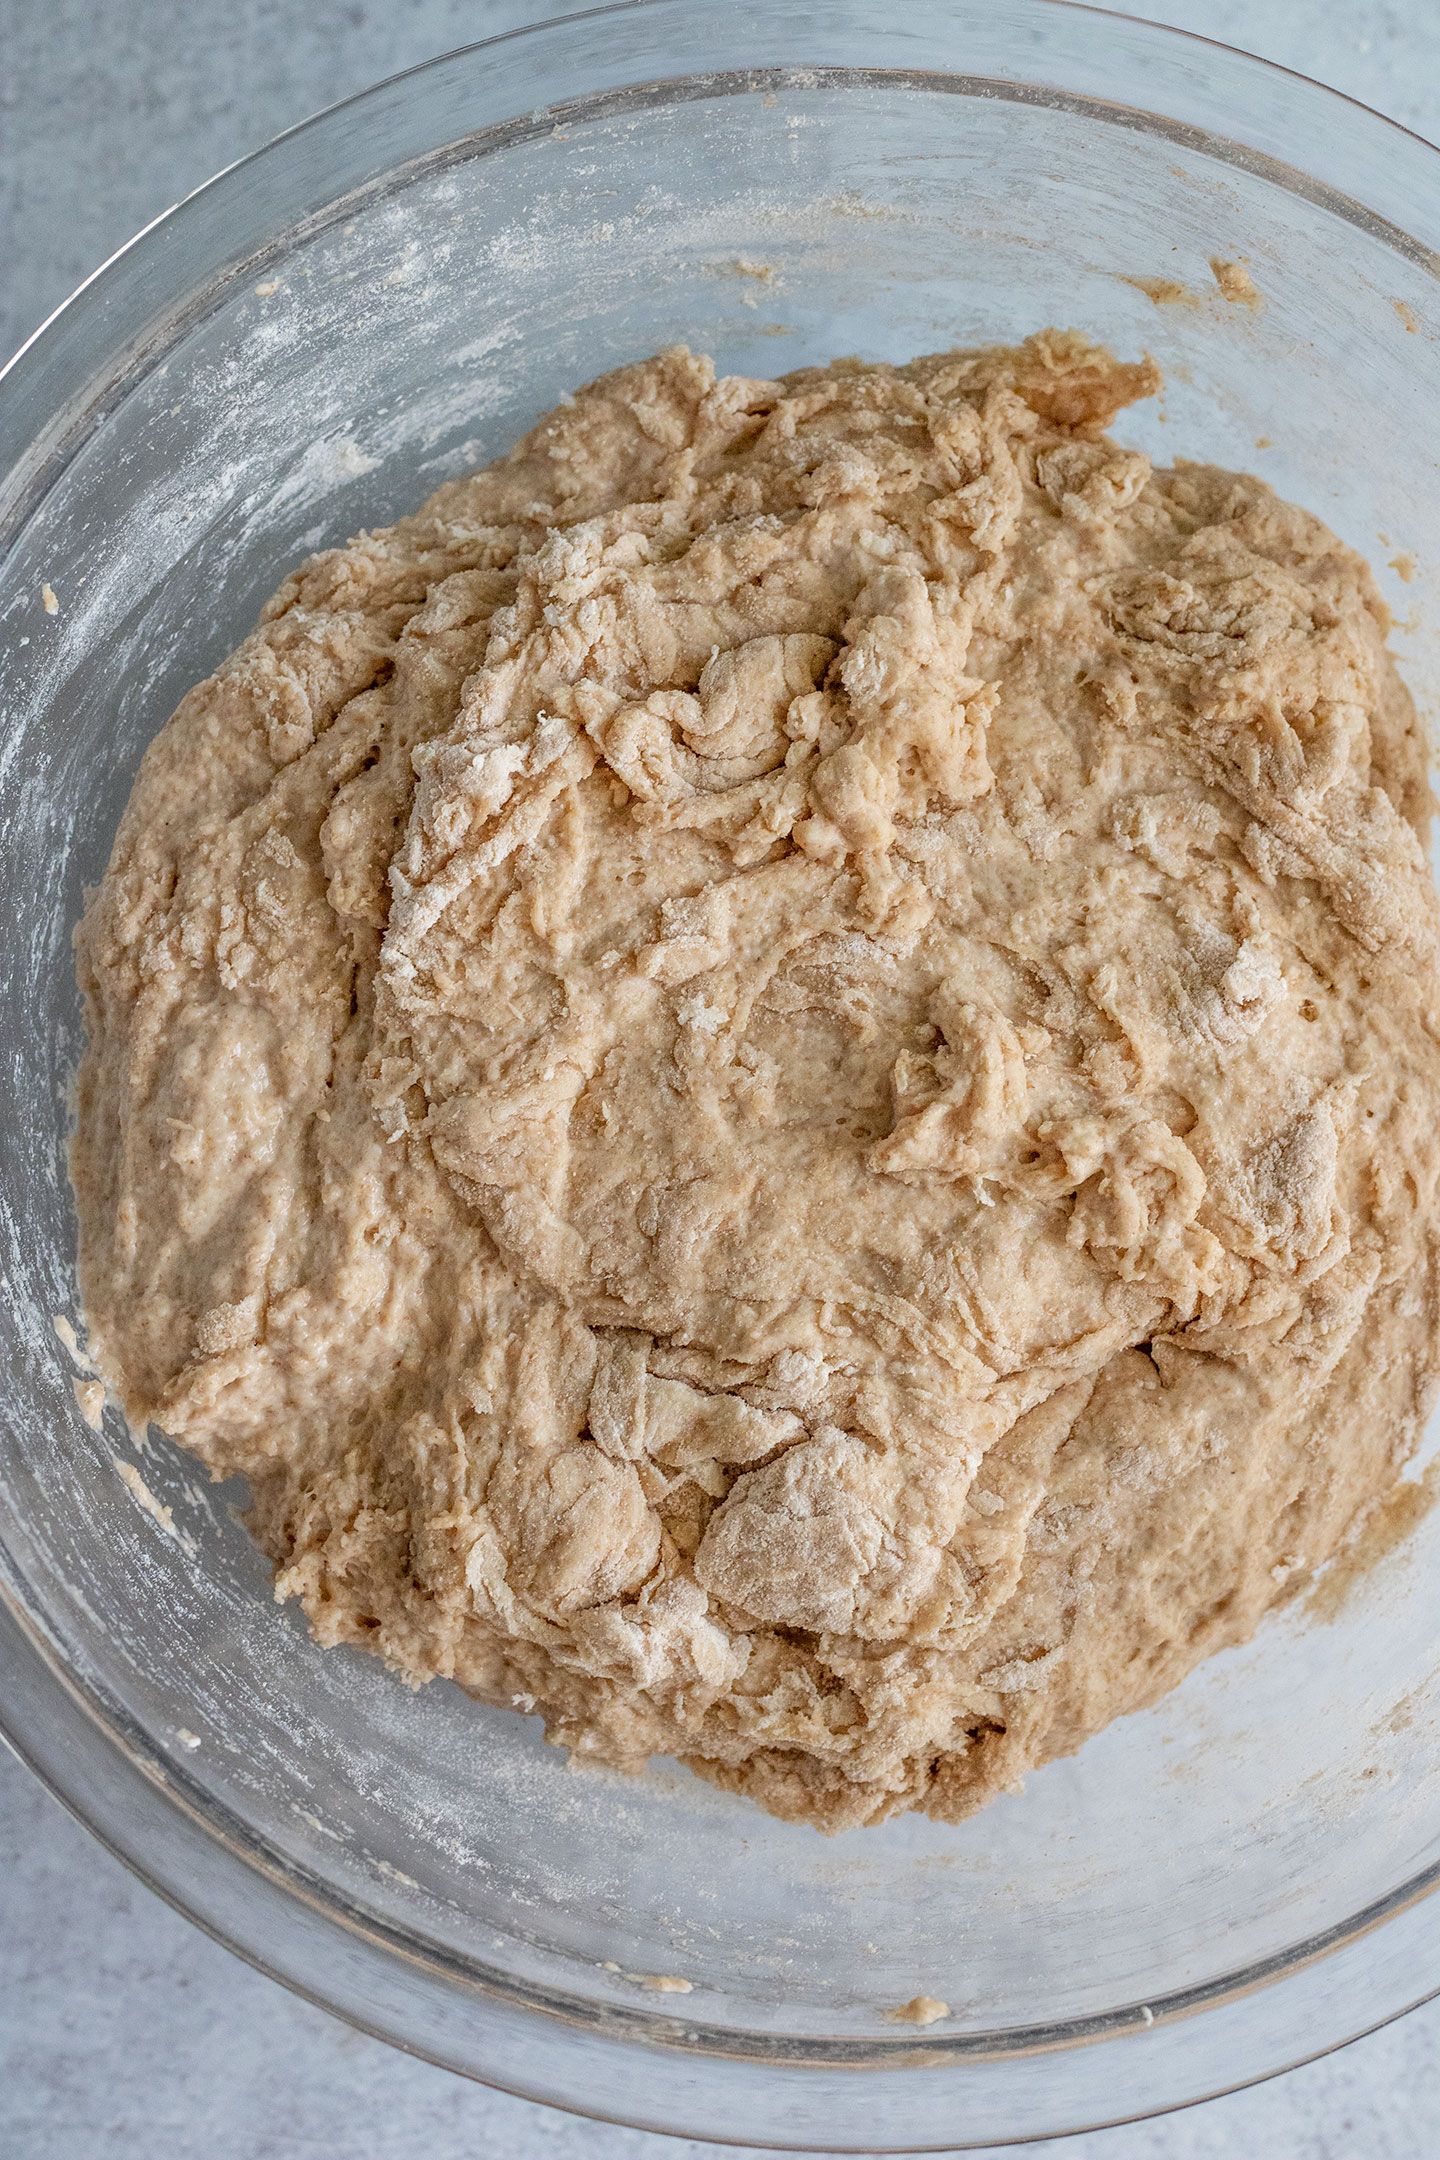
With a spatula, fold the ingredients together until you have a rough looking dough. Cover your bread and allow it to rise for an hour. The dough should double in size.


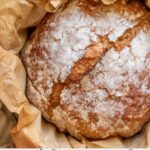
Transfer your dough to a well-floured surface and add just a small sprinkle of flour on top. Fold the edges of the dough towards the center. Then flip the dough over, and with your hands shape into a round loaf. Carefully transfer the dough to a lightly floured sheet of parchment paper, cover and allow to rest as you preheat your Dutch oven.
Cooking Bread in a Dutch Oven


Place the full Dutch oven into the oven and preheat to 450°F. Allow the Dutch oven to come to temperature for about 25 minutes. Once warm, remove from the oven and place the parchment paper with the dough into the Dutch oven, cover with its lid and place back in the oven to bake for 30 minutes. Remove the lid and allow to bake for another 10-15 minutes or until the crust is nice and golden to your liking.
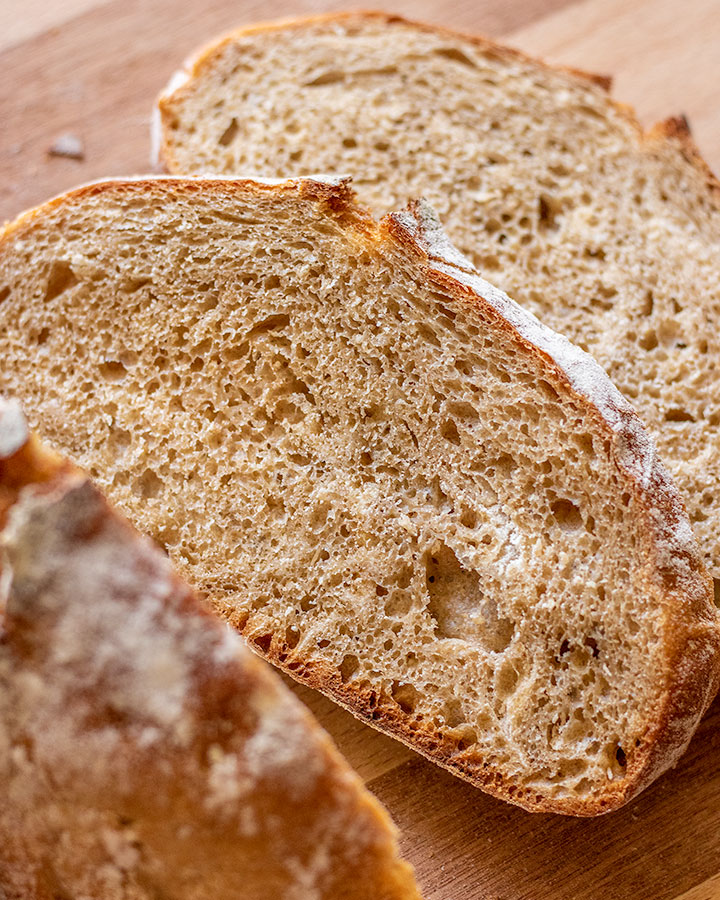
Transfer the bread to a rack and allow to cool before slicing into it.
Expert Tips
- Check to make sure your yeast is not expired. Old or expired yeast will prevent your bread from properly rising.
- Use warm water, not hot water for your yeast. It should be between 100-115°F. If the water feels hot to the touch, it will likely kill your yeast.
- For the best warm temperature rising environment for your dough, place your covered bowl in your oven with just the oven light on. Do not turn on your oven otherwise. The warmth of the light is enough especially on colder days.
- Do not cover your bowl with a kitchen towel. If the dough rises too much, it can get caught on the towel leaving a mess.
- You can test to see if your bread is done by checking the internal temperature of the bread, which should read between 190 to 200°F. Another sign it is done is to tap the bottom of the bread. If you get a hollow sound, it’s a good sign it is done baking.

Frequently Asked Questions
A Dutch oven guarantees that there will be even heat distribution for whatever you are cooking in it. Placing the dough inside a Dutch oven with the lid on helps to steam the dough, which better helps develop the golden crust on the outside.
The point of baking the bread with a lid is to encourage the bread to steam, which helps the development of that beautiful crust at the end. Do not skip this step!
Yes. You still want to create an environment that allows for the initial steaming process. You can use an oven safe pot and place a sheet pan over it to seal it. I would follow the instructions and other available options from this article.
This can happen for a number of reasons. First thing to check is if your yeast is old or expired. Old yeast is not active and won’t create the reaction needed for your dough to rise. If the yeast is fine, you may have accidentally killed your yeast with water that is too hot. Make sure the water is warm at about 100-115F. Also check to see if your dough is in a slightly warm spot. If it’s too cold, your dough will rise at a very slow pace. I recommend placing the dough in an oven with the light on to create the perfect environment. For more tips, use this guide.
It sounds like you used too much flour. First, make sure to aerate the flour by stirring it well with a spoon, then use the spoon and level method when measuring your flour with measuring cups. You can also use a dedicated kitchen scale to way your ingredients exactly every time. Remember, the dough will be slightly sticky after rising. Just a light dusting of flour is enough to help shape it.
If after the first rise, the dough is particularly loose and not holding its shape, just add a little more flour. This can be helpful for individuals that are baking in a different climate or altitude. For reference, I bake in the North East. If you are baking in a different region, you might be dealing with more humidity or dryness, so adjust accordingly.
I have only tested this recipe with the suggested mix of flours. Not all flours are created equal as they vary in terms of absorption, protein (gluten) and weight.

Storage Tips
There are a number of ways to store this bread, but the biggest thing to do for short term storage is to make sure it is to minimize direct airflow and excess moisture. For short term storage try storing in a bread box or wrapping with foil. For long term storage cut the bread into slices and place in a freezer bag in the freezer.
More Homemade Baked Goods To Try
- Lemon Blueberry Baked Oatmeal
- Apple Crisp Stuffed Baked Apples
- Vegan Chocolate Chip Zucchini Muffins
- Flourless Chocolate Chip Cookies
- Vegan Lemon Blueberry Muffins
- Easy Peach Crisp

No-Knead Whole Wheat Bread
- Prep Time: 90 minutes
- Cook Time: 45 minutes
- Total Time: 2 hours 15 minutes
- Yield: 8 servings 1x
- Category: Sides
- Method: Baking
- Cuisine: American
- Diet: Vegan
Description
This No Knead Whole Wheat Bread is healthy, soft, flavorful and bakes to perfection in a Dutch oven. Made using a quick rise method and perfect for beginners.
Ingredients
- 2 cups One Degree Organics Sprouted Whole Wheat Flour (290g)
- 2 cups all-purpose flour (290g)
- 2 cups warm water, between 100-115°F
- 1 packet active dry yeast (7g)
- 1 1/2 tsp kosher salt (6g)
- 2 tbsp maple syrup or cane sugar
- 1 tbsp vital wheat gluten (10g)
Instructions
- In a large mixing bowl, combine your dry ingredients including your flour, vital wheat gluten, dry yeast and salt. Carefully mix everything together until evenly distributed.
- To a separate large measuring cup, measure out your warm water and stir in the maple syrup to combine.
- Pour the wet ingredients into the dry and with a spatula starting at the edge of the bowl, fold the ingredients together until most of the flour is incorporated. You should be left with a rough looking dough.
- Cover your dough with a silicone cover or plastic wrap and turn the light of your oven on. Place the bowl in the oven (make sure the oven itself is not turned on) and allow to rise for 1 hour.
- Remove the bowl from the oven, then place your whole Dutch oven in the oven and preheat the oven to 450°F. Allow the Dutch oven to heat up for at least 25 minutes as you prep the dough.
- As the oven preheats, transfer the dough to a well-floured smooth working surface. Lightly sprinkle a little flour on top and then fold your dough in on itself. Start by folding each edge towards the center of the dough to form a tighter shape. Flip the dough over, and with your hands shape into a round loaf. Once formed, place the dough on a piece of lightly floured parchment paper, then wrap again with plastic wrap or cover with a large bowl and allow the dough to rest as the Dutch oven comes to temperature.
- Using oven mitts, very carefully remove the Dutch oven from the oven. Remove the wrap from the dough and carefully lift the parchment paper with the dough and place into the Dutch oven. Place the Dutch oven lid back on and then place the whole thing into the oven to bake for 30 minutes with the lid on.
- After 30 minutes, remove the lid and bake the bread for another 10 to 15 minutes until the bread is golden and crusty.
- Carefully, remove the bread from the Dutch oven and transfer the bread to a cooling rack for at least 30 minutes before slicing into it.
Notes
Check to make sure your yeast is not expired. Old or expired yeast will prevent your bread from properly rising.
Use warm water, not hot water for your yeast. It should be between 100-115°F.
If you need a warm place for your dough to rise, place it in the oven with just the oven light on.
Do not cover your bowl with a kitchen towel as it can get stick from the dough.
You can test to see if your bread is done by checking the internal temperature of the bread, which should read between 190 to 200°F. Another sign it is done is to tap the bottom of the bread. If you get a hollow sound, it’s a good sign it is done baking.
If you tried this recipe or any other recipe on the blog, then let me know what you thought in the comments below! And if you loved it, don’t forget to rate it too. Feel free to follow on Instagram, Pinterest, and TikTok for the latest nutrition tips and recipe videos.
★ Catherine
This post contains affiliate links which means I will make a small commission if you purchase from those links. I only recommend and share products that I know, trust and personally use myself!


What is vital wheat gluten? I could not find this in my local wegmans.
Hi Betsy! At my local grocery chain (ShopRite and Stop&Shop) they usually have it in the baking section with the flours. Bob’s Red Mill often carries it. Since this uses whole wheat flour, the gluten helps to give more structure and help with the rising. If you can’t find it, you may need to wait an extra 30 minutes with the rise, so wait for the dough to double in size and you should still be okay. 🙂