


Brothy Butternut Squash Simmered Beans
Beans simmered in a butternut squash and miso infused broth. All the flavors of fall in one cozy pot that will make getting your fiber in a lot more enjoyable.

Why You Should Simmer your Beans in a Butternut Squash Miso Broth
- A budget-friendly way to add flavor and nutrition. Butternut squash is an incredibly affordable winter squash at your local market that is loaded with beta-carotene. This is a powerful antioxidant that can convert to Vitamin A and is associated with protecting you against certain cancers, heart disease and cognitive disorders like Alzheimer’s Disease.
- Probiotic benefits from the miso. Miso is a fermented condiment loaded with probiotics. The beneficial bacteria in miso may help with improving overall digestion, which can then improve nutrient absorption from your meals.
- Seasonal flavors that help make their fiber much more enjoyable. I love alternating the flavors I use to simmer my beans with as the seasons change. Right now I’m craving those peak cozy, autumn flavors, so infusing that in this broth makes its much easier to enjoy and hit those daily fiber goals.
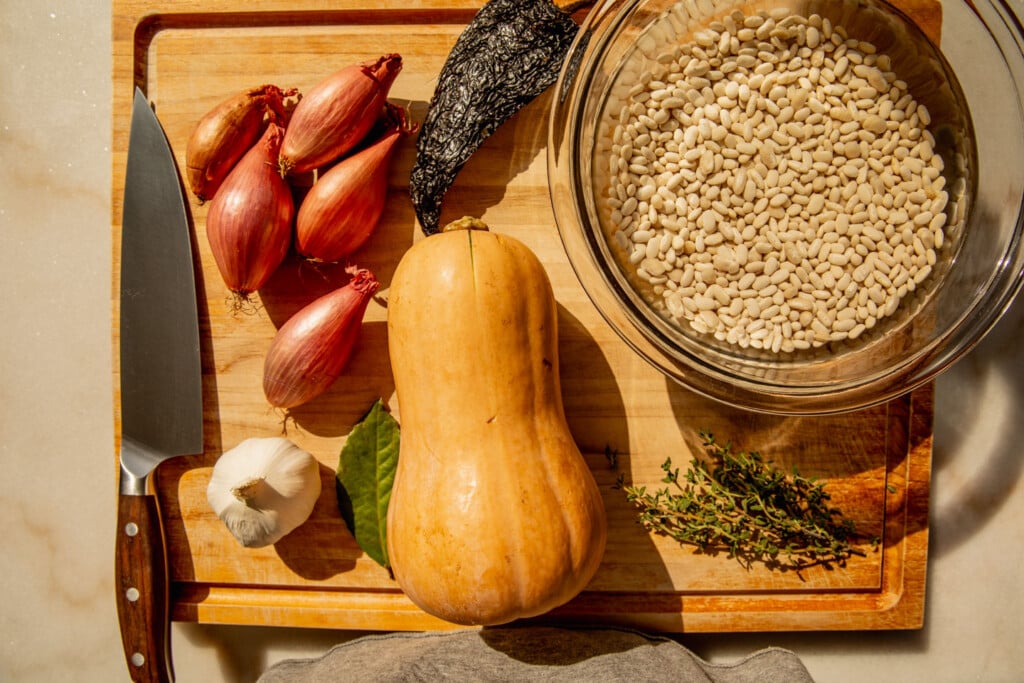
Key Ingredients and Substitutions
- Beans: I love the creaminess of white beans like cannellini beans, but any bean can really work for this. Just note that their soaking and cooking time can vary, so adjust accordingly!
- Butternut Squash: Alternatively, I love using honeynut squash as it provides a richer and sweeter flavor notes to the broth.
- Dried Chilies: I used an ancho chili to add some extra smokiness. I purchased mine from a local grocery store, but you can also find them in your local latin markets or on Amazon.
- Miso Paste: I prefer yellow or white miso paste. Most grocery stores will often have this in the refrigerated section where produce is sold.
- Shallots: You can also use red, yellow, or white onion.
- Herbs: For this pot of beans, I went for thyme, bay leaves, and some parsley. You can always add or swap in other seasonal herbs like sage or rosemary if desired.
- Olive Oil: Choosing the right oil can help add more depth and complexity to your beans, so choose brands that suit your taste. I personally like to use a good extra virgin olive oil for beans like this.
How to Make Brothy Butternut Squash Simmered Beans
Sort through your beans: Pick out any rocks or debris. Rinse and drain the beans, then completely cover with water. Soak overnight (or at least 2 hours if you forgot to soak).

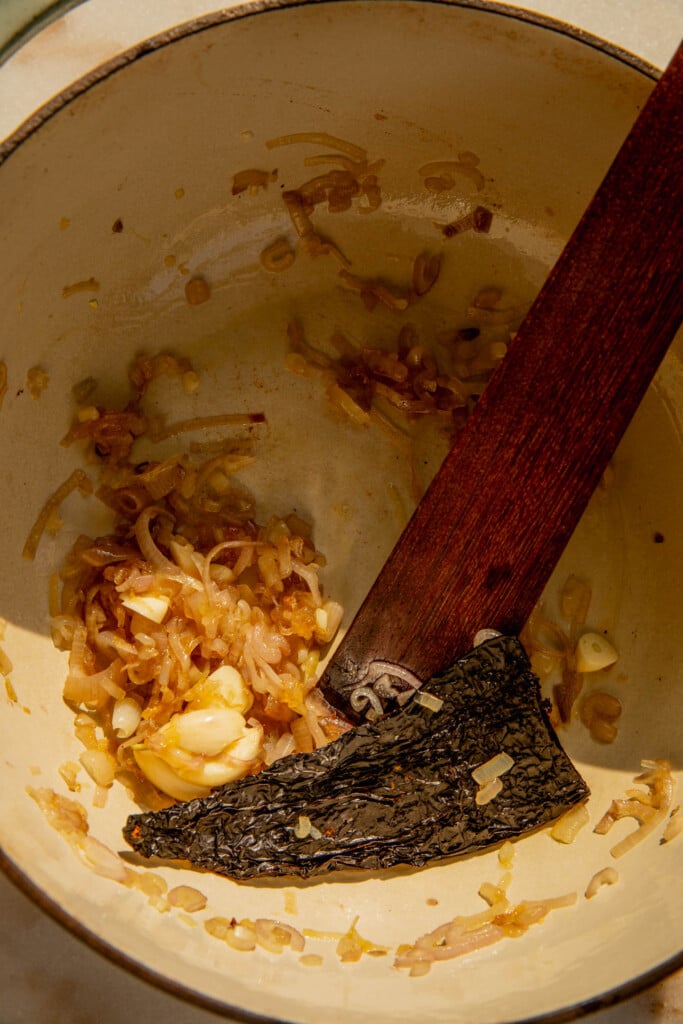
Cook the aromatics: Heat your oil up in a pot. Add the sliced shallots with a pinch of salt and sauté for about 5-8 mins, or until lightly browned. Add the crushed garlic and continue to sauté for 2-3 mins or until fragrant.
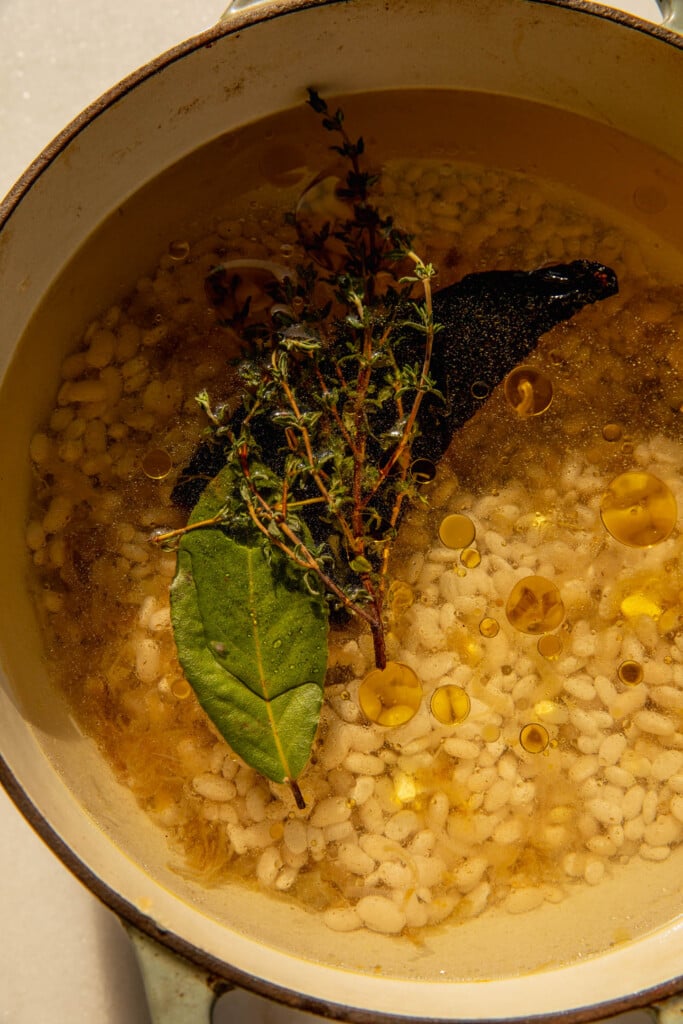
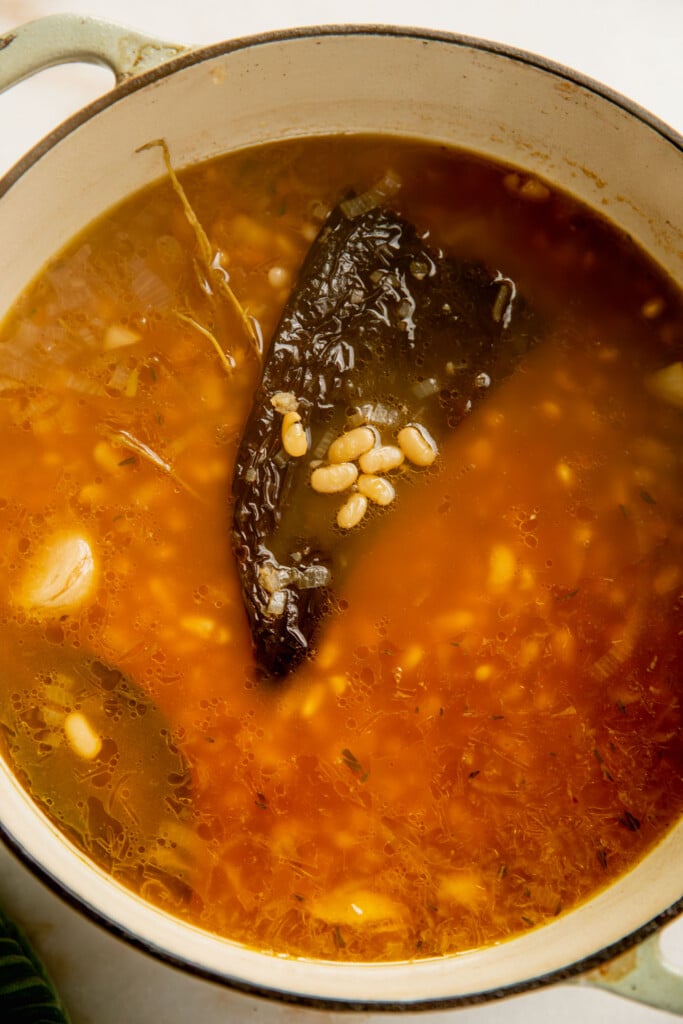
Simmer long and slow: Add the drained beans with the chili, 8 cups of water, thyme sprigs, bay leaf, 2 tsp of salt, and 1 tbsp more olive oil on top. Boil, then reduce heat to a gentle simmer. Partially cover and cook for 1 to 2 hours. After an hour, check the beans about every 30 mins, stirring briefly and adding more water if no longer fully submerged.
TIP: Test out at least 3 beans from different parts of the pot and give them squeeze to see if they are cooked through and softened. If not, cook further and check again every 30 mins until fully cooked.


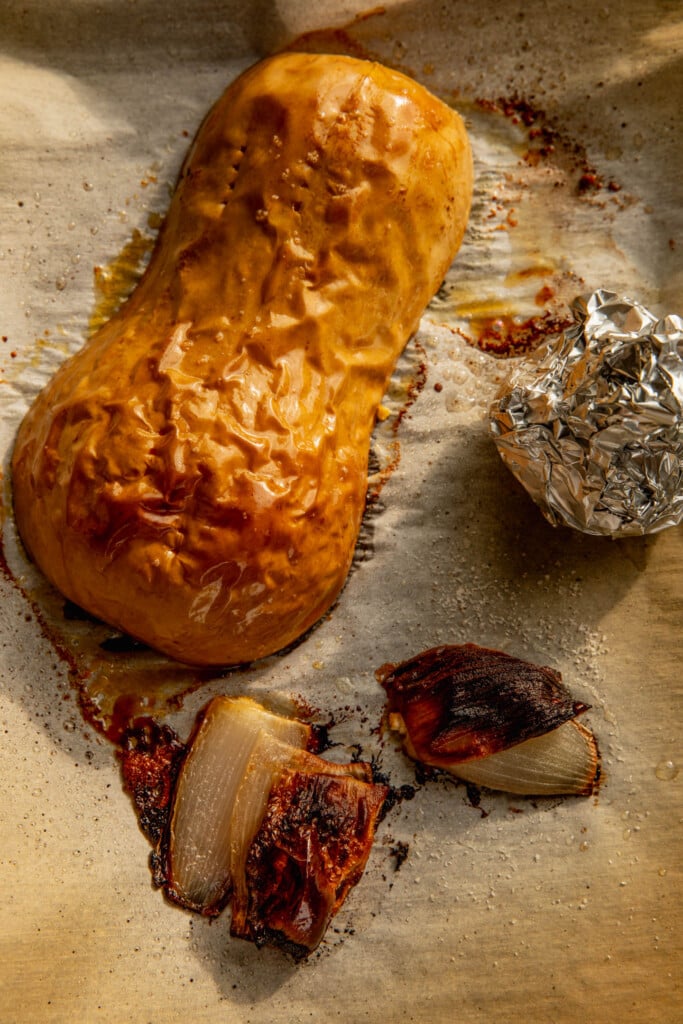
Bake the squash: Place the shallot and one of the squash halves on the baking tray. Drizzle with 1-2 tsp of oil and a pinch of salt, then place cut side down on the baking sheet. Drizzle the garlic bulb with oil and a pinch of salt, then wrap foil around the bulb and place on the baking tray. Bake for 20-25 mins and remove the shallot once caramelized on the bottom. Return the tray to the oven for another 20 mins or until the squash is cooked all the way through. Allow to cool.
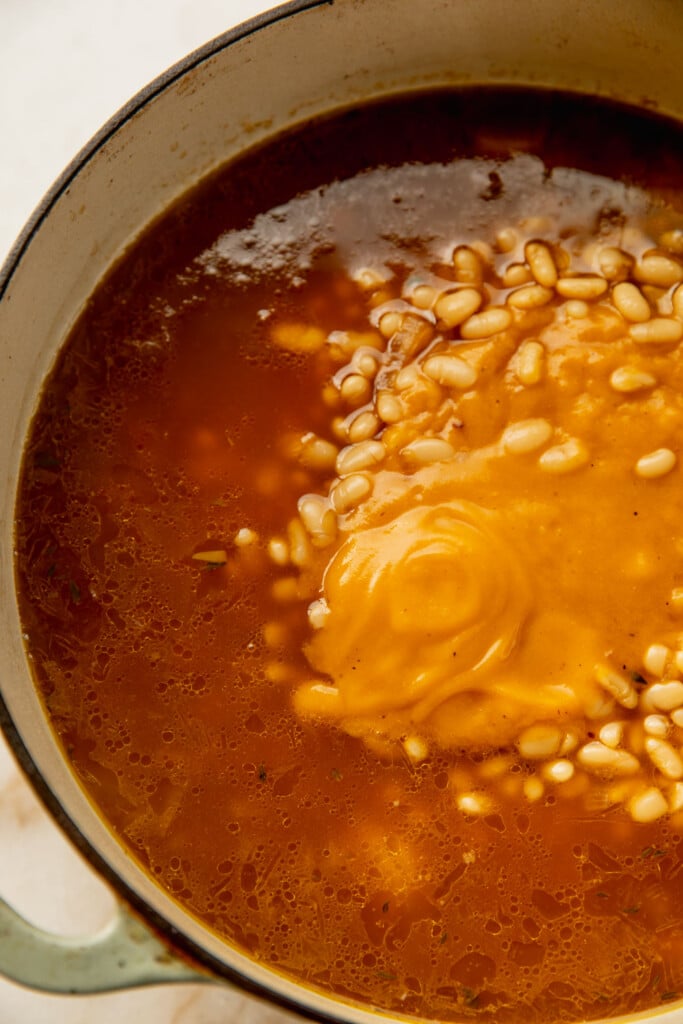
Blend your roasted veggies: Scoop the squash flesh out into a blender cup, squeeze in the garlic from the bulb, add the miso paste, and 1 1/2 cups of water. Blend on high until smooth.
Prep your beans: Discard the ancho chili, thyme sprigs, and bay leaf from the pot of beans. Pour in the blended squash and stir well to combine. Taste the broth and stir in additional salt to taste.


To serve: Spoon the beans and broth into serving bowls. Top your bowl with some candied jalapeños, fresh cracked black pepper, minced parsley, and a squeeze of lemon. Enjoy alongside some toasted bread or a bowl of rice.
Expert Tips
- Maintain the probiotic benefits. To take advantage of the beneficial probiotics from the miso paste, make sure to stir in the blended squash and miso mixture at the end of cooking while the beans are simmering on low. Once added, give the beans a good stir then remove the beans from heat.
- Adjust the balance of flavors. If your beans are tasting bland, you likely need to add more salt to help bring out more of those sweet and savory flavors. This is why I season with salt throughout the cooking process. If you are worried they will toughen your beans, please note this has been tested and debunked by America’s Test Kitchen.
- Save time by using canned beans. When you get to step 4, replace the soaked beans for 2 cans of drained and rinsed beans, use 1 tsp of salt, and add only 4 cups of water along with the other ingredients. Bring to a boil, reduce to a simmer, and cook covered for 40 minutes. Taste and adjust flavors as desired.
- Check the age of your beans. Most times, the cause for tough beans that take forever to cook is not adding salt too early, it’s the age of your beans. Check the best by day and avoid using beans that have been sitting in the back of your pantry for over 2 years.

Storage Recommendations
Store these beans in an airtight container in the fridge for up to 5 days. Alternatively, you can freeze these beans for up to 3 months in individually portioned containers to make thawing and reheating smaller portions easier.

Nutrition Addition Recommendations
A bowl of these beans will provide fiber, protein, healthy fats, complex carbs, and a bunch of micronutrients. We can always fill in more nutrition gaps and add more plant diversity by including the following:
- Enjoy with some whole grain sourdough bread or a bowl of rice for extra energy and meal satisfaction
- Add some greens like chopped kale, spinach, or spinach towards the end of cooking for more antioxidants
- Squeeze in a little lemon or lime for a boost of vitamin C that can help you better absorb the iron
Watch Me Make This Recipe
Recipe videos provide a general idea for recipe preparation. Please read the full recipe instructions and notes for the most accurate recipe results.
More Fiber-Packed Meals to Try
- Corn-Simmered Brothy Beans
- High Fiber Chickpea Rice
- Marinated Artichoke Bean Salad with Crispy Shallots
- Creamy Salsa Verde White Bean Soup
- Cilantro Lime Edamame Toast with Pickled Onion Radish Salad

If you tried this recipe or any other recipe on the blog, then let me know what you thought in the comments below! And if you loved it, don’t forget to rate it too. Feel free to follow on Instagram, Pinterest, and TikTok for the latest nutrition tips and recipe videos.
Print
Brothy Butternut Squash Simmered Beans
- Prep Time: 15 minutes
- Soak Time: 8 hours
- Cook Time: 2 hours
- Total Time: 10 hours 15 minutes
- Yield: 6–8 servings 1x
- Category: Main Dish
- Method: Stove Top
- Cuisine: American
- Diet: Vegan
Description
Beans simmered in a butternut squash and miso infused broth. All the flavors of fall in one cozy pot that will make getting your fiber in a lot more enjoyable.
Ingredients
For the Squash Puree
- 1 shallot, peeled and cut in half
- 1 butternut squash or honeynut squash (~450g or 1 pound), cut in half lengthwise and seeds removed ***
- 1 garlic bulb
- 2 tbsp yellow miso paste
For the Beans
- 1 pound dry white beans (cannellini beans, navy beans, or butter beans)
- 3–4 tbsp olive oil
- 4 shallots, peeled and thinly sliced
- 2 garlic cloves, peeled and crushed
- 1 ancho chili, stem trimmed and seeds removed
- 12 stems of fresh thyme
- 1 large bay leaf
- Kosher salt
- Black pepper
- Fresh parsley leaves for serving
- Lemon wedges for serving
- Candied jalapeños for serving (optional)
Instructions
- Spread the dry beans out on a flat surface and remove any rocks or debris. Rinse the beans well, then drain. Place the beans in a large bowl and cover with fresh filtered water, ensuring the water is about 3 inches above the beans (about 2 quarts of water). Cover and soak overnight (or at least 2 hours if you forgot to soak, but note that your cooking time will likely be longer).
- Preheat the oven to 425F and line a baking sheet with parchment paper.
- Heat up 2 tbsp of oil in a large pot over medium heat. Add the sliced shallots with a pinch of salt and sauté for about 5-8 minutes, or until the shallots start to lightly brown. Add the crushed garlic and continue to sauté for 2-3 minutes or until fragrant.
- Drain the beans and add them to the pot along with the ancho chili, 9 cups of water, thyme sprigs, bay leaf, 2 tsp of salt, and 1 tbsp more olive oil on top. Bring to a boil, then reduce heat to a gentle simmer. Partially cover the pot with a lid and cook for 1 to 2 hours. After an hour, check the beans about every 30 minutes, stirring briefly and adding more water if the beans are no longer fully submerged. To ensure the beans are fully cooked, test out at least 3 beans from different parts of the pot and press them to see if they have softened. If not, cook further and check again every 30 minutes or so for doneness.
- While the beans are cooking, roast your veggies. Place both shallot halves and one of the squash halves on the baking tray. Drizzle with 1-2 tsp of oil and sprinkle with a pinch of salt, then place cut side down on the baking sheet. Drizzle the garlic bulb with 1 tsp of oil and sprinkle with a pinch of salt. Wrap the bulb in foil and place on the baking tray. Bake in the oven for 20-25 minutes. At this point, remove the shallot when it has caramelized on the bottom. Return the squash and garlic to the oven and bake for another 20 minutes or until the squash is cooked all the way through. Allow to cool.
- Once the squash has cooled, scoop the flesh out into a blender cup, squeeze in the garlic from the bulb, add the miso paste, and 1 1/2 cups of water. Blend on high until smooth.
- Discard the ancho chili, thyme sprigs, and bay leaf from the pot of beans. Pour in the blended squash and stir well to combine. Remove from heat, then taste the broth. Stir in additional salt to taste.
- To serve, spoon the beans and broth into serving bowls. You can top your bowl with some candied jalapeños and finish with a few cracks of black pepper, minced parsley, and a squeeze of lemon (the vitamin C from the lemon will help you absorb the iron from the beans). Enjoy along side some toasted bread or a bowl of rice.
Notes
Maintain the probiotic benefits. To take advantage of the beneficial probiotics from the miso paste, make sure to stir in the blended squash and miso mixture at the end of cooking while the beans are simmering on low. Once added, give the beans a good stir then remove the beans from heat.
Adjust the balance of flavors. If your beans are tasting bland, you likely need to add more salt to help bring out more of those sweet and savory flavors. This is why I season with salt throughout the cooking process. If you are worried they will toughen your beans, please note this has been tested and debunked by America’s Test Kitchen.
Save time by using canned beans. When you get to step 4, replace the soaked beans for 2 cans of drained and rinsed beans, use 1 tsp of salt, and add only 4 cups of water along with the other ingredients. Bring to a boil, reduce to a simmer, and cook covered for 40 minutes. Taste and adjust flavors as desired.
Check the age of your beans. Most times, the cause for tough beans that take forever to cook is not adding salt too early, it’s the age of your beans. Check the best by day and avoid using beans that have been sitting in the back of your pantry for over 2 years.
This post contains affiliate links which means I will make a small commission if you purchase from those links. I only recommend and share products that I know, trust and personally use myself!