

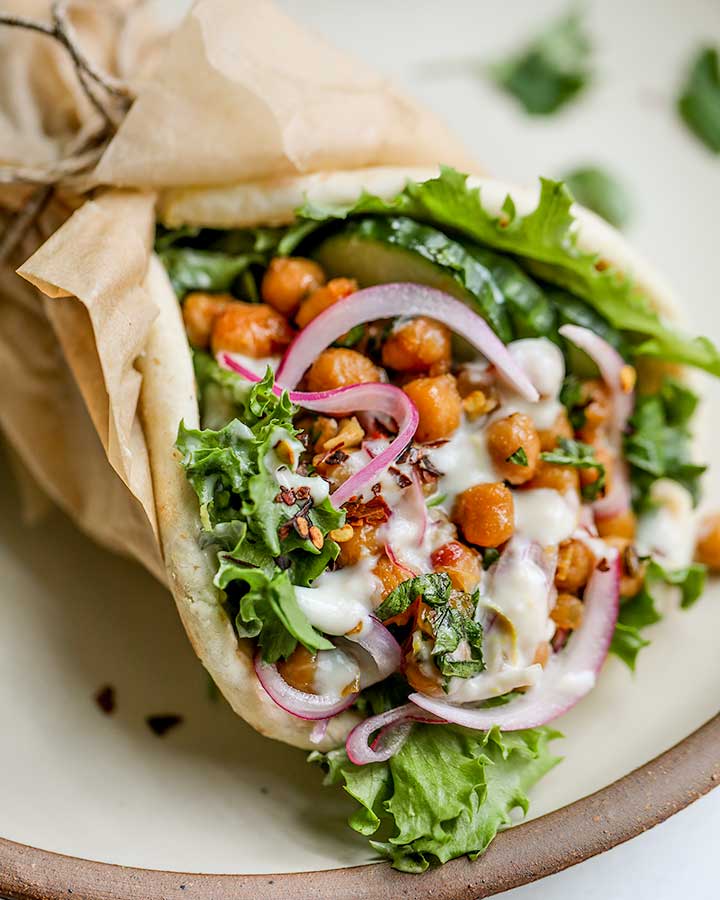
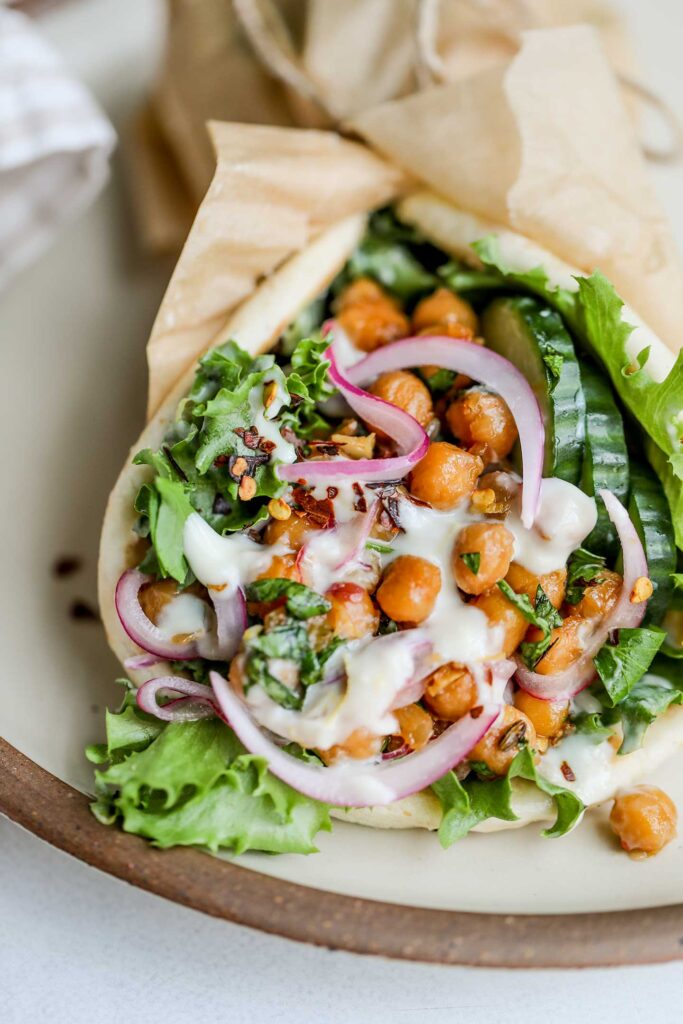
Sticky Lemon Chickpea Pita Wrap
This sticky lemon chickpea pita wrap is drizzled with a creamy yogurt tahini sauce. Easy to prep in advance for quick meals during the week.
I’m gonna confess, lunch is probably the meal I struggle with the most. A lot of times I’m really busy and underestimate how long something will take me to do. So I try really hard to prep my lunches in advance to minimize stress and decision fatigue. One lunch that I have been prepping regularly, has been these chickpea pita wraps. I sauté the chickpeas and prep the yogurt tahini sauce ahead of the week that way it makes assembling these wraps super easy when I need them. And, that leaves me with no excuse not to eat lunch.
Why You’ll Love This Sticky Lemon Chickpea Pita Wrap
- Budget-friendly. Making your own wraps at home may help save money compared to ordering that wrap out. Plus, using budget friendly options like chickpeas further helps keep this within a decent price range.
- Great make ahead option. The components of these wraps keep well in the fridge. Just prep in advance to help make lunch prep during the week a lot easier.
- Packed with nutrition. Between the pita, veggies and chickpeas, you are getting a balance of all your major nutrients in one meal. Doing so helps make this a satisfying and filling meal that will keep you energized.
Key Ingredients and Substitutions
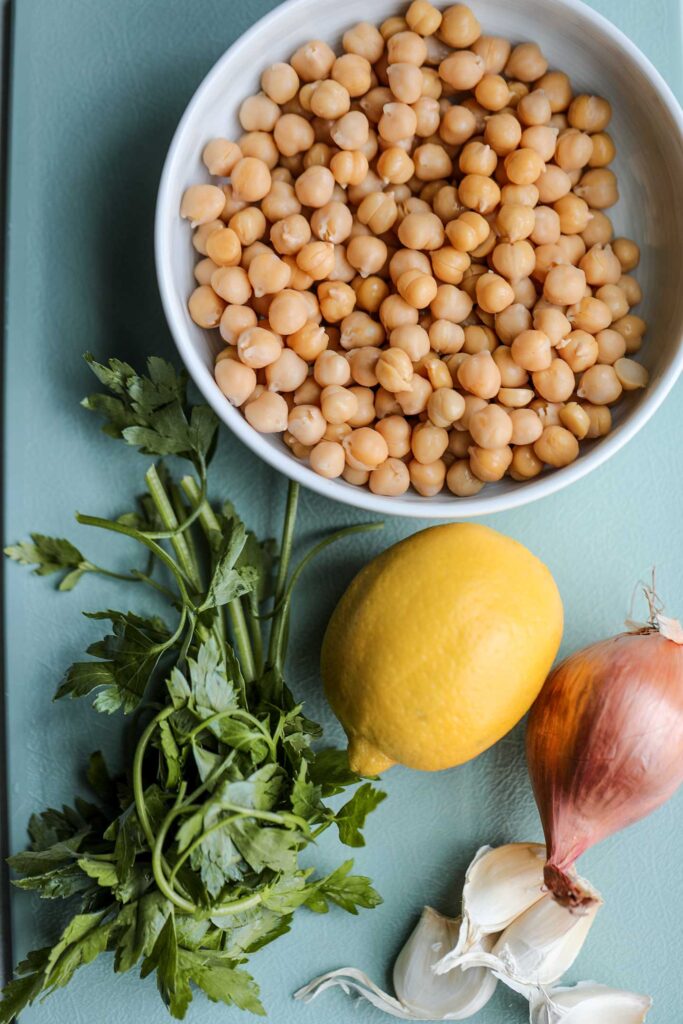
- Chickpeas: To make this come together quickly, I used canned cooked chickpeas. You can also use freshly cooked chickpeas. Just make sure if using homemade options that you don’t overcook the chickpeas.
- Pita: Use your favorite pita bread brand or use a large flour tortilla. Check the FAQ section for gluten-free alternatives.
- Lemon: Fresh lemon is best as we need both the lemon zest and juice. You can also swap this for lime instead if that is what you have.
- Garlic: Fresh garlic will add the best flavor. If sensitive to garlic, consider a garlic infused oil instead to sauté everything in.
- Maple Syrup: I love using this as my main sweetener, but feel free to replace with other options like agave syrup or light brown sugar.
- Yogurt: I used a thick and creamy soy based yogurt from Silk. Swap for any of your favorite plant-based yogurts, but try to aim for varieties that are thicker in consistency.
- Tahini: Use a good quality tahini when you can. If allergic to sesame seeds, use sunflower seed butter as an alternative.
- Spices: I used a mix of coriander and fennel seeds. As an alternative, you can swap both for a seasoning blend like za’atar.
- Herbs: I used fresh parsley. Cilantro is a great alternative.
- Hot Sauce: Use your favorite brand. Do note, that hot sauce vary in heat, so adjust the amount based on your own preference. You can also feel free to leave it out.
How to Make a Sticky Lemon Chickpea Pita Wrap
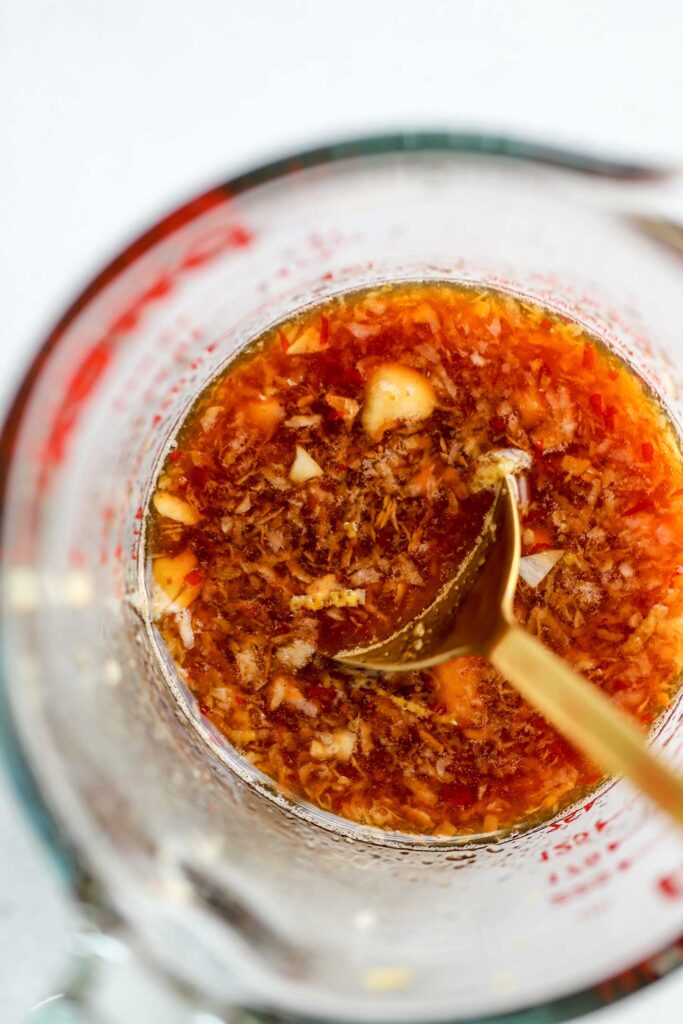
To a bowl or large measuring cup, add 2 cloves of grated garlic, the juice and zest of half a lemon, soy sauce, 2 tbsp of maple syrup, and hot sauce then whisk together to combine. Set the mixture aside.

Add the oil to a large skillet over medium heat. Place the chickpeas on a clean kitchen towel and dry them well. Once the oil is hot, add the chickpeas. Stir them into the oil and spread out into an even layer. Allow the chickpeas to cook undisturbed for about 3 minutes to help them get golden. Toss the chickpeas and cook again undisturbed for an additional 2 minutes.
Stir in the shallots along with a generous pinch of salt and continue to sauté until the shallots have softened. Add in the coriander and fennel seeds then toss together with the chickpeas, continuing to sauté for 1-2 minutes.
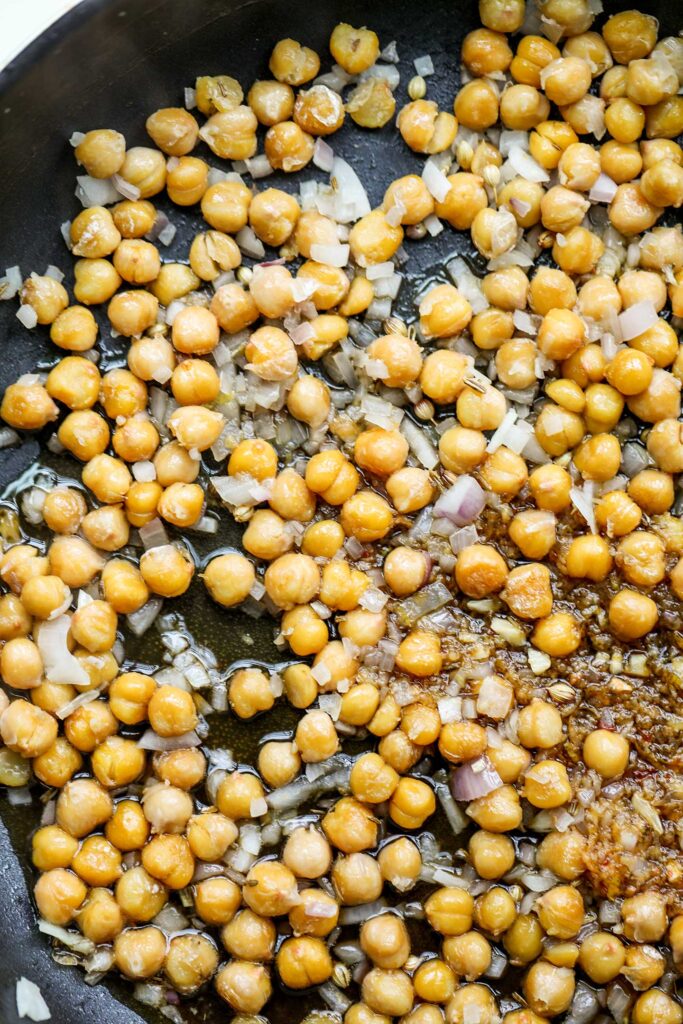

Lower the heat to low then pour in the lemon mixture and toss together with the chickpeas. Allow the mixture to simmer and thicken while you continue to stir and coat the chickpeas. Once the chickpeas are glazed, stir in the parsley then remove from heat. Taste and adjust with more salt and pepper as desired.
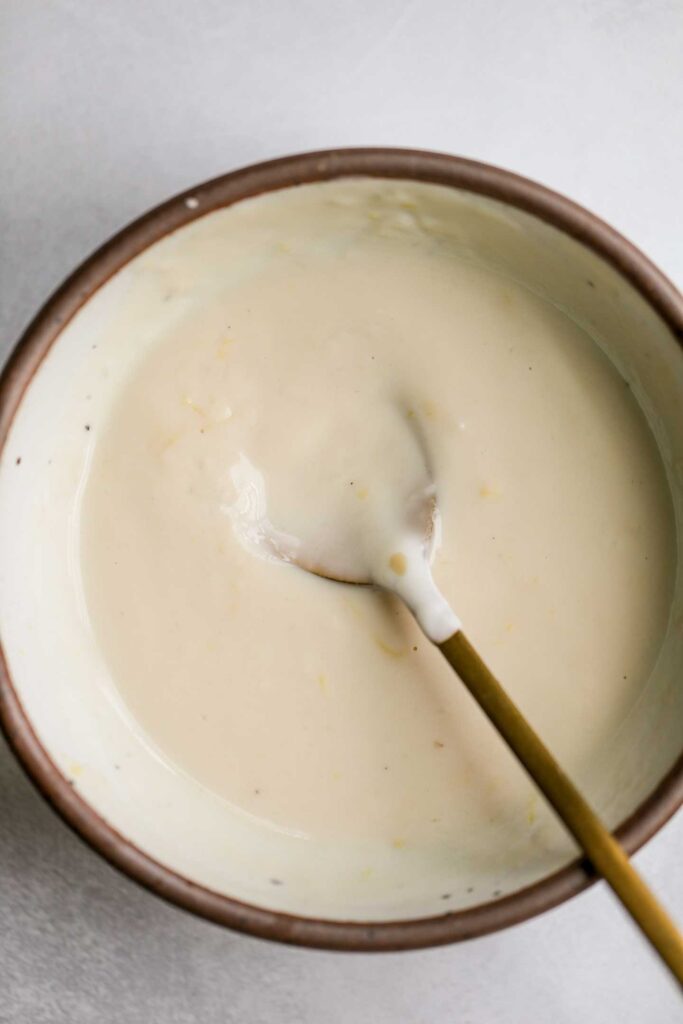
To a small mixing bowl, add the yogurt and tahini along with the remaining maple syrup, grated garlic, lemon juice and zest. Sprinkle with a pinch of salt and pepper then whisk to combine.
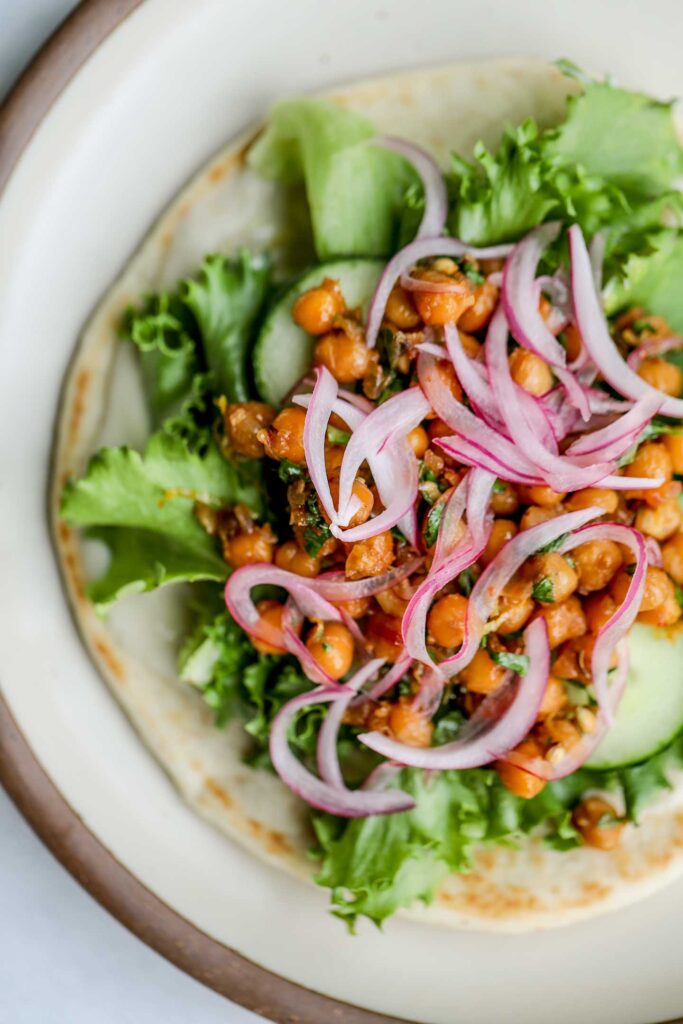
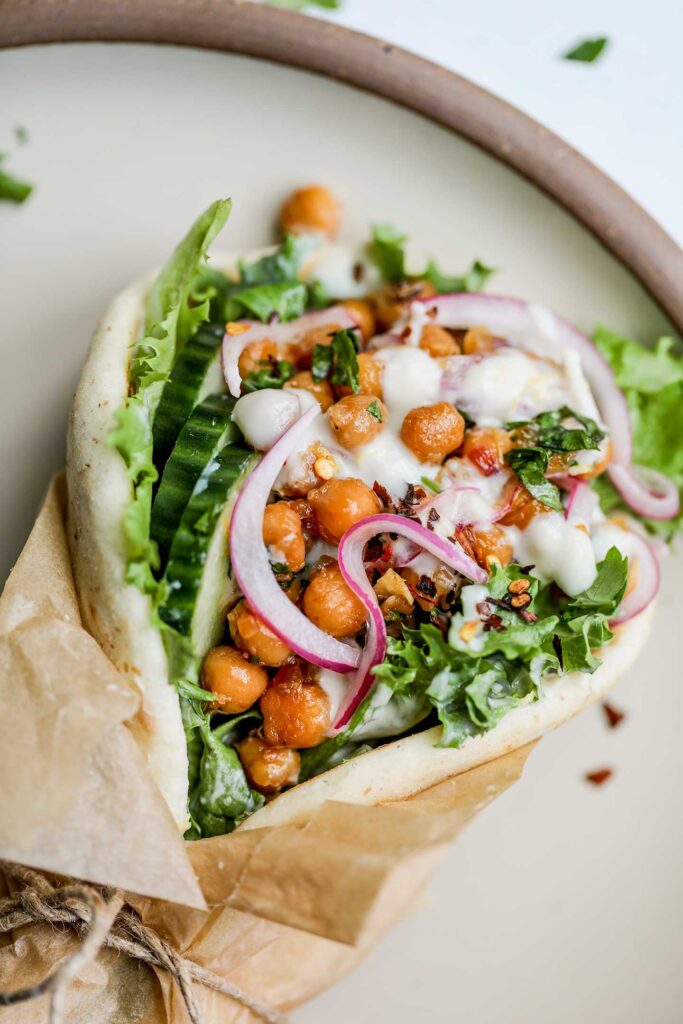
Warm up a pita according to package instructions then spread with a generous spoon of the yogurt tahini mixture. Top with the lettuce, cucumber slices, a spoonful of the chickpeas and the pickled onions. Drizzle with more yogurt sauce if desired then fold and enjoy.
Expert Tips
- Adjust the spice to your own preference. I like my meals spicy, but you may wish to lower or increase the spice. You can do this by using a hot sauce you best tolerate and enjoy. You can also use more or less of the hot sauce when making the glaze.
- Dry your chickpeas well before cooking. Dry them using a clean kitchen towel to help remove as much moisture as possible. This will help crisp up the chickpeas and prevent oil splash back as they cook.
- Warm the pita before stuffing. You can heat it in the microwave with a damp paper towel or lightly warm it in a dry skillet for a few seconds on each side. Warming the pita will help soften it and make it easier to fold without tearing.
- Customize it how you like. Change up the veggies you load your pita with or feel free to use a different spread entirely.
Frequently Asked Questions
The two sources of gluten in this recipe are the tamari/soy sauce and pita. To make it gluten-free use a wheat-free tamari or coconut aminos in place of the soy sauce. You will also want to replace the pita with a gluten-free alternative or a large gluten-free wrap. You can also serve these chickpeas over your favorite gluten-free grains and turn it into a nourish bowl instead.
Yes, but you will want to wait to assemble the full wrap the day you plan to enjoy. Prep the chickpeas, yogurt sauce, and chopped vegetables in advance in separate airtight containers and place in the fridge. Store the chickpeas for up to 4 days, the yogurt sauce for 4 days and the chopped vegetables for 3-4 days.

Enjoying Your Wrap
Enjoy these wraps your way. You can change up the spread or swap the veggies for what’s in season. If you need some suggestions to try, consider the following:
- Lemon Garlic White Bean Dip
- Roasted Bell Pepper
- Artichoke Hearts
More Vegan Lunch Ideas
- Gochujang Tofu Sandwich
- Samosa Wraps
- Herby Avocado White Bean Salad
- Homemade Peanut Miso Instant Noodles
- Tostadas with Refried Beans

Sticky Lemon Chickpea Pita Wrap
- Prep Time: 15 minutes
- Cook Time: 20 minutes
- Total Time: 35 minutes
- Yield: 3 wraps 1x
- Category: Lunch
- Method: Stove Top
- Cuisine: American
- Diet: Vegan
Description
This sticky lemon chickpea pita wrap is drizzled with a creamy yogurt tahini sauce. Easy to prep in advance for quick meals during the week.
Ingredients
- 3 cloves garlic, grated
- 1 medium lemon
- 3 tbsp maple syrup
- 2 tsp soy sauce or coconut aminos
- 1–2 tsp hot sauce
- 1 tbsp avocado oil
- 1, 15 oz can chickpeas, drained and rinsed
- 1 shallot, minced
- 1/2 tsp ground coriander
- 1/4 tsp fennel seeds
- 1/4 cup fresh parsley, minced
- 3 tbsp unsweetened plain plant-based yogurt
- 2 tbsp tahini
For Assembly
- 3 pitas
- 2 cups green leaf lettuce
- 1 cucumber, thinly sliced
- Pickled onions, optional
- Kosher salt
- Fresh cracked pepper
Instructions
- To a bowl or large measuring cup, add 2 cloves of grated garlic, the juice and zest of half a lemon, soy sauce, 2 tablespoons of maple syrup, and hot sauce then whisk together to combine. Set the mixture aside.
- Add the oil to a large skillet over medium heat. Place the chickpeas on a clean kitchen towel and dry them well. Once the oil is hot, add the chickpeas. Stir them into the oil and spread out into an even layer. Allow the chickpeas to cook undisturbed for about 3 minutes to help them get golden. Toss the chickpeas and cook again undisturbed for an additional 2 minutes.
- Stir in the shallots along with a generous pinch of salt and continue to sauté until the shallots have softened. Add in the coriander and fennel seeds then toss together with the chickpeas, continuing to sauté for 1-2 minutes.
- Lower the heat to low then pour in the lemon mixture and toss together with the chickpeas. Allow the mixture to simmer and thicken while you continue to stir and coat the chickpeas. Once the chickpeas are glazed, stir in the parsley then remove from heat. Taste and adjust with more salt and pepper as desired.
- To a small mixing bowl, add the yogurt and tahini along with the remaining maple syrup, grated garlic, lemon juice and zest. Sprinkle with a pinch of salt and pepper then whisk to combine.
- Warm up a pita according to package instructions then spread with a generous spoon of the yogurt tahini mixture. Top with the lettuce, cucumber slices, a spoonful of the chickpeas and the pickled onions. Drizzle with more yogurt sauce if desired then fold and enjoy.
Notes
Adjust the spice to your own preference. I like my meals spicy, but you may wish to lower or increase the spice. You can do this by using a hot sauce you best tolerate and enjoy. You can also use more or less of the hot sauce when making the glaze.
Dry your chickpeas well before cooking. Dry them using a clean kitchen towel to help remove as much moisture as possible. This will help crisp up the chickpeas and prevent oil splash back as they cook.
Warm the pita before stuffing. You can heat it in the microwave with a damp paper towel or lightly warm it in a dry skillet for a few seconds on each side. Warming the pita will help soften it and make it easier to fold without tearing.
Customize it how you like. Change up the veggies you load your pita with or feel free to use a different spread entirely.
If you tried this recipe or any other recipe on the blog, then let me know what you thought in the comments below! And if you loved it, don’t forget to rate it too. Feel free to follow on Instagram, Pinterest, and TikTok for the latest nutrition tips and recipe videos.
★ Catherine
This post contains affiliate links which means I will make a small commission if you purchase from those links. I only recommend and share products that I know, trust and personally use myself!


Oh this recipe is so so good! The yogurt sauce is beautiful! So tasty. I am definitely going to share this one with everyone! Yum! I can’t wait to eat it again tomorrow!
Total flavor bomb. Catherine is completely changing my view on chickpeas!