

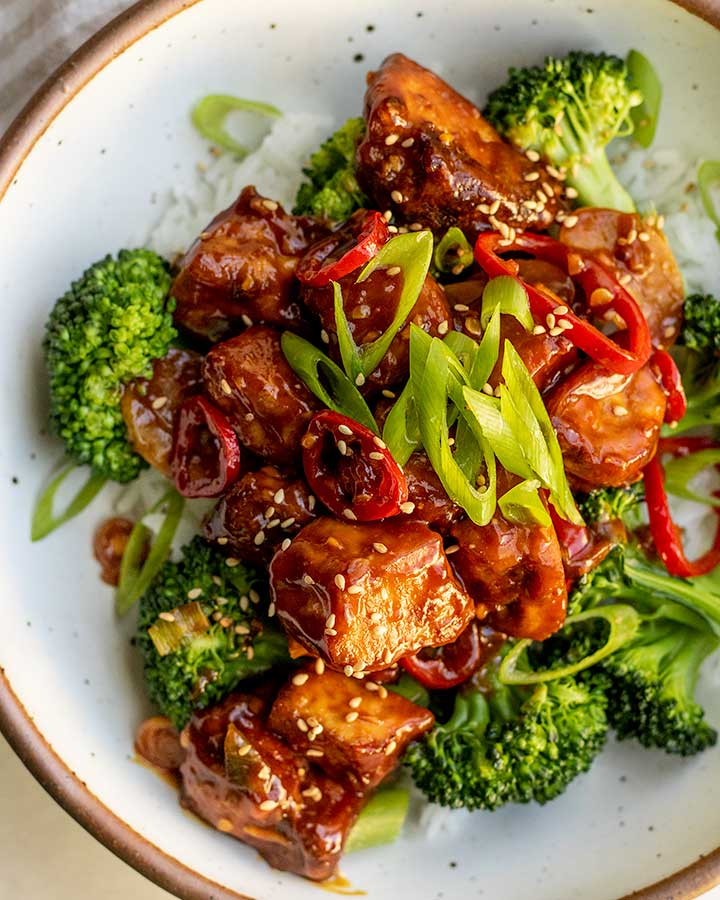
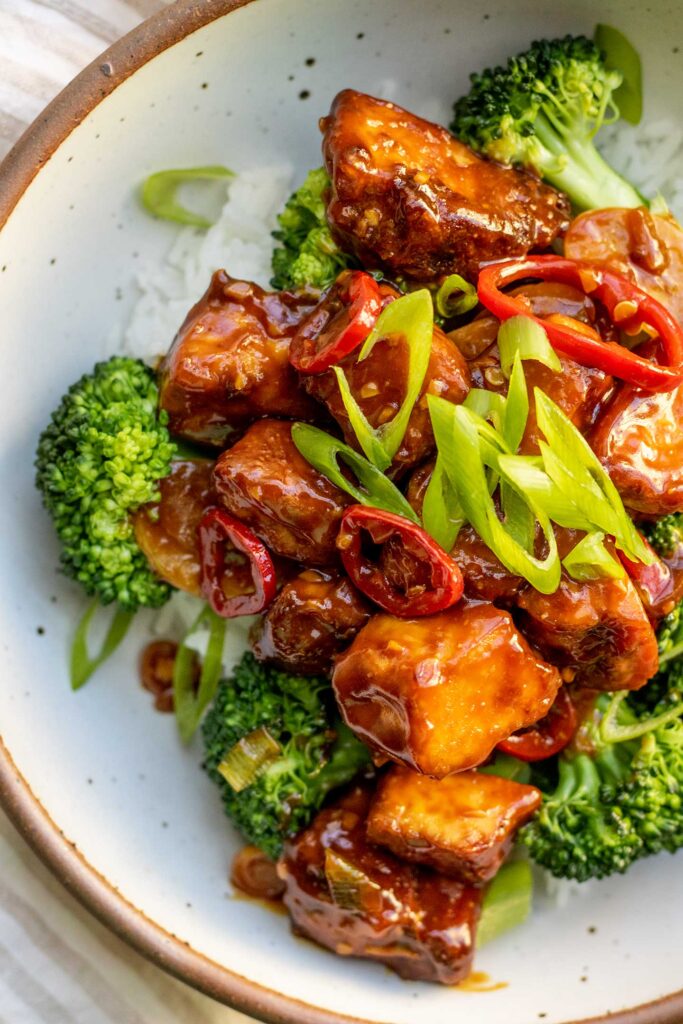
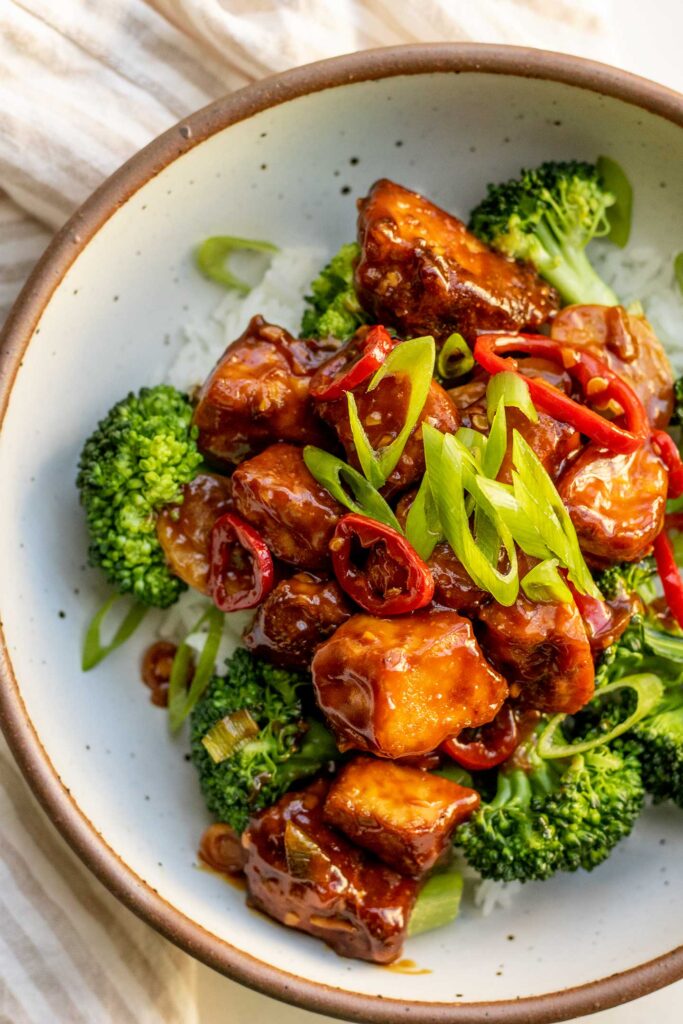
Sticky Miso Tofu
Sweet, savory sticky miso tofu. A budget-friendly, high-protein, umami-rich dish that is easy to put together for a weeknight meal.
In this economy, I do my best to just cook at home, but sometimes it’s easier said than done. You get tired, you don’t want to be slaving over complicated dishes, but you also know it’s a lot more expensive and challenging to fit in consistently if you have a health condition. So, if you decide to take matters into your own hands, don’t over complicate the system. This sticky miso tofu might just be perfect for you.
Now, I will be honest, you will need to cook and chop a few things if you are open to it. However, the idea for this recipe is to keep the steps simple and with minimal hands on time. We bake the tofu in the oven for both easy clean up and to multitask. So, while everything bakes you whisk the sauce together, heat it in a pan then add the tofu in when it’s ready. I have more tips below for getting the other sides sorted without extra work on your part, so let’s get cooking.
Why You’ll Love This Miso Tofu
- Comes together quickly. Just bake the tofu and while you wait prepare the sauce. Whisk the ingredients together, thicken in a pan then add the baked tofu. This makes it a pretty easy weeknight meal.
- High Protein. Using a high protein ingredients like tofu helps to make this meal more satisfying.
- Budget friendly takeout alternative. Instead of getting takeout, use this recipe to save some money while still getting a sticky umami-rich dish you may be craving. Best part, you can control the amount of sodium and sugar used in a dish when you make it yourself.

Key Ingredients and Substitutions
- Tofu: Use extra firm tofu. For the best texture, do press it for at least 15 minutes before using to remove excess water. For extra protein, feel free to use super firm tofu.
- Miso Paste: I recommend using a milder miso paste like white or yellow miso for this recipe.
- Soy Sauce: I used a wheat-free tamari to help make this meal gluten-free for everyone. You can use regular soy sauce, reduced-sodium soy sauce or coconut aminos instead.
- Mirin: This is a sweetened sake. Mirin is typically sold in local grocery stores in the international section right near the soy sauce. If you are unable to find mirin for any reason, you can try substituting every tablespoon of mirin with 1 tablespoon sake (or water) + 1 tsp sugar. While it won’t be exactly the same, this will be your closest swap. Do not replace with rice wine vinegar.
- Sweetener: I used brown sugar as a budget-friendly alternative. If you prefer to use an unrefined sugar, feel free to use coconut sugar.
- Cornstarch: This is for both the baked tofu and to thicken the sauce. Feel free to swap for some arrowroot starch instead.
How to Make Miso Tofu
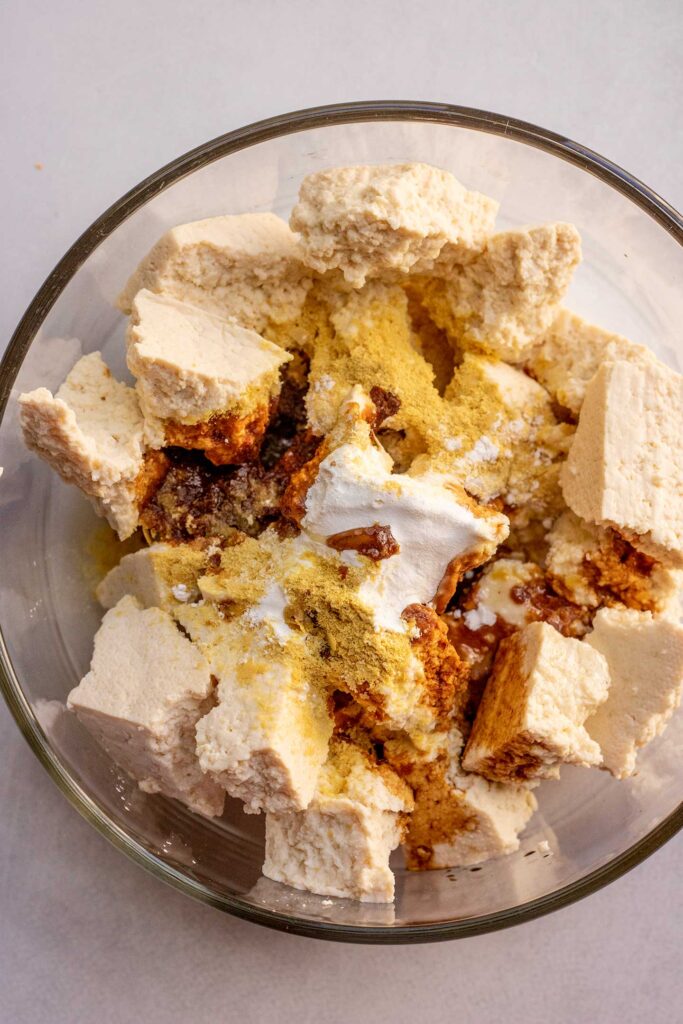
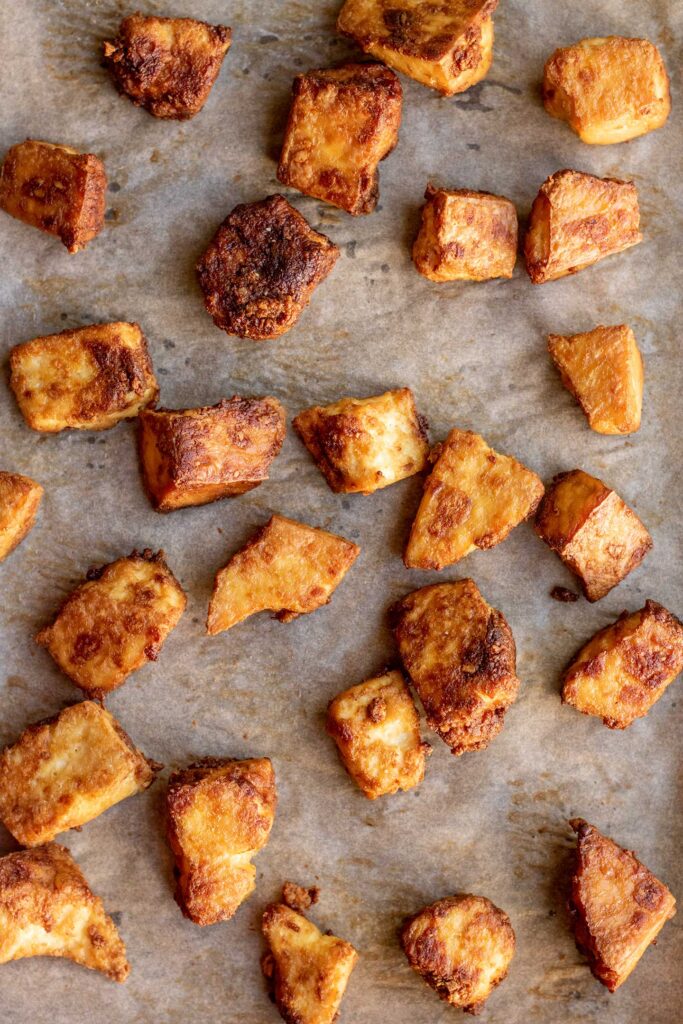
Preheat oven to 425F. Take your pressed tofu and tear it into 1 inch chunks with your hands into a large container or bowl. Drizzle with the tamari and avocado oil, then evenly sprinkle the cornstarch, nutritional yeast, white pepper and five spice over top. Toss the tofu in the mixture to evenly coat.
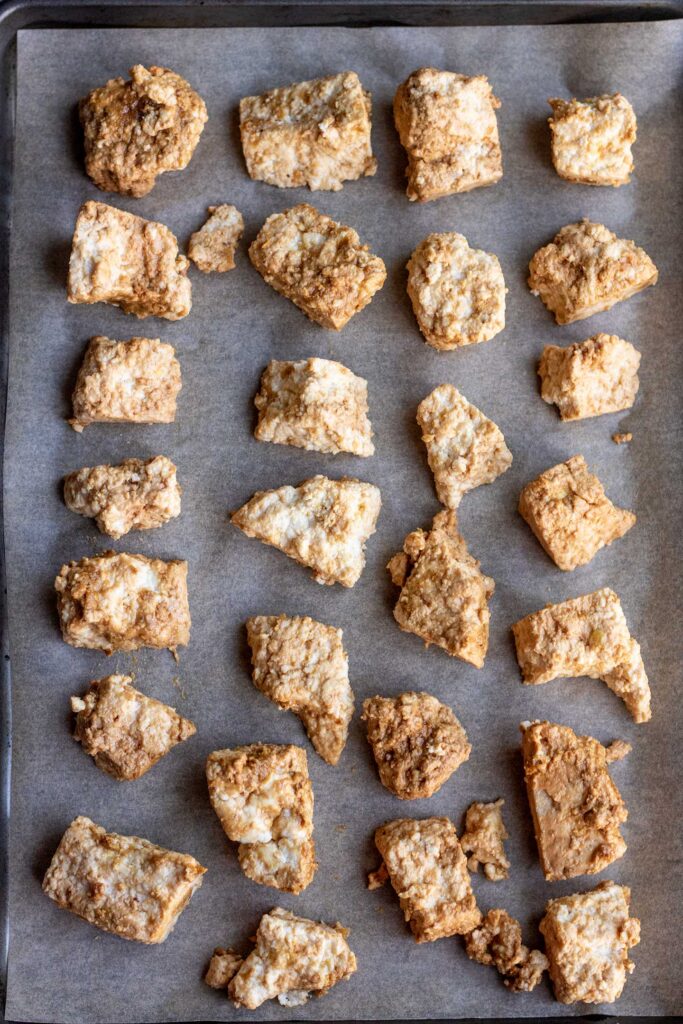
Spread the seasoned tofu in an even layer on a parchment lined baking tray and place in the oven to bake for 30 minutes, flipping half way.
Meanwhile, in a measuring cup add the miso paste, sugar, tamari, and mirin. With a spoon lightly mash the mixture together to break up the miso and smooth out any lumps. Add the water and vigorously whisk together until smooth. In a separate small bowl combine the cornstarch with 2 tbsp of water, whisking well until smooth.
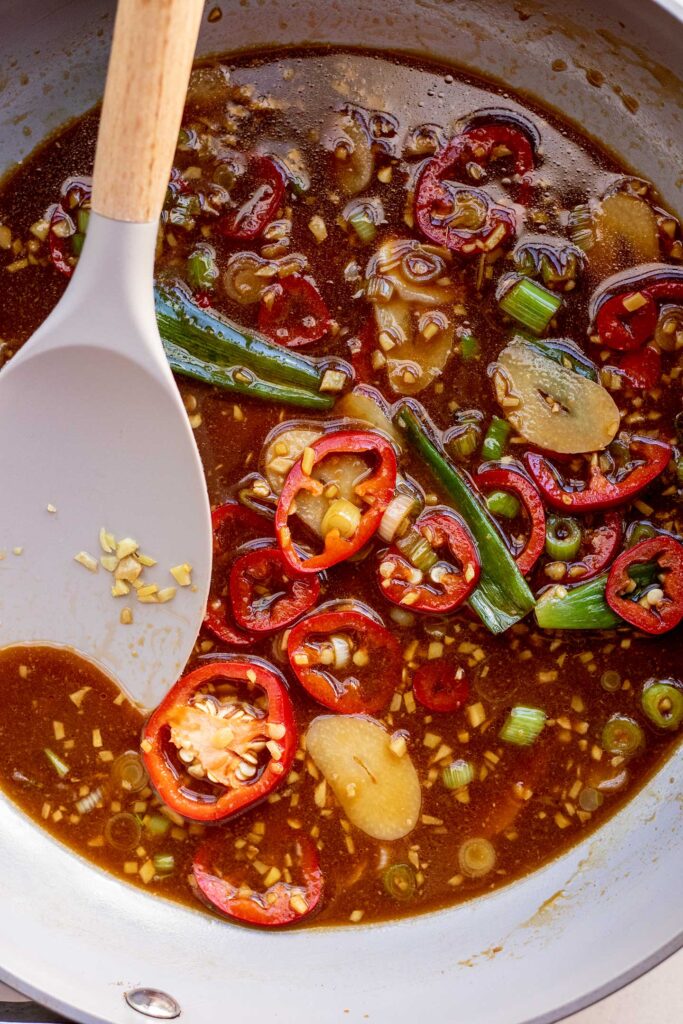
Heat up a medium-sized skillet with cooking oil over medium heat. Once the oil is hot, add the white portion of the scallions, garlic, ginger and the chilies. Sauté for 2 minutes or until the garlic is both fragrant and starting to become golden.
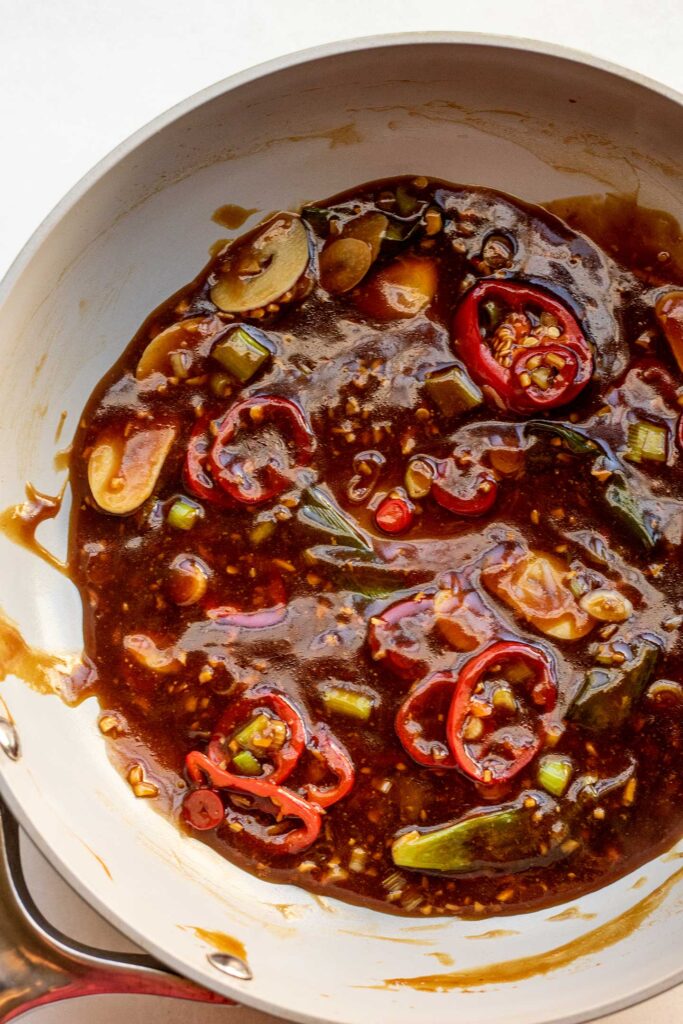
Pour the miso sauce into the pan and stir well into the aromatics until it starts to lightly simmer. Pour in the cornstarch, turn the heat down low then continue to stir for about 5 minutes or until the sauce begins to thicken to your liking.
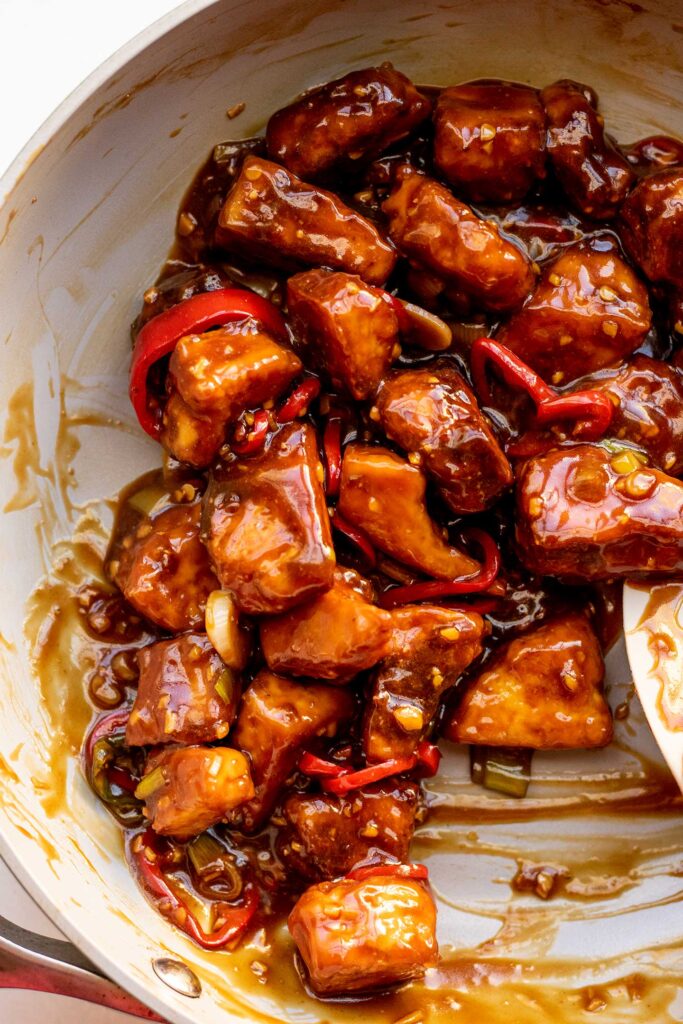
Stir in the tofu, making sure that it coats the tofu entirely then remove from heat. Serve your tofu garnished with the remaining scallions and enjoy.
Expert Tips
- Freeze your tofu to transform it’s texture. If you can spare the time, I recommend freezing your tofu. This will transform the texture of the tofu and make it chewier. You can freeze the tofu directly in it’s package. Once frozen, remove from the freezer and allow to fully thaw. Once it is thawed, remove from package and gently press out the water (the water comes out pretty easily so you can do this with your hands if you wish) and proceed with the recipe.
- Tear your tofu. Tearing your tofu will create more rough edges that will crisp up and adhere more sauce to it when coated in sauce.
- Control the sodium. Use low-sodium soy sauce or coconut aminos as a replacement for regular soy sauce or tamari. Brands of lower sodium miso paste are also available too.
- Modify the sauce. Feel free to use more or less of any ingredient based on preference. You can start with less soy sauce or less sugar then slowly add more to taste.
Frequently Asked Questions
If you have leftover sticky tofu, allow to cool completely and store in an airtight container to place in the fridge for up to 4 days. You can also whisk the sauce ingredients together in advance and keep ready for when you wish to make this dish. Store the whisked ingredients in the fridge in an airtight container for up to 7 days.
Make sure to use a wheat-free tamari, gluten-free soy sauce or coconut aminos to replace regular soy sauce in order to make this dish completely gluten-free.
You will need to modify a good portion of this recipe to make it soy-free. You can swap the miso for a chickpea miso or soy-free vegetable bouillon base and make sure that you opt for a gluten-free soy sauce alternative. You can swap the tofu for seitan pieces or some vegan chicken substitutes. Instead of baking these substitutes, pan-sear them, remove from the pan then follow with the remainder of the recipe. Alternatively for a soy and gluten-free protein substitute, try this dish with some sauteed chickpeas instead.
Since baking is different from pan frying, we want to do two things. The first is to press your tofu to remove some excess liquid from your tofu. A wetter tofu will keep the tofu soft and often takes longer to crisp up when coated using this method. Second, evenly coat the pieces in enough cornstarch and oil. If you feel your tofu isn’t properly coated, you can always add more oil or spray the tofu with a cooking spray once it is on the baking sheet.
How to Serve
This tofu is a great source of plant protein. You can turn this into a complete meal by pairing your tofu with a grain like rice, quinoa or noodles and add some extra veggies like steamed broccoli for some fiber and extra antioxidants.
But don’t over complicate it. If you are pressed for time, use some frozen or shelf stable grains and steam in the bag veggies to avoid extra dishes and still have a meal on the table fairly quickly.
You can also serve this tofu in a lettuce wrap for a lighter and refreshing dish on a hotter summer day.
More Tofu Recipes to Try
- Orange Chipotle Shredded Tofu Tacos
- Teriyaki Tofu Sandwich
- Easy Baked Peanut Tofu
- Tofu Cabbage Stir Fry
- Lemon Pepper Tofu and Asparagus


Sticky Miso Tofu
- Prep Time: 15 minutes
- Cook Time: 35 minutes
- Total Time: 50 minutes
- Yield: 4 servings 1x
- Category: Main Dish
- Method: Roasting
- Cuisine: American
- Diet: Vegan
Description
Sweet, savory sticky miso tofu. A budget-friendly alternative for takeout that is high-protein, rich in umami flavor and easy to put together for a weeknight meal.
Ingredients
Tofu
- 1, ~400g block extra firm tofu, pressed and drained for at least 15 minutes
- 1 1/2 tbsp avocado oil
- 1 tbsp tamari
- 1 tbsp cornstarch
- 1 tbsp nutritional yeast or 1 extra tbsp cornstarch
- 1/4 tsp white pepper
- 1/4 tsp Chinese five spice, optional
Miso Sauce
- 2 tsp yellow miso paste
- 2 tbsp light brown sugar or coconut sugar
- 2 tbsp tamari or coconut aminos
- 2 tbsp mirin
- 1/4 cup water
- 2 tsp cornstarch
- 2 tsp avocado oil for cooking
- 2 scallions, thinly sliced with white and green portions separated
- 2 cloves garlic, thinly sliced
- 1 tsp ginger, grated
- 1 Fresno chili pepper or jalapeno pepper, thinly sliced
Instructions
- Preheat oven to 425F. Take your pressed tofu and tear it into 1 inch chunks with your hands into a large container or bowl. Drizzle with the tamari and avocado oil, then evenly sprinkle the cornstarch, nutritional yeast, white pepper and five spice over top. Toss the tofu in the mixture to evenly coat.
- Spread the seasoned tofu in an even layer on a parchment lined baking tray and place in the oven to bake for 30 minutes, flipping half way.
- Meanwhile, in a measuring cup add the miso paste, sugar, tamari, and mirin. With a spoon lightly mash the mixture together to break up the miso and smooth out any lumps. Add the water and vigorously whisk together until smooth. In a separate small bowl combine the cornstarch with 2 tbsp of water, whisking well until smooth.
- Heat up a medium-sized skillet with cooking oil over medium heat. Once the oil is hot, add the white portion of the scallions, garlic, ginger and the chilies. Sauté for 2 minutes or until the garlic is both fragrant and starting to become golden.
- Pour the miso sauce into the pan and stir well into the aromatics until it starts to lightly simmer. Pour in the cornstarch, turn the heat down low then continue to stir for about 5 minutes or until the sauce begins to thicken to your liking.
- Stir in the tofu, making sure that it coats the tofu entirely then remove from heat. Serve your tofu garnished with the remaining scallions and enjoy.
Notes
Freeze your tofu to transform it’s texture. If you can spare the time, I recommend freezing your tofu. This will transform the texture of the tofu and make it chewier. You can freeze the tofu directly in it’s package. Once frozen, remove from the freezer and allow to fully thaw. Once it is thawed, remove from package and gently press out the water (the water comes out pretty easily so you can do this with your hands if you wish) and proceed with the recipe.
Tear your tofu. Tearing your tofu will create more rough edges that will crisp up and adhere more sauce to it when coated in sauce.
Control the sodium. Use low-sodium soy sauce or coconut aminos as a replacement for regular soy sauce or tamari. Brands of lower sodium miso paste are also available too.
Modify the sauce. Feel free to use more or less of any ingredient based on preference. You can start with less soy sauce or less sugar then slowly add more to taste.
If you tried this recipe or any other recipe on the blog, then let me know what you thought in the comments below! And if you loved it, don’t forget to rate it too. Feel free to follow on Instagram, Pinterest, and TikTok for the latest nutrition tips and recipe videos.
★ Catherine
This post contains affiliate links which means I will make a small commission if you purchase from those links. I only recommend and share products that I know, trust and personally use myself!


Wow this tofu was really amazing! Loved the coating and cooking method, will definitely try again!
Thank you so much Layla! So glad you enjoyed. 🙂
This recipe was so delicious. Full of flavour. Will definitely make again